No Watermark By Default—Because Good Work Speaks
Here’s the deal: if a tool is good, it doesn’t need to shout with a watermark. Your story is the signature. Our editor exports clean video—no badges, no stamps, no strings.
Still, sometimes a watermark is useful: to credit a creator, protect work, or nudge viewers to remember you.
Brand video with your logo or text. You can even add our small “made with love” badge if you feel like spreading the word. We won’t push—promise.
1. Add Your Video and Watermark files
Bring anything you have—video, audio, photos, GIFs—in virtually any format: MP4, MOV, WEBM, WAV, MP3, PNG, JPG, GIF, and more.
A watermark can be anything: video, image, photo, GIF, or simple text. Just add your file to the project.
Tip: keep it lightweight and high-contrast so it stays readable on busy shots.
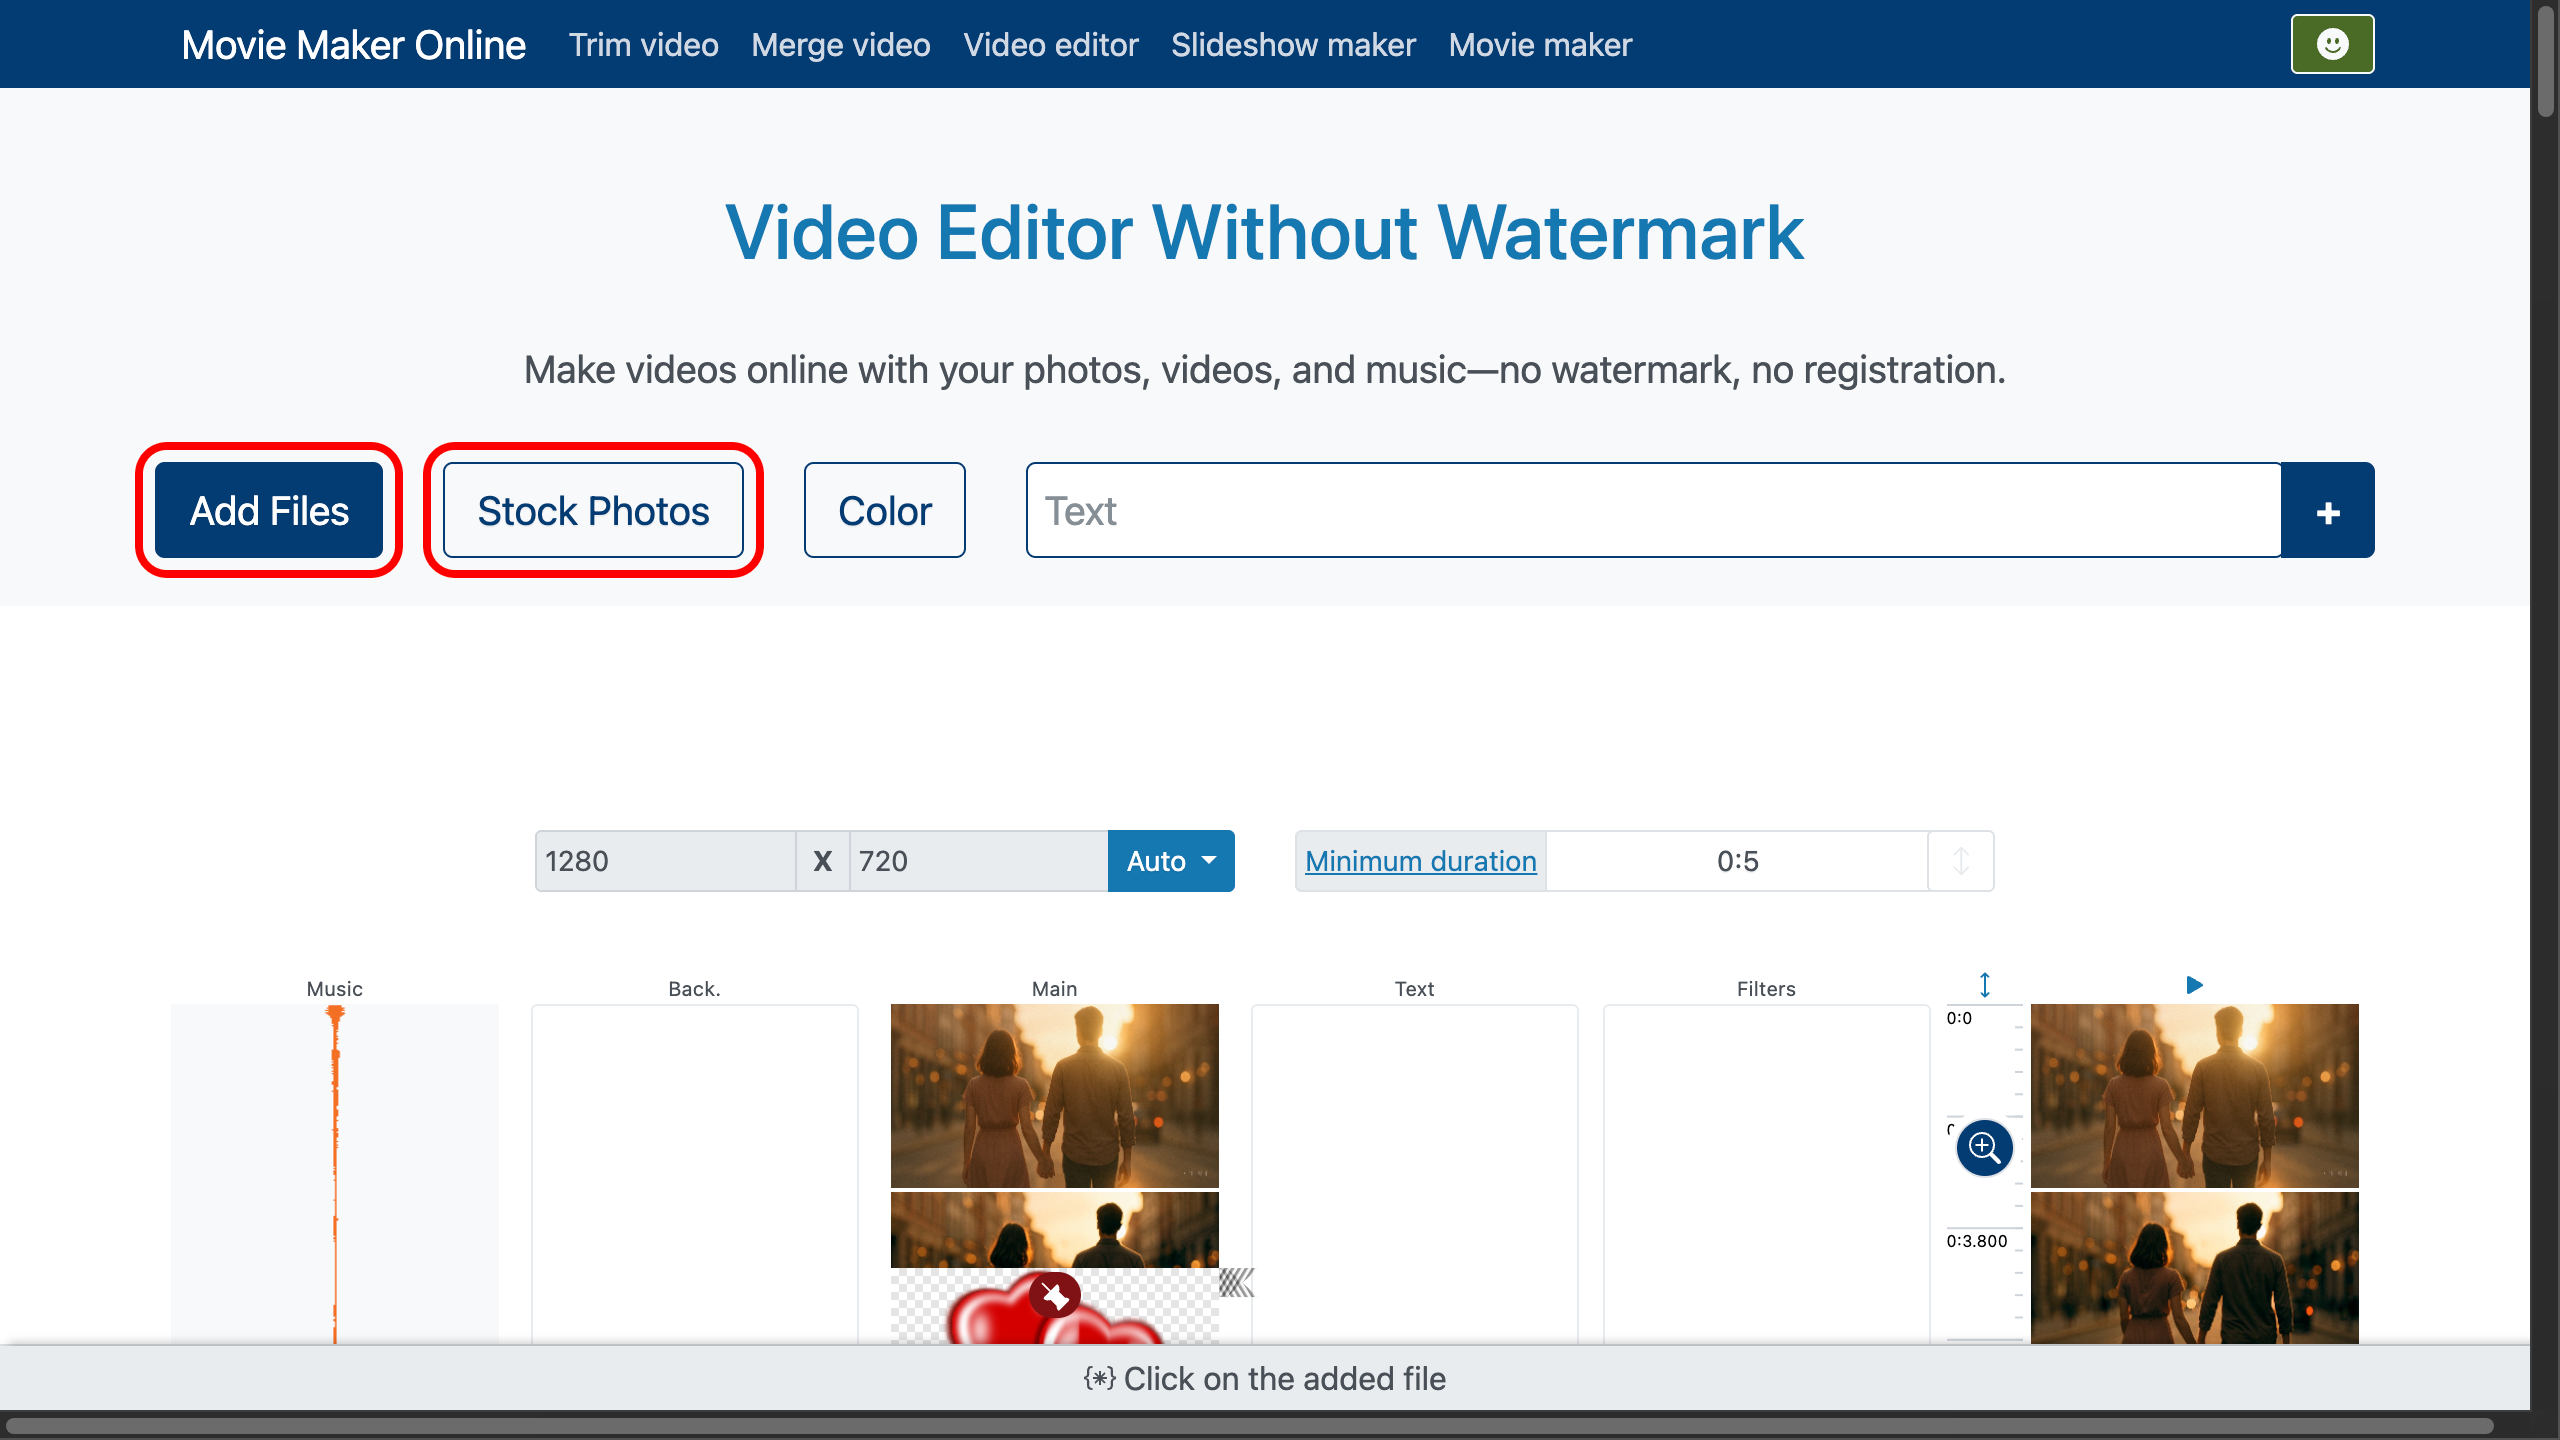
For this demo, we’ll use a short clip of a loving couple walking through an evening city. Romantic music will play in the background, and a subtle heart will serve as our watermark.
You can find both the music and the heart graphic on a fantastic free-media service (photos, music, and videos under a CC0-style license—free for almost any use): Pixabay. Use the button at the top to open it, pick your assets, and download.
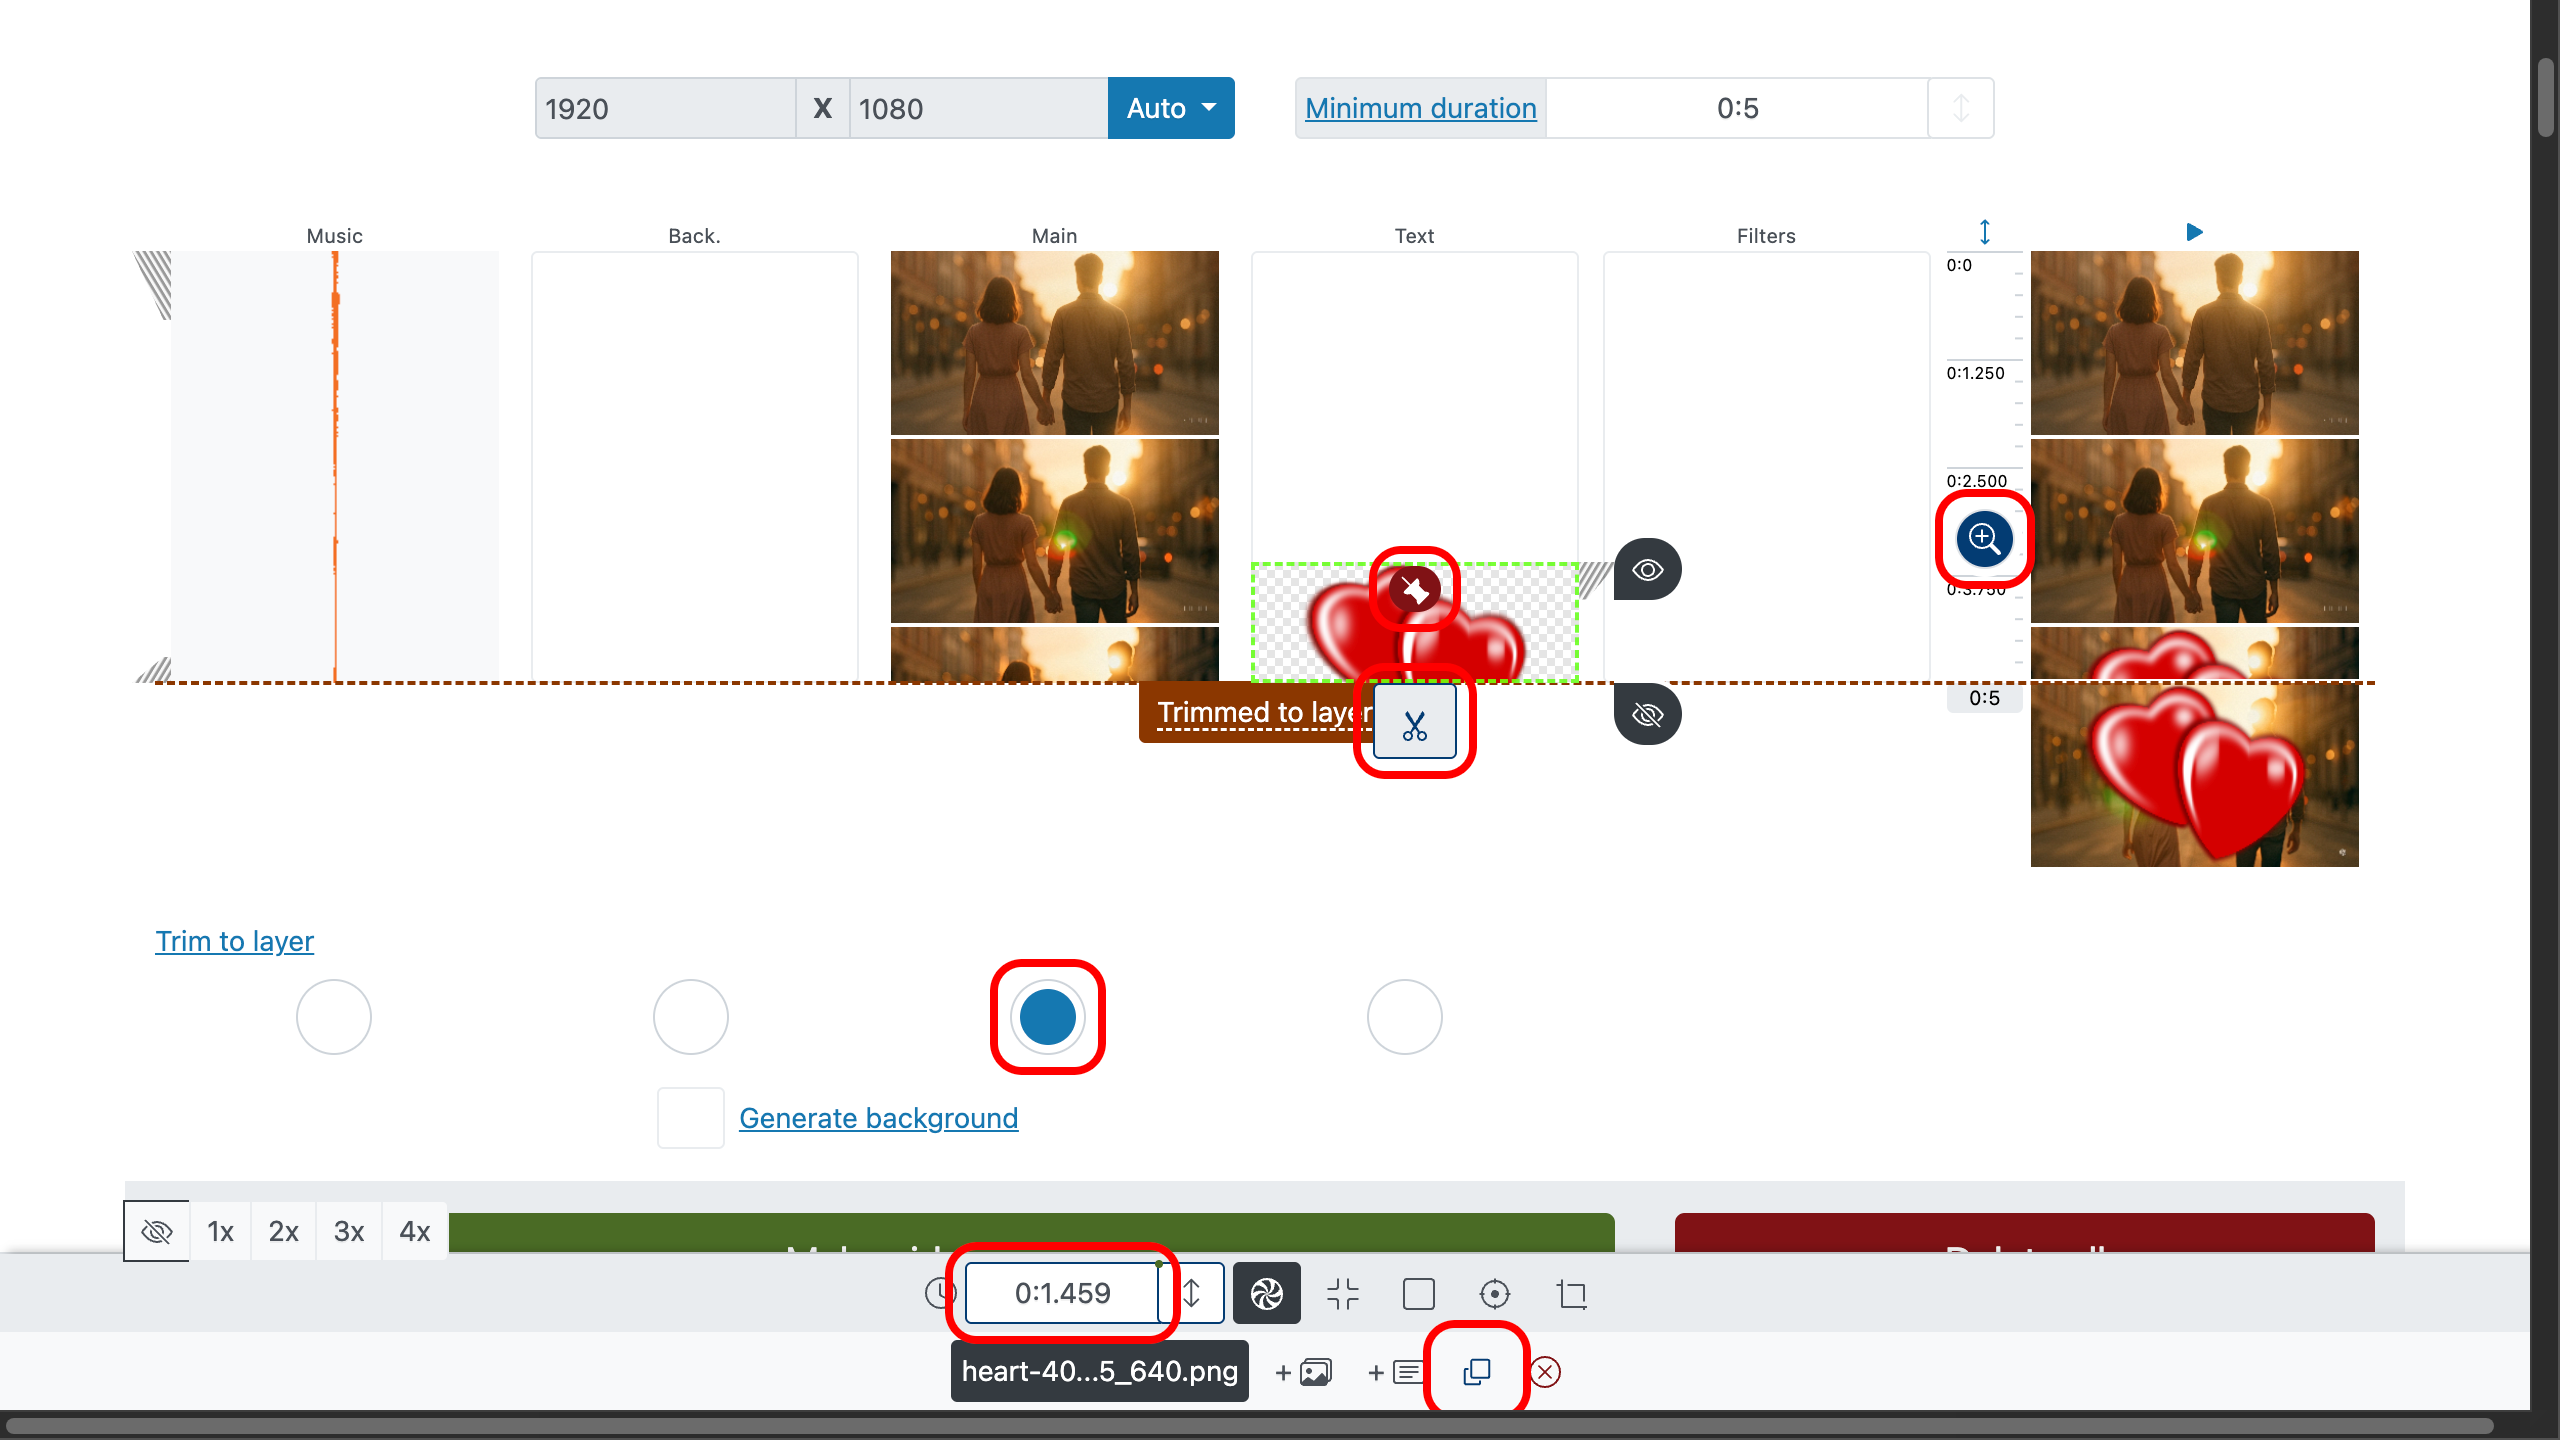
2. Place the Watermark on the Timeline
Track logic is simple: items lower in the list play after items above; items farther right visually cover items to their left in the frame.
Drag your watermark to the rightmost track so it appears above the video.
Want it to pop up again later? Duplicate it with the clone button .
Use the lock position button to lock its timing on the timeline (its in/out positions).
Drag the scale button to zoom the timeline for precision trims.
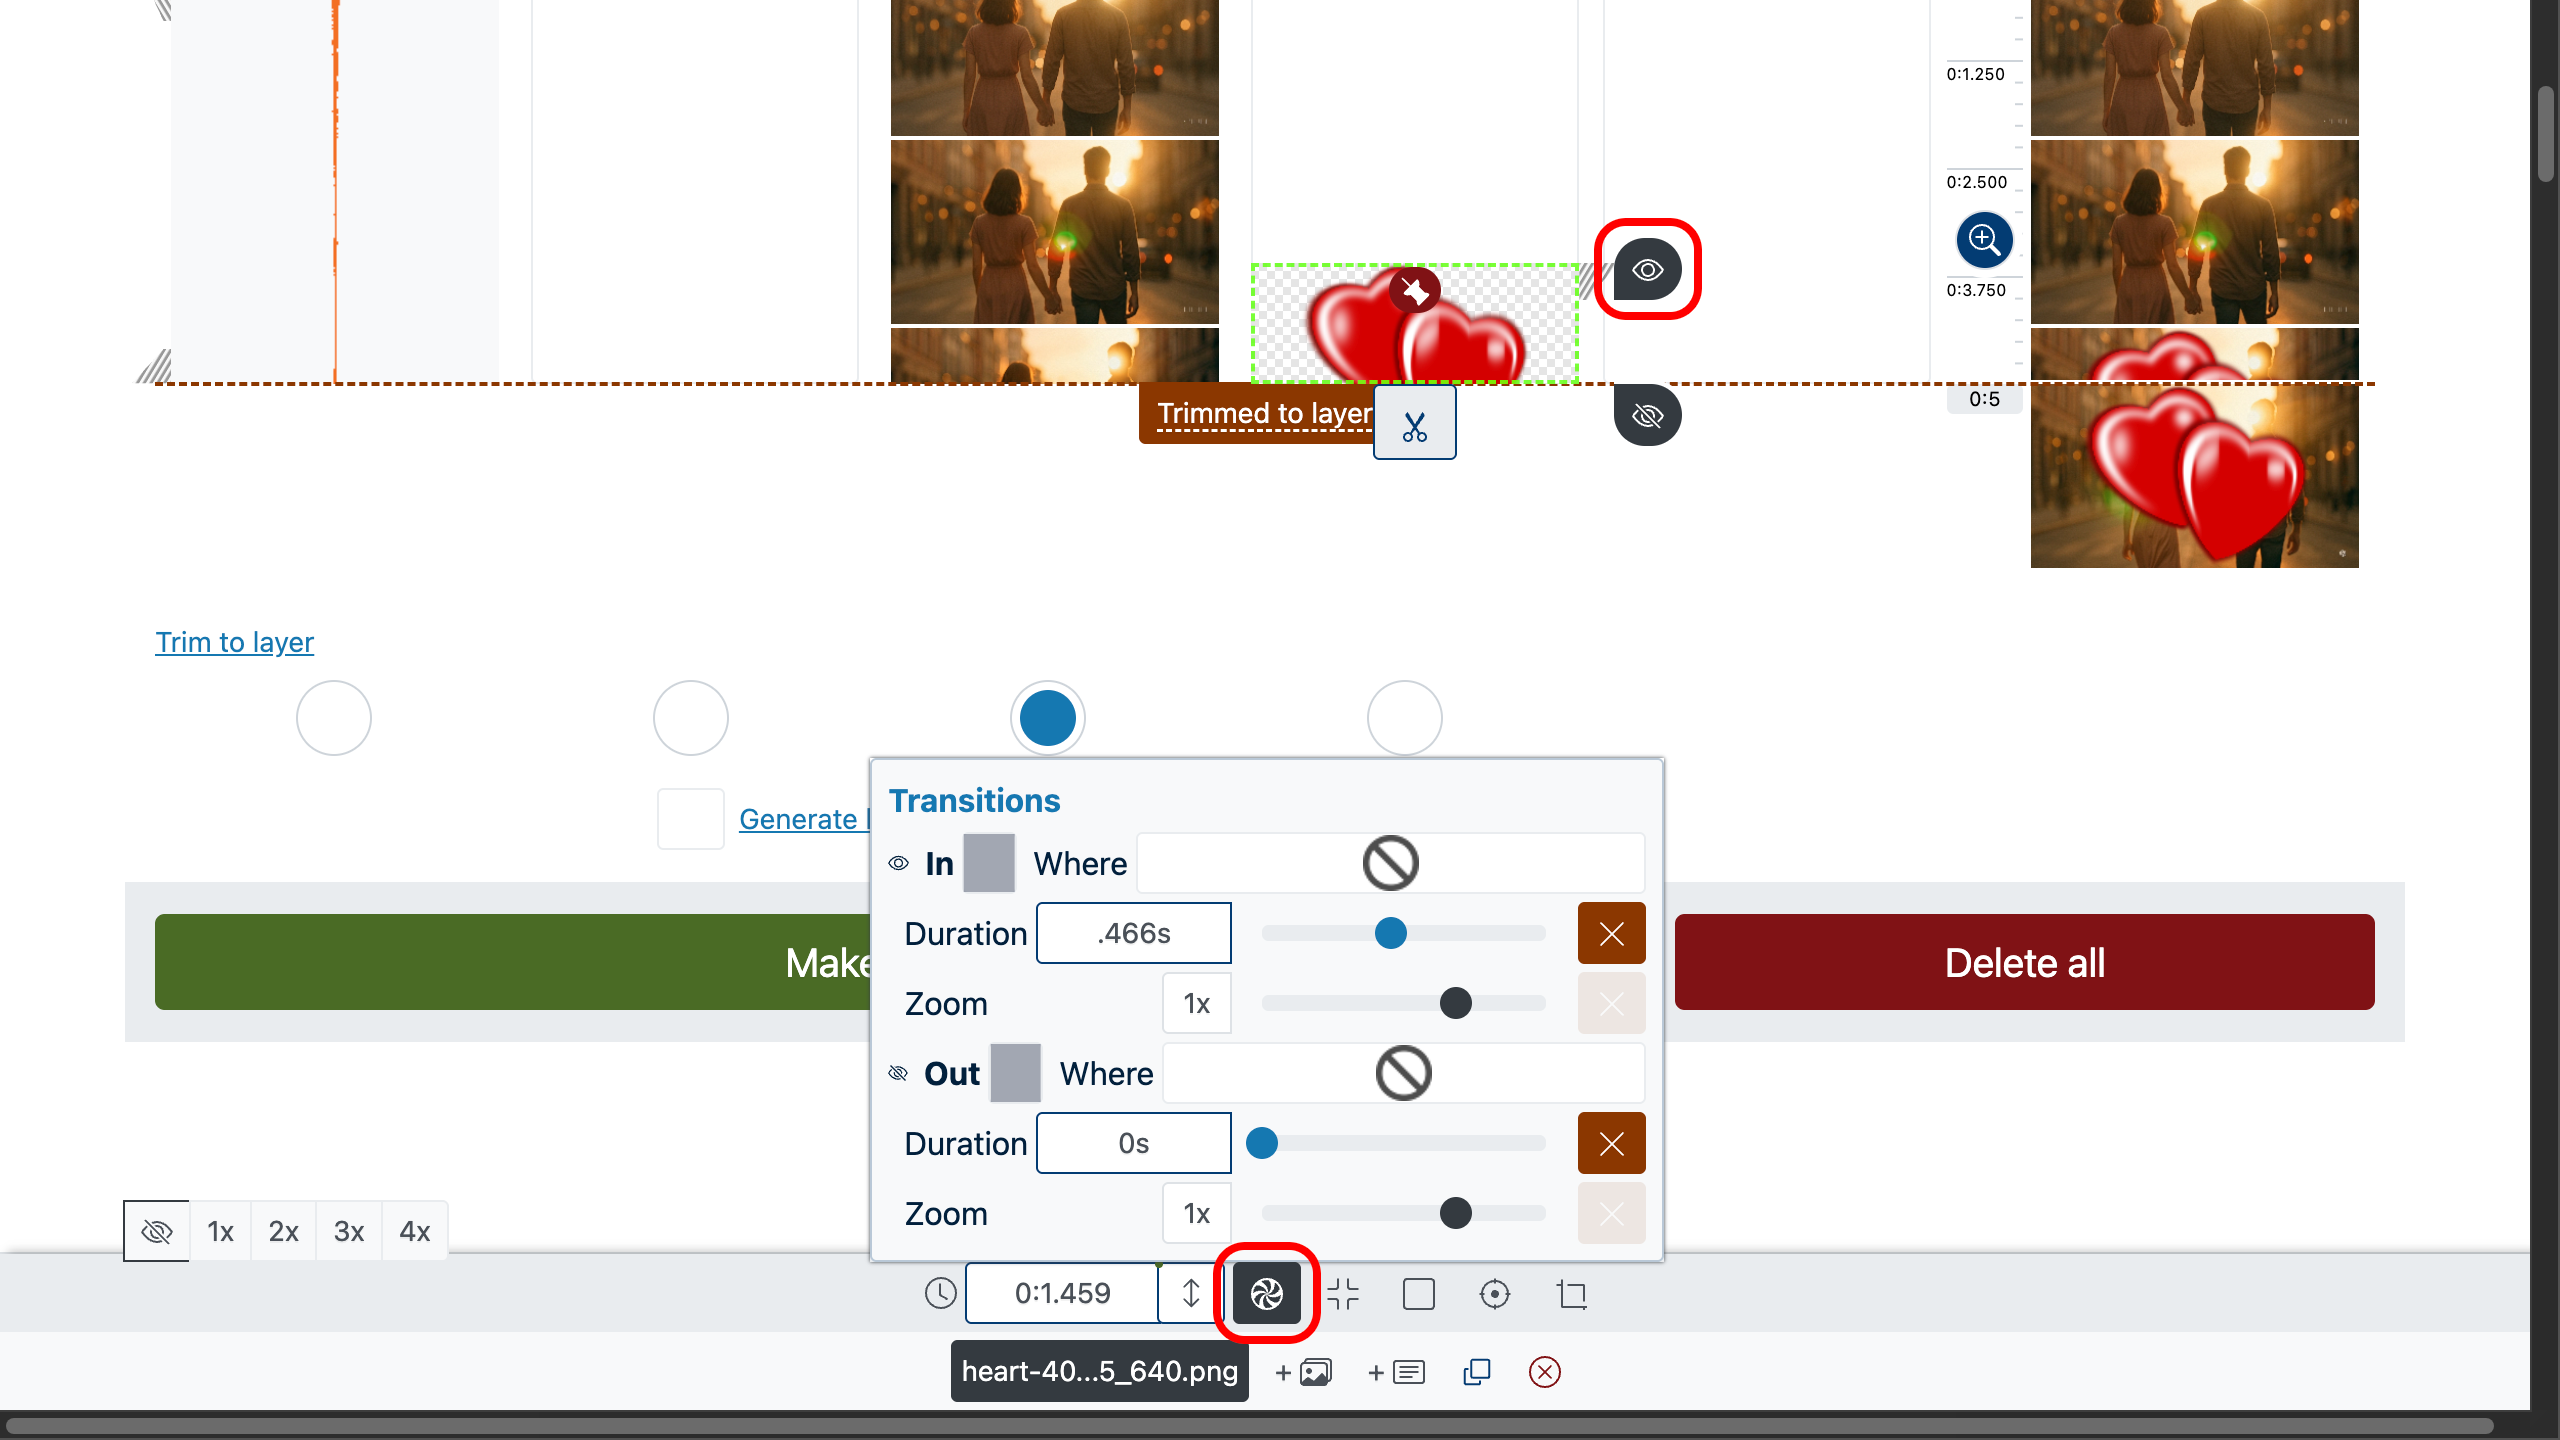
Set how long the watermark stays by dragging the duration control or by entering exact times on the lower panel.
For convenience and speed, we didn’t try to perfectly match the music and watermark lengths to the video; we simply trimmed them to the video layer using the fit to layer button .
3. Control the Watermark’s Appearance
We also added a smooth fade-in using the slider, or by entering values in the control panel.
In the control panel, you can also choose where the watermark enters the frame (top, bottom, left, right, or center), where it exits, the starting and ending scale (for example, zoom in from 120% to 100%), and the specific entrance and exit effects.
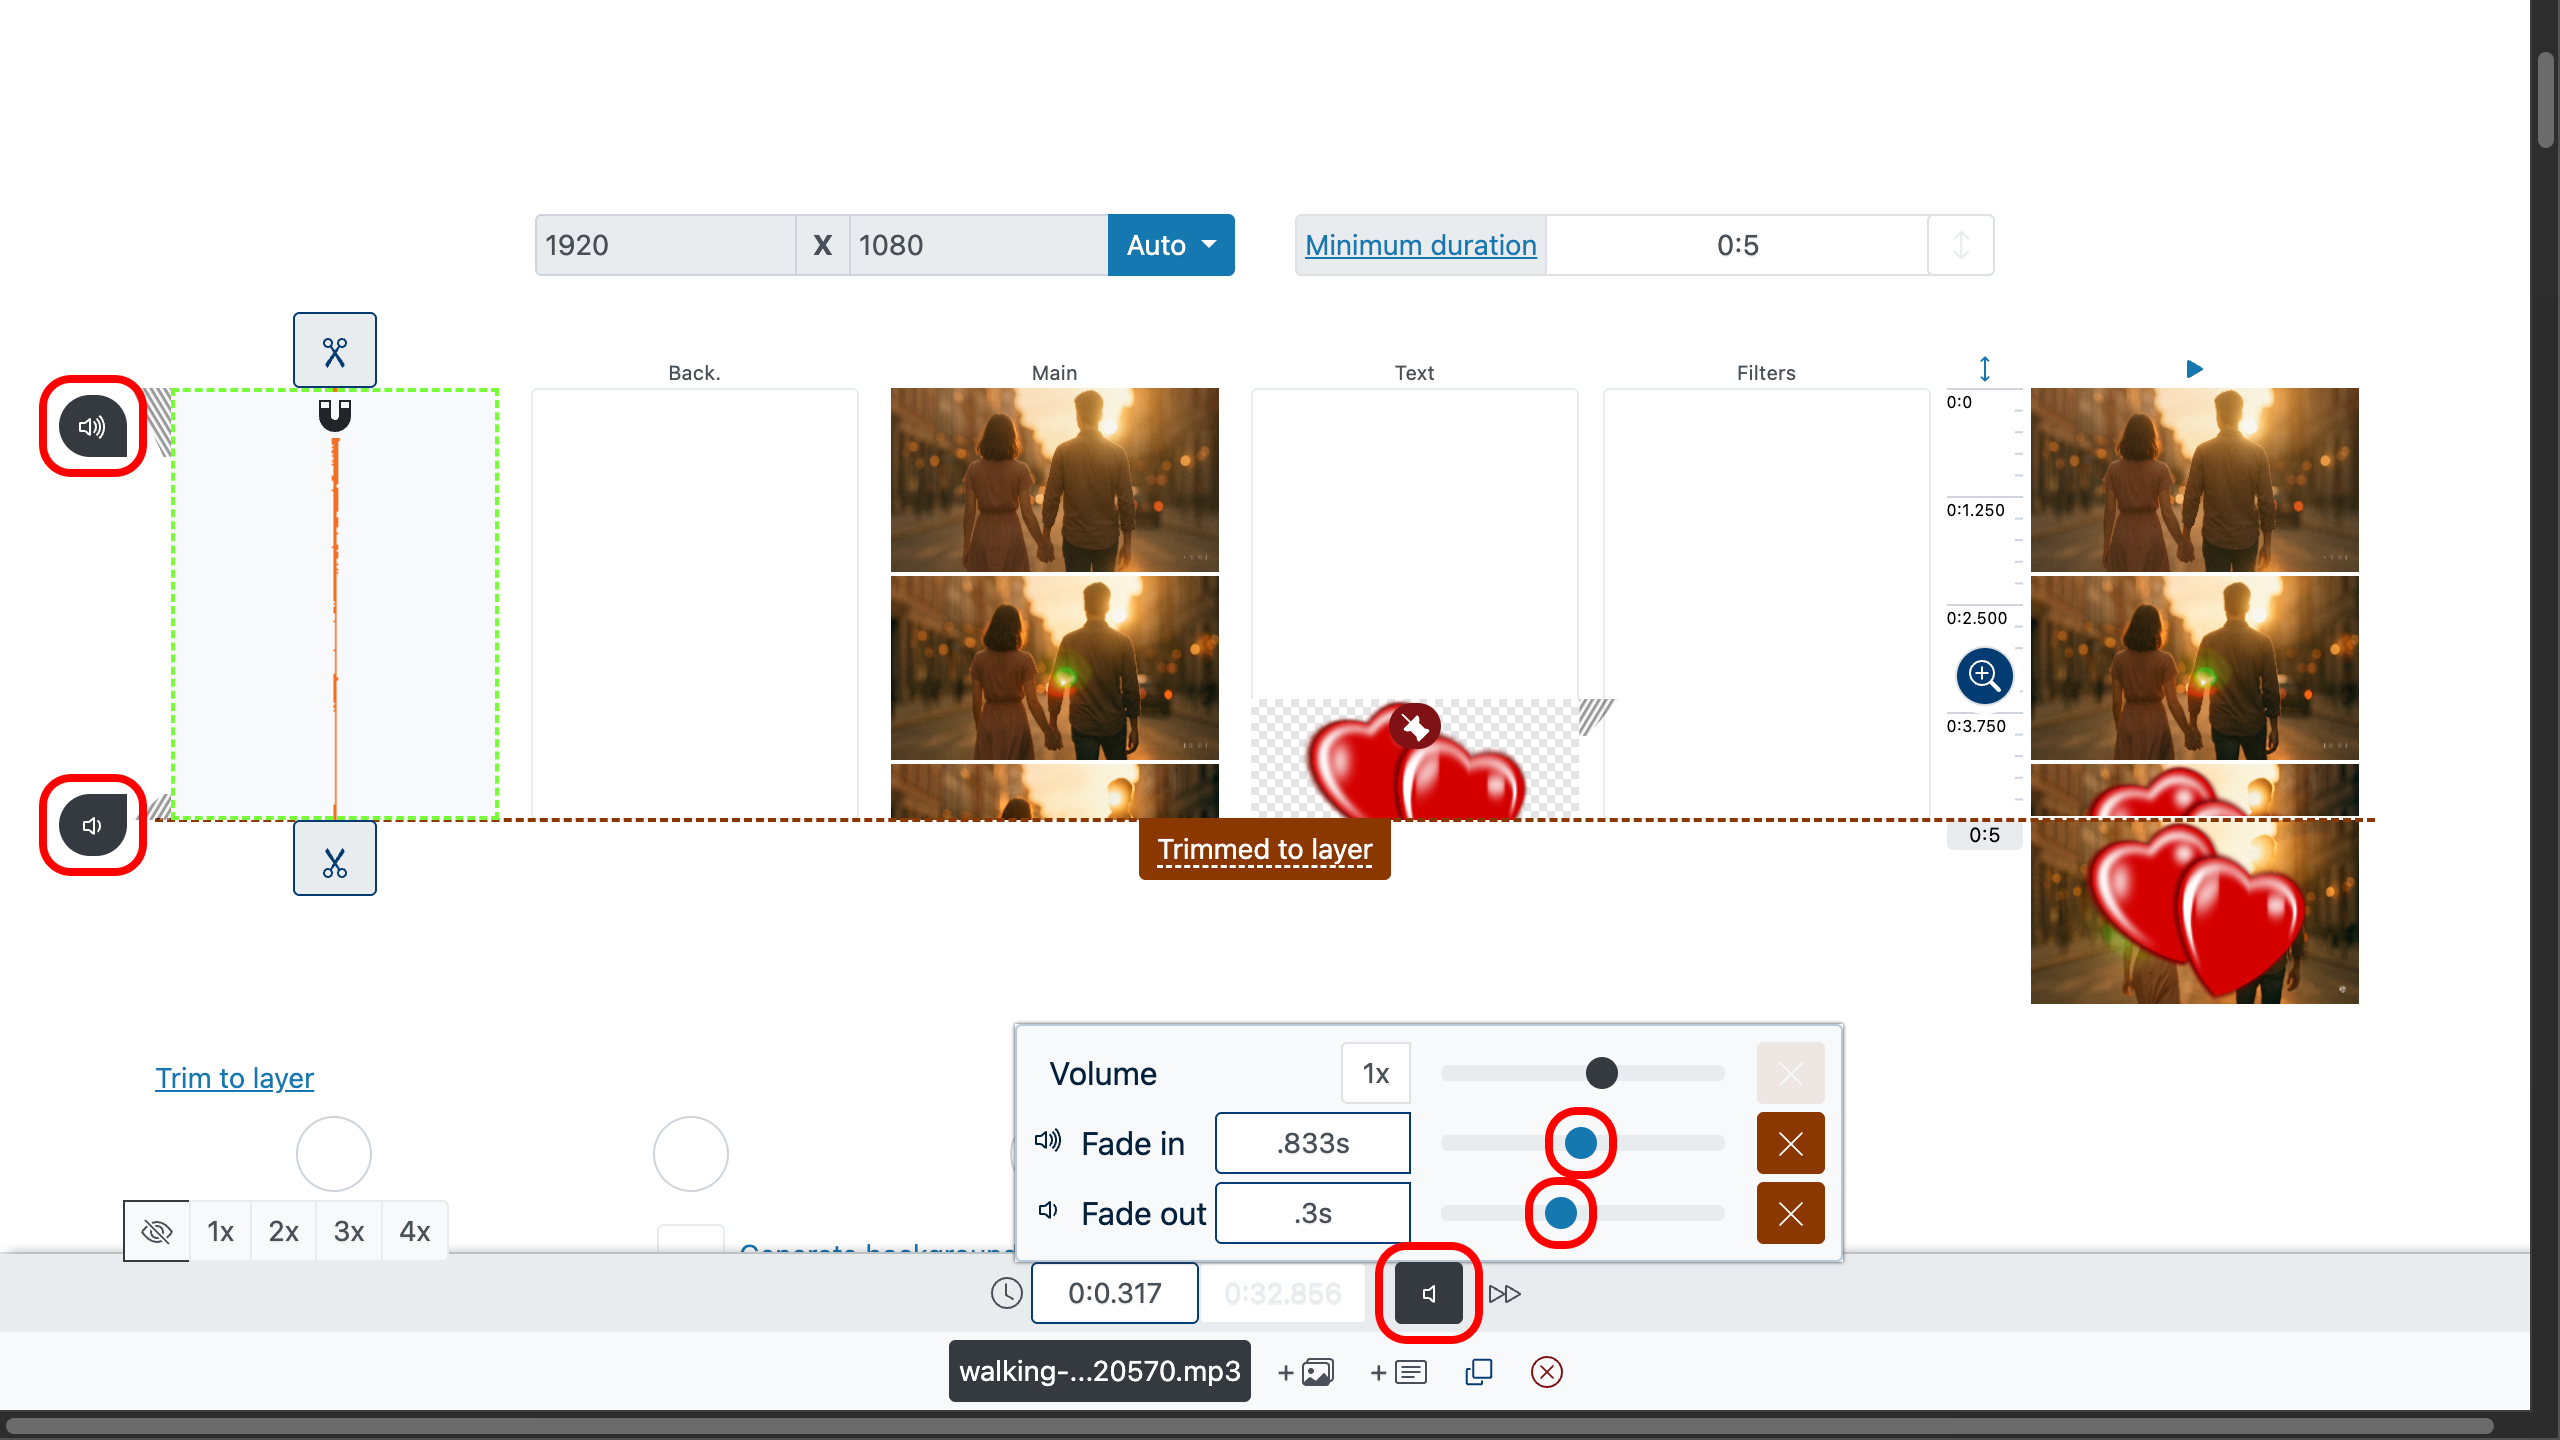
4. Music Fade-In & Fade-Out
We also added smooth audio fade-in and fade-out using the slider; alternatively, enter the values in the control panel.
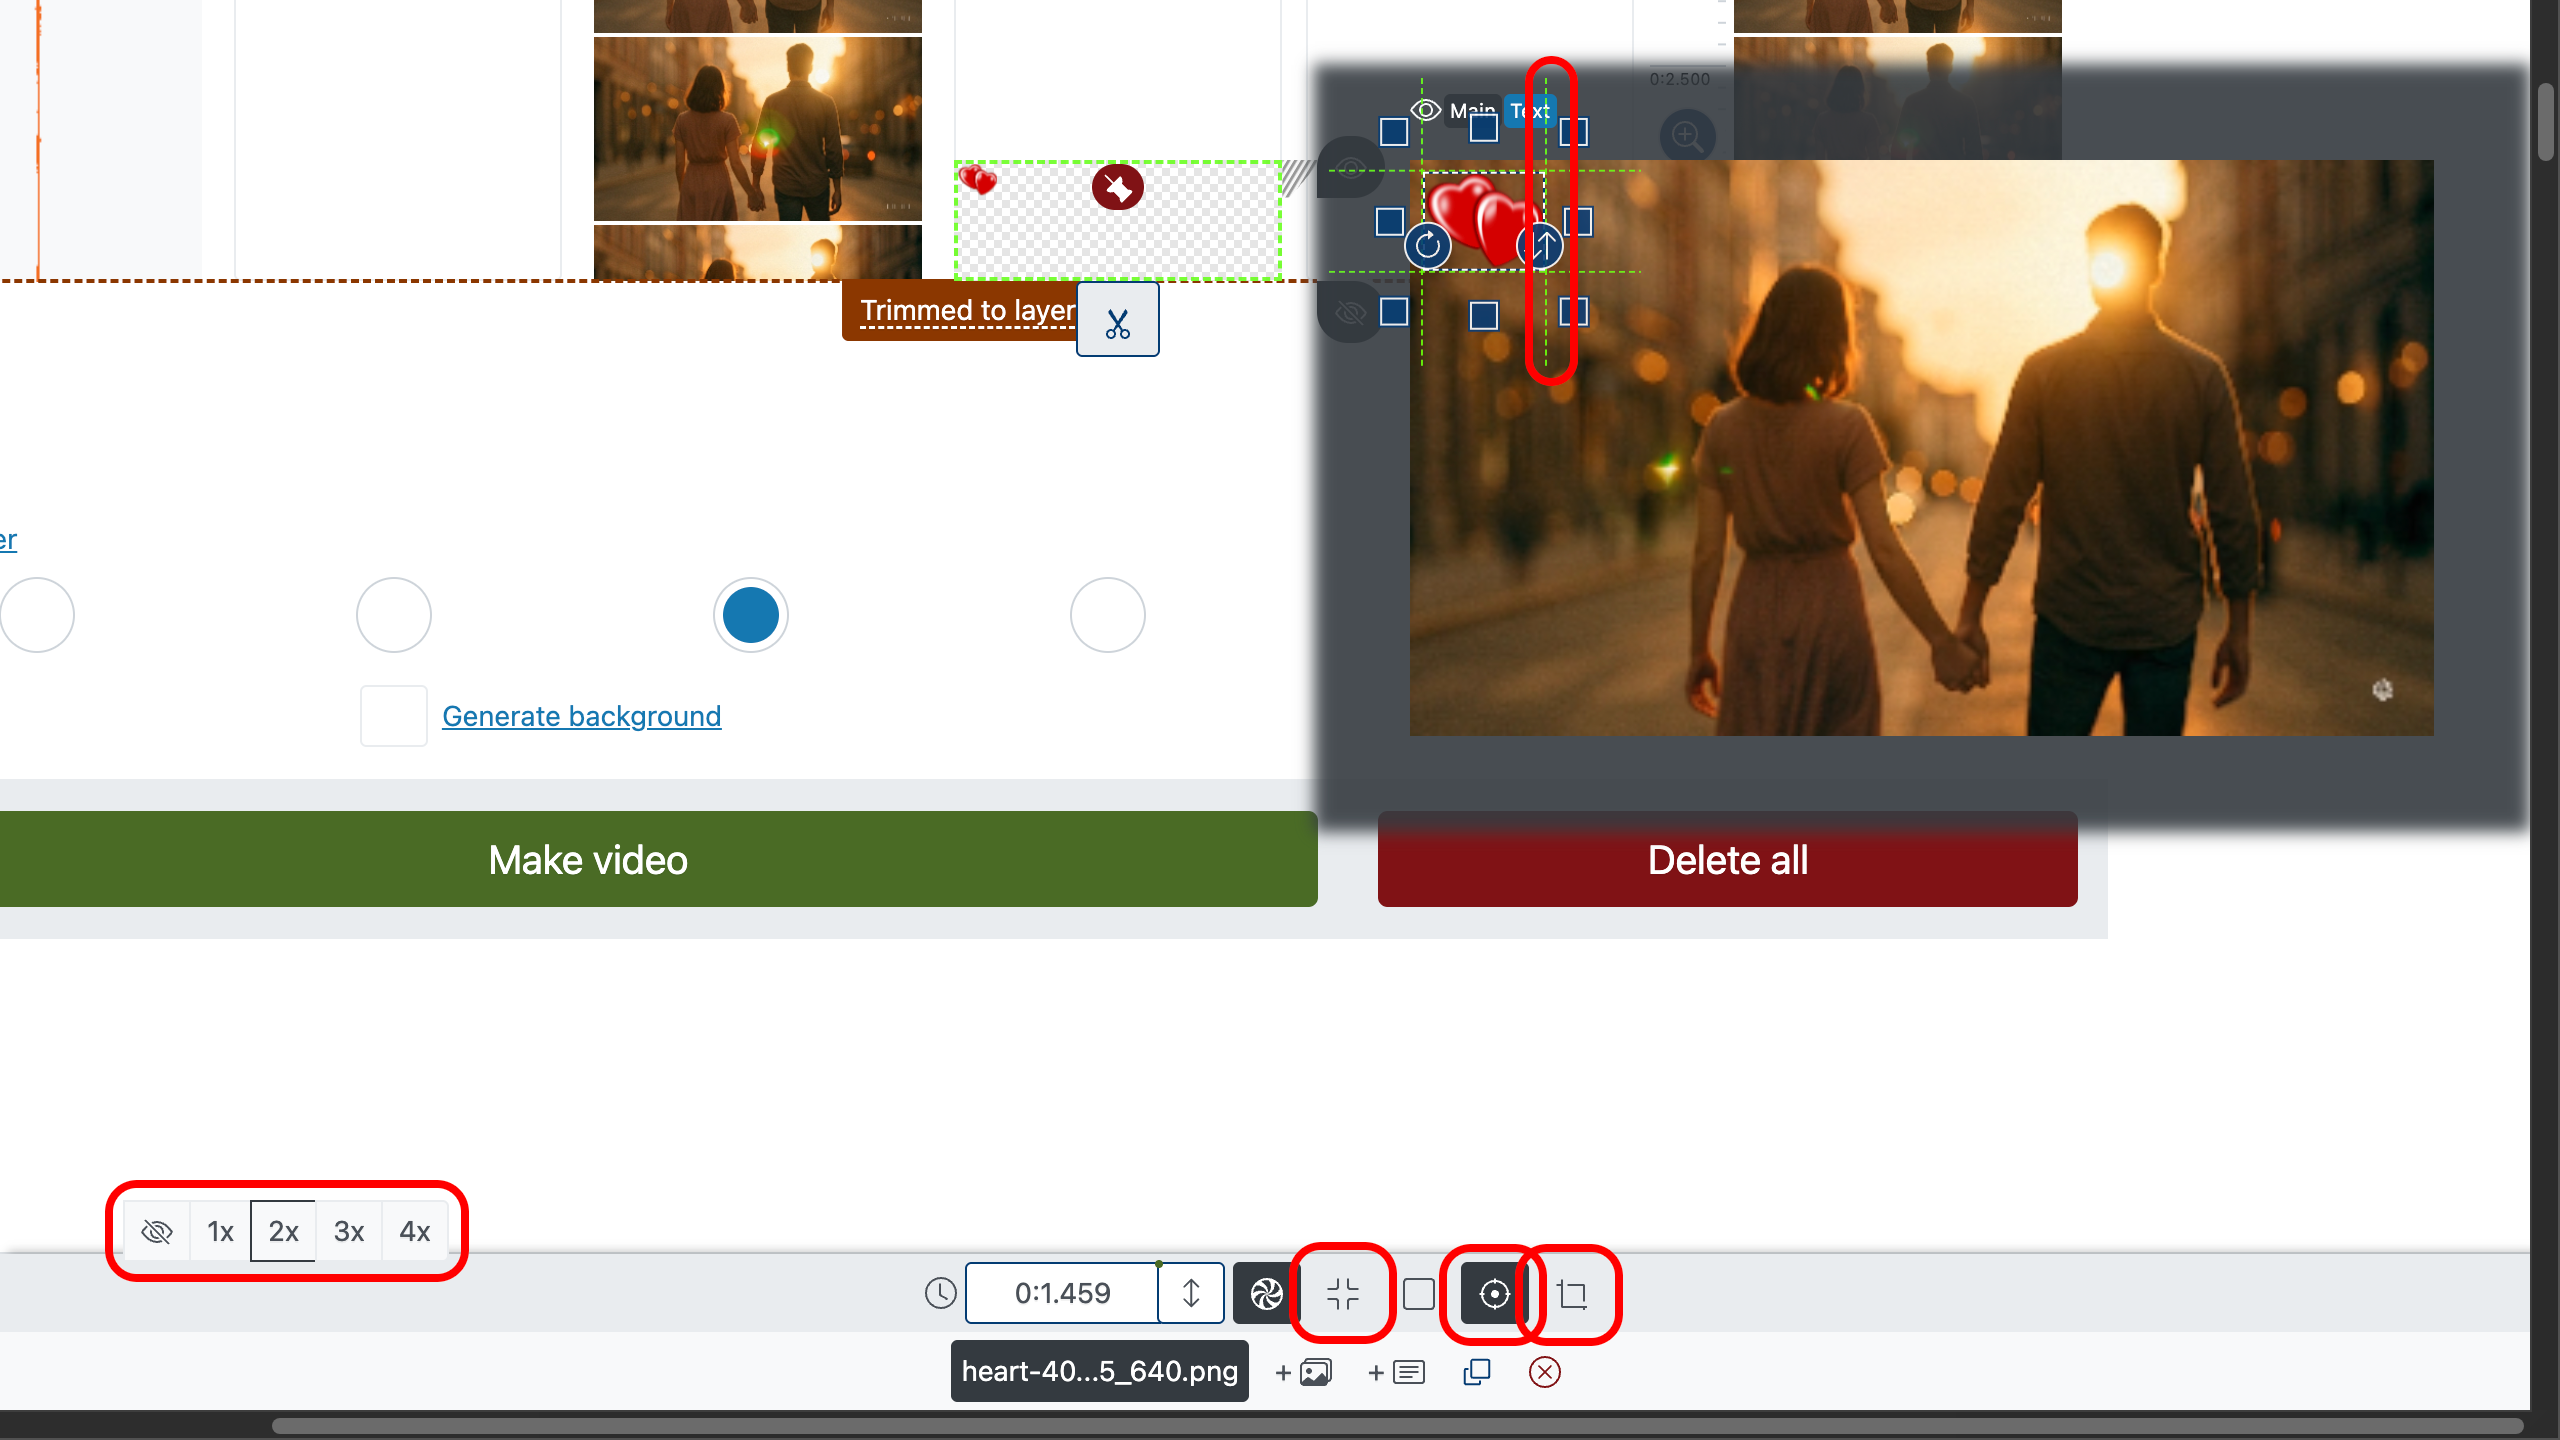
5. Place&Size Your Watermark
Turn on the frame editor with the Frame Editor button , then drag your watermark to a corner or the center—wherever it looks best.
Resize the occupied area with . Rotate that area with to match your shot’s angle.
Fine-tune tilt using for subtle perspective tweaks.
Choose how it fills the space with : fit inside or stretch to cover.
Crop extra edges with (or adjust manually via the toolbar controls and ).
Let’s move the heart to the top-left corner — in this video, that spot feels the most suitable for a watermark.
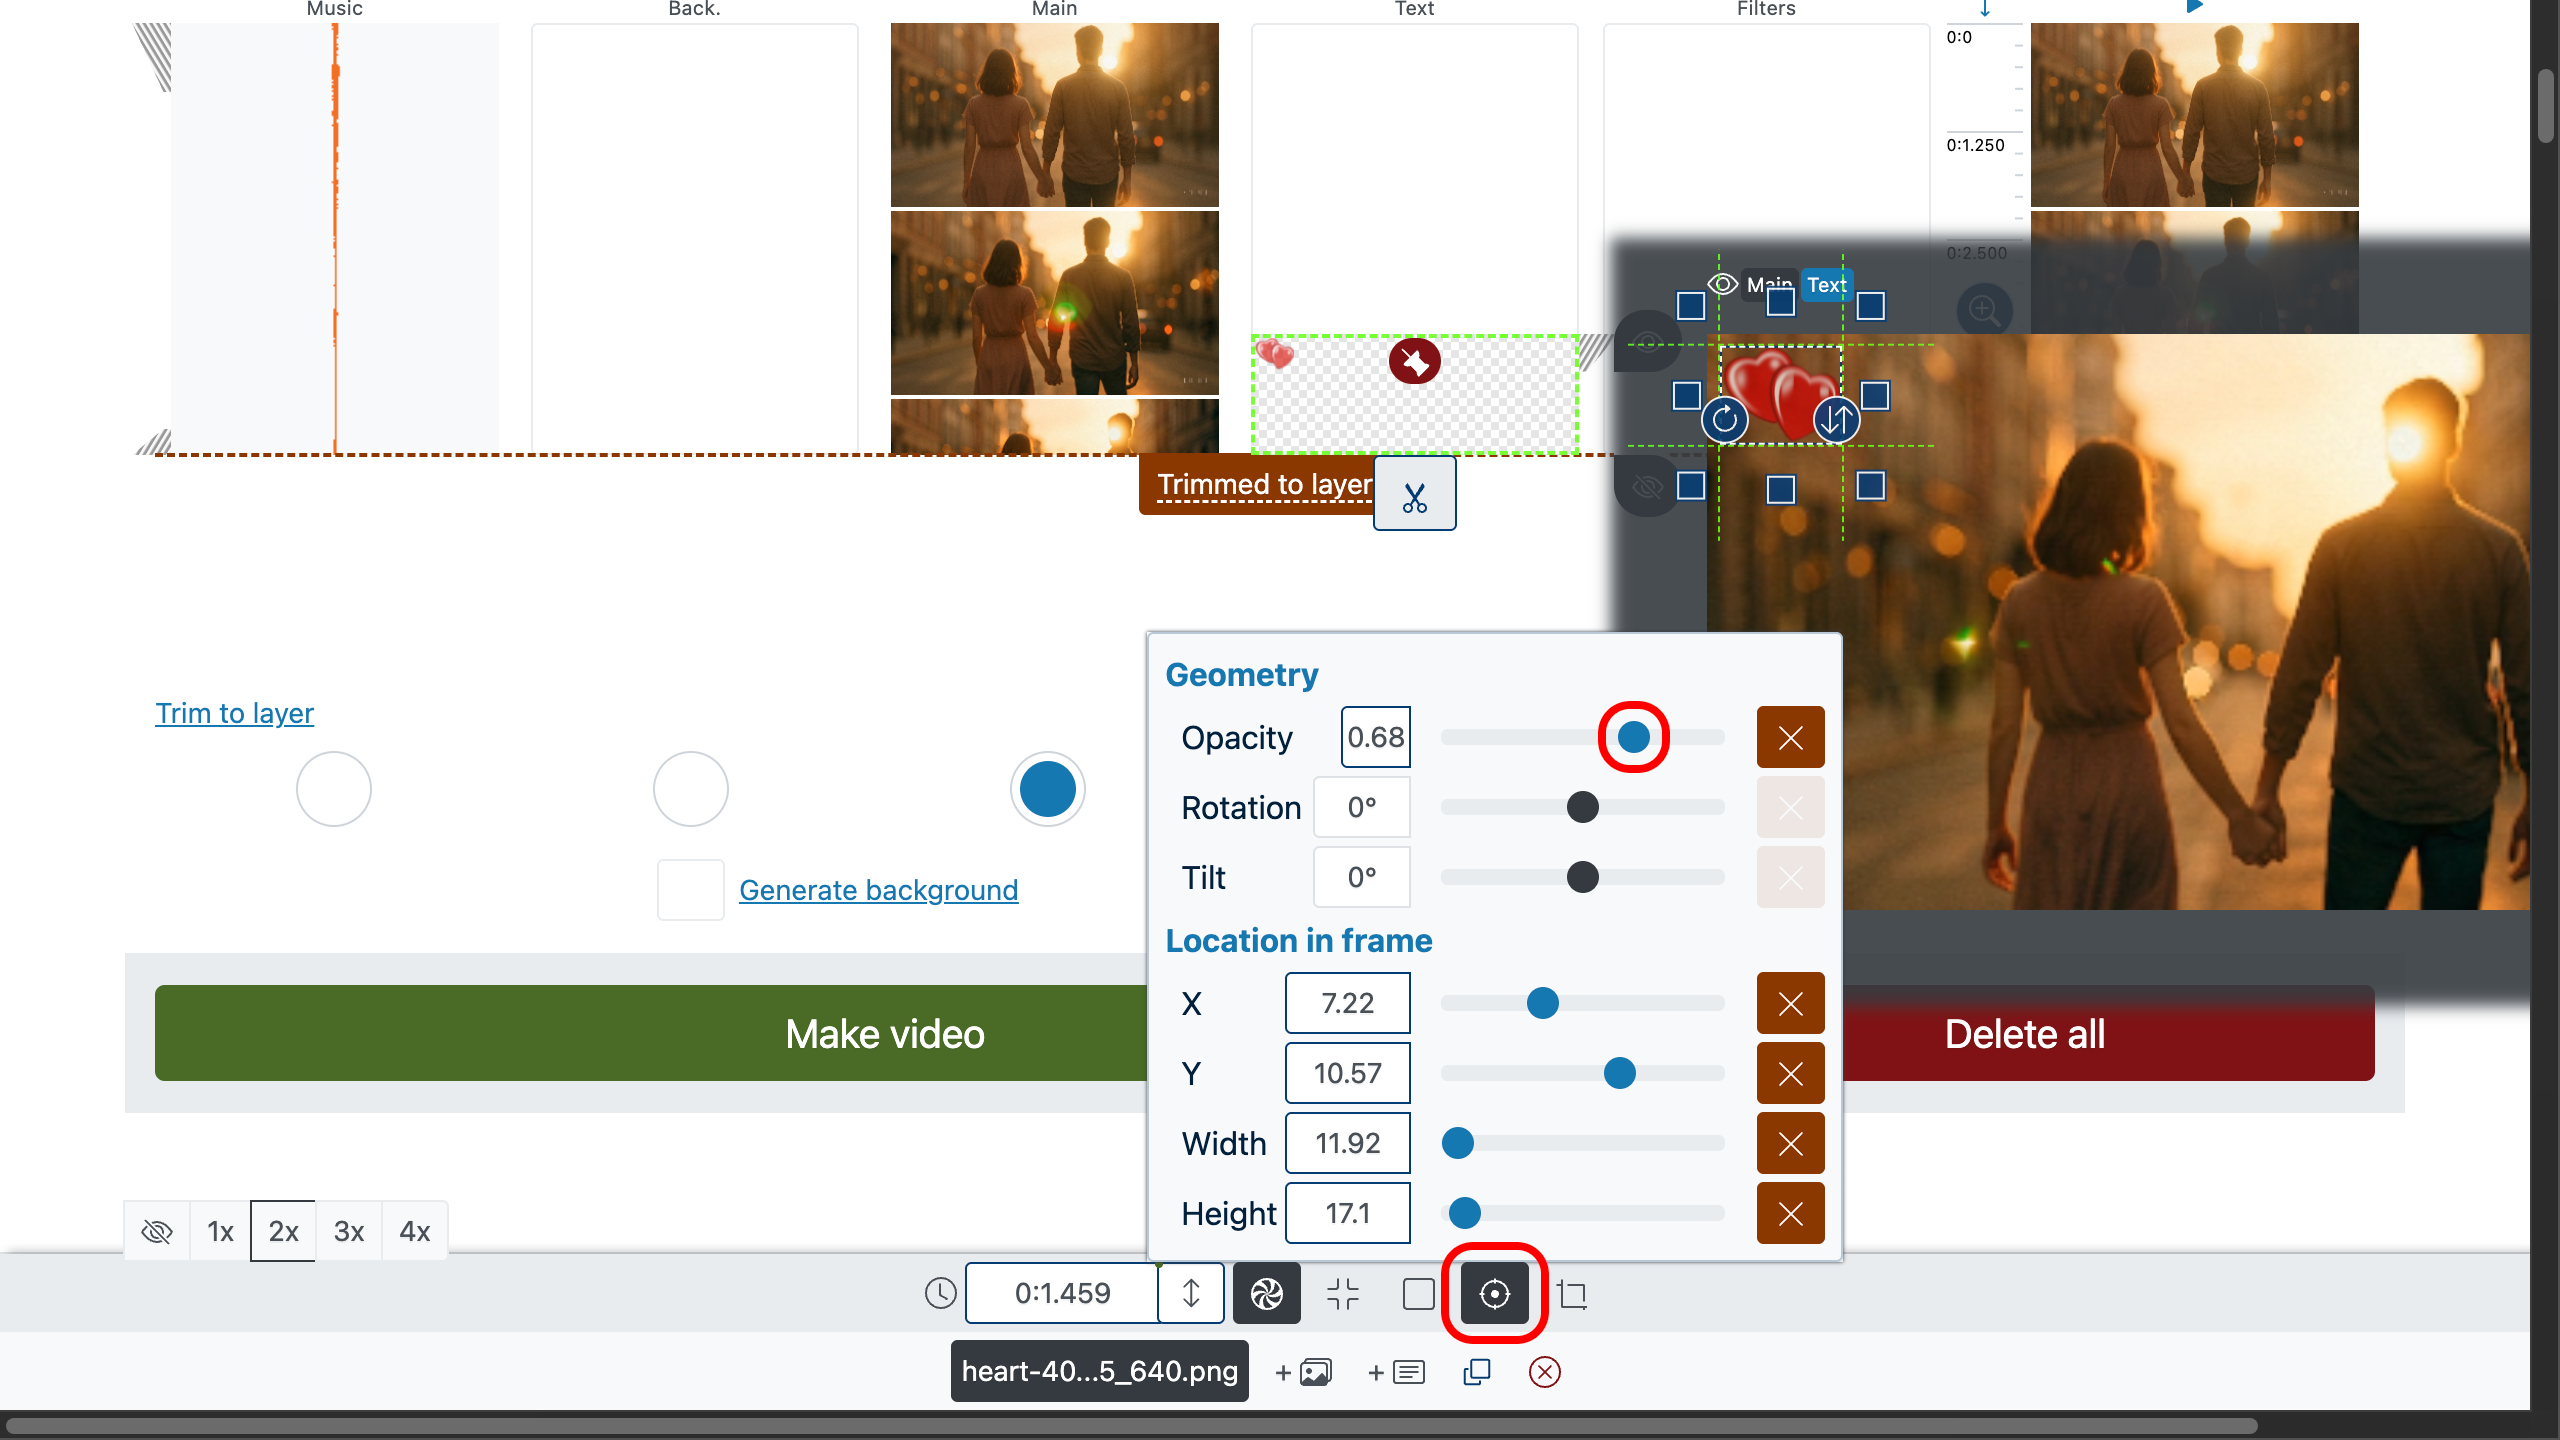
6. Adjust Watermark Opacity
A watermark usually works best when it’s semi-transparent, so it doesn’t steal attention from the story while still being recognizable.
Set the desired transparency in the control panel : drag the opacity slider or enter an exact value (0–1). Lower values make it more transparent; higher values make it more solid.
Tip: preview on both light and dark parts of the frame to ensure the watermark stays readable without becoming distracting.
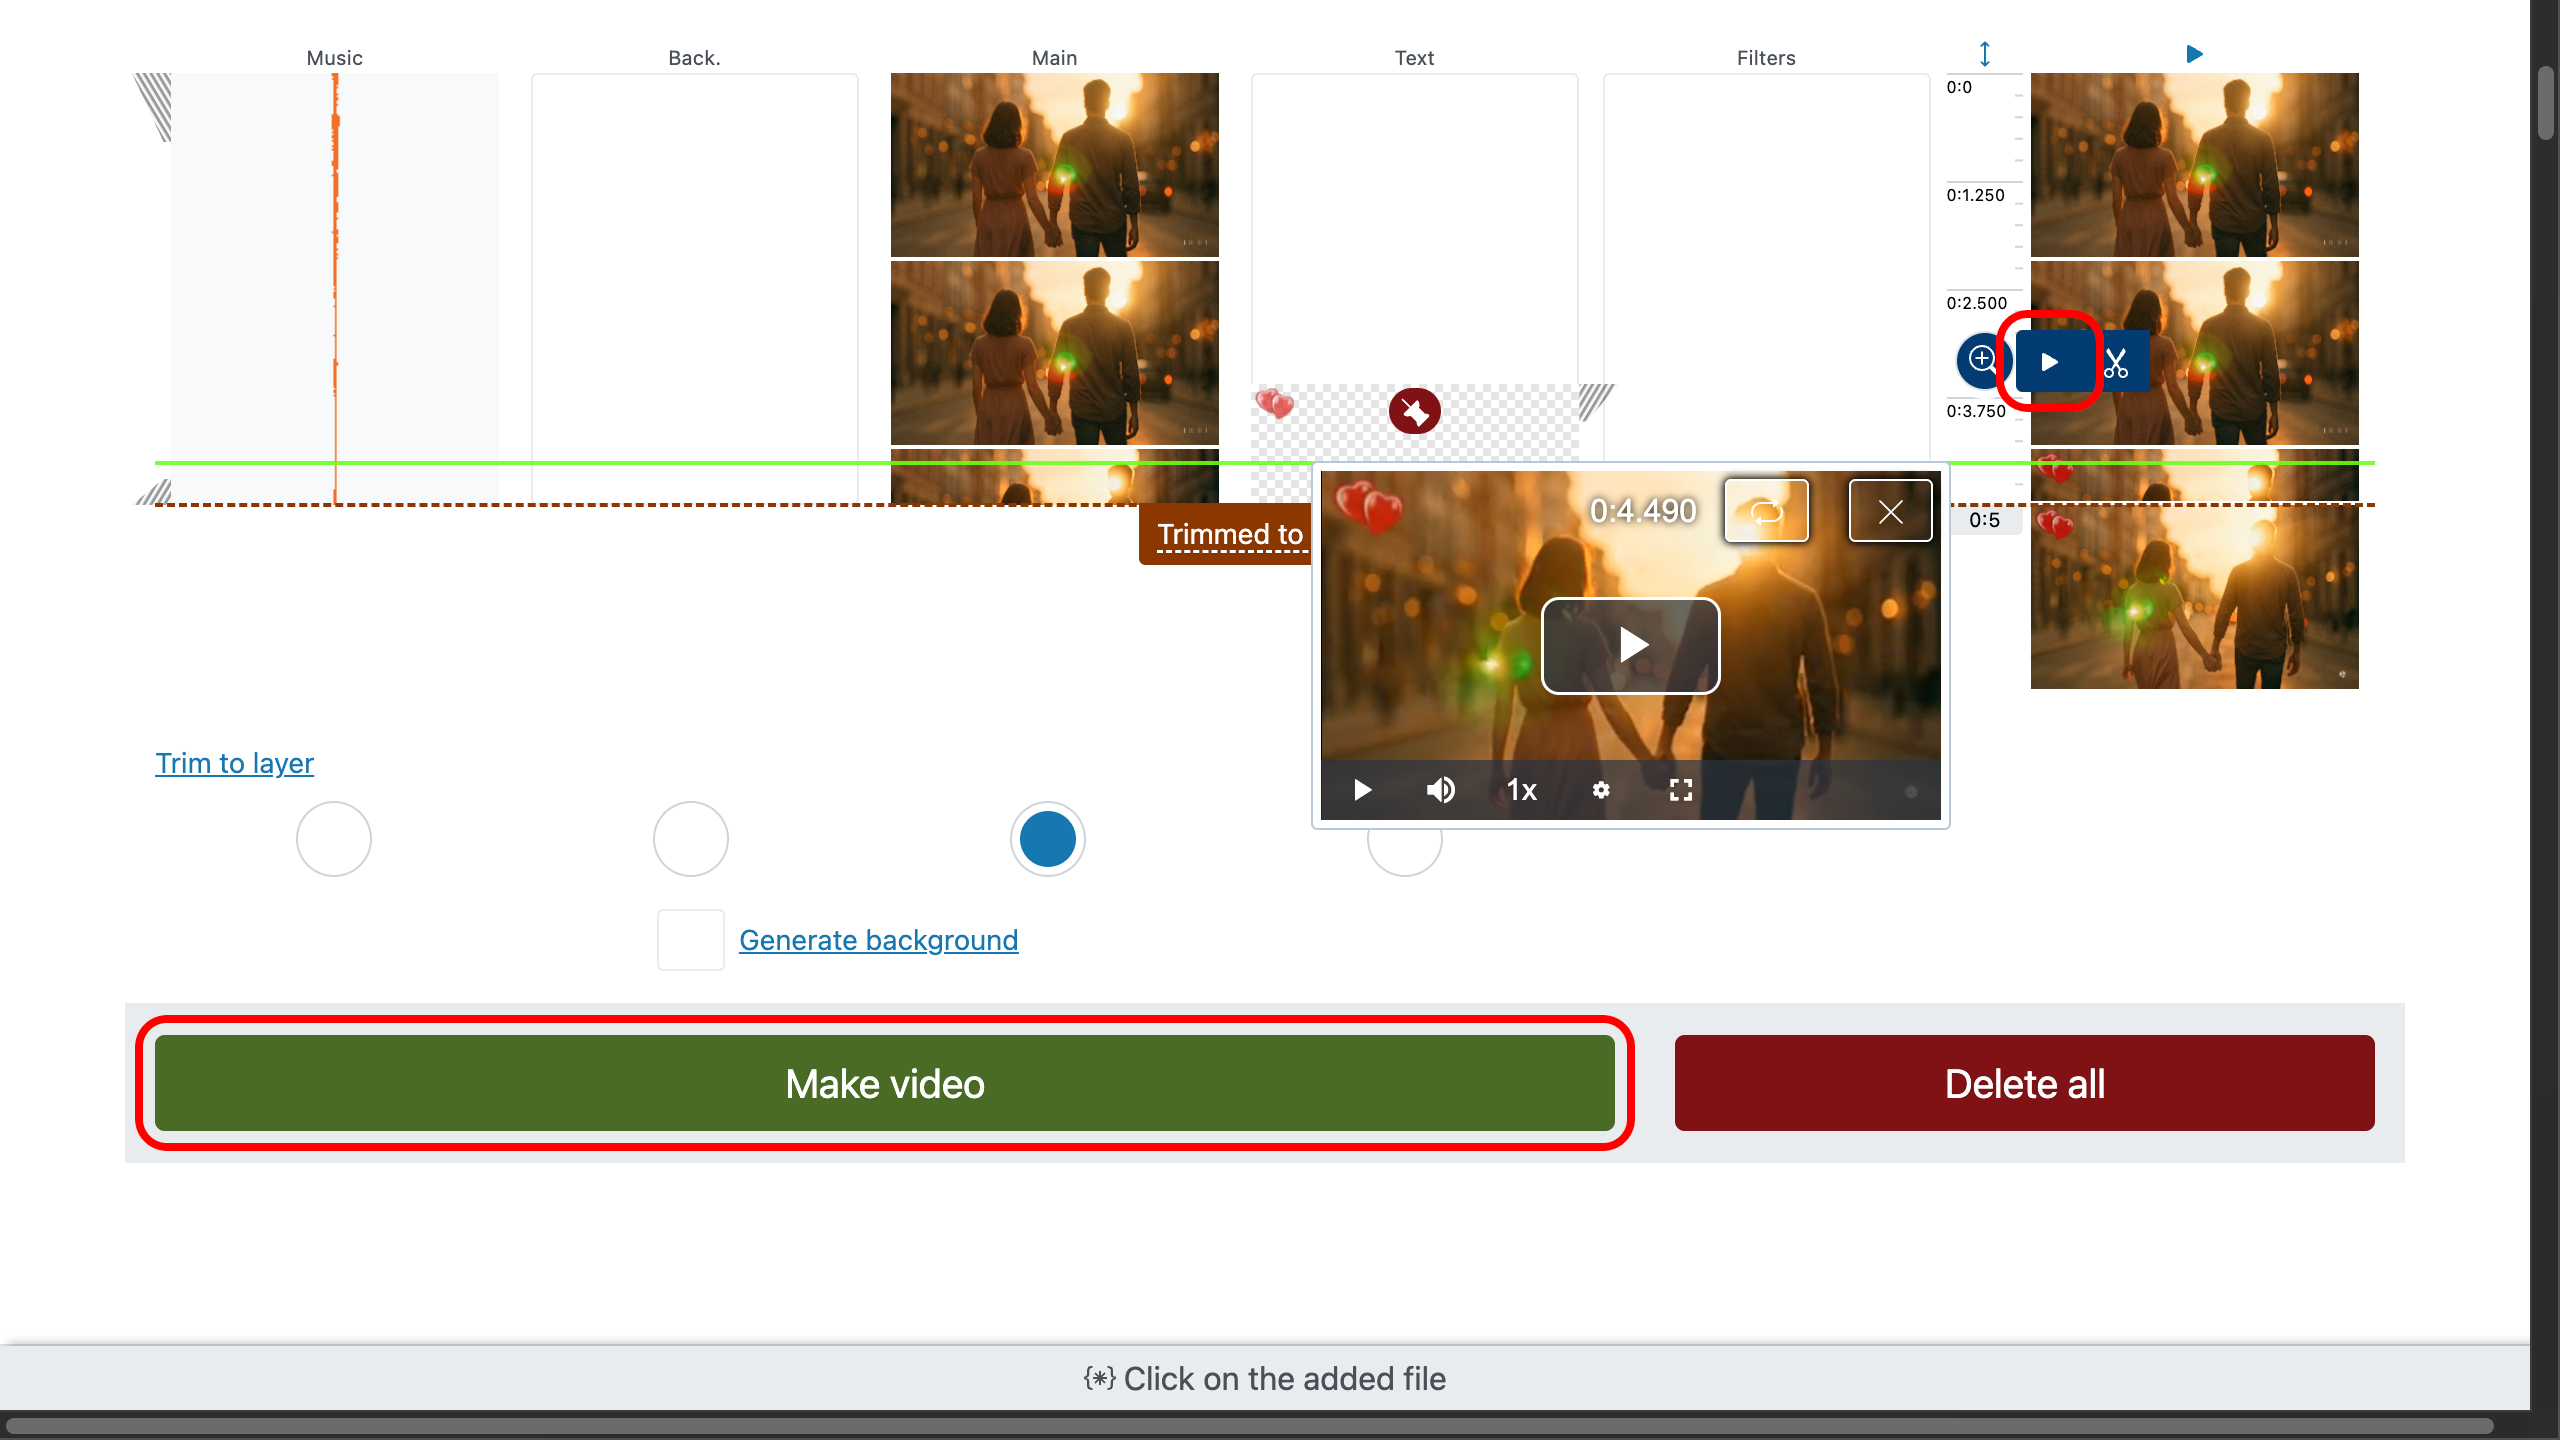
7. Finish and Export
Give your video one last preview from any position—double click on the preview area and then press the play button to start playback.
Then click “Make video” to generate the final file. You’ll get a clean result from a free video editor without watermark, ready to post anywhere.
Why This Video Maker
A free video editor without watermark that runs in any modern browser on iPhone, Mac, PC, Android, Windows, or Linux. No registration. No downloads. No installations. No watermark. Just drag, drop, edit, export.
Bring anything: video, audio, photos, GIFs—any format. Mix MP4, MOV, WEBM, WAV, MP3, PNG, JPG, GIF and more on a single timeline.
Simple enough for quick posts, powerful enough for layered storytelling.