How to Merge Videos Online
Some stories start as fragments—an unguarded laugh at the kitchen table, a pet tilting its head at just the right moment, a product glowing under the last light of day.
Alone, they are pieces. Together, they become a memory, a message, or a pitch that lives beyond the moment.
With our free online app, you can shape those pieces into a sequence worth showing—whether for family, friends, or the crowded aisles of a marketplace.
It runs in your browser on any device — iPhone, Android, Mac, or PC — and accepts video, images, and music in almost any format. No registration. No installation. Just open it and start creating.
Use the video editor to make every scene flow into the next until your story feels whole.
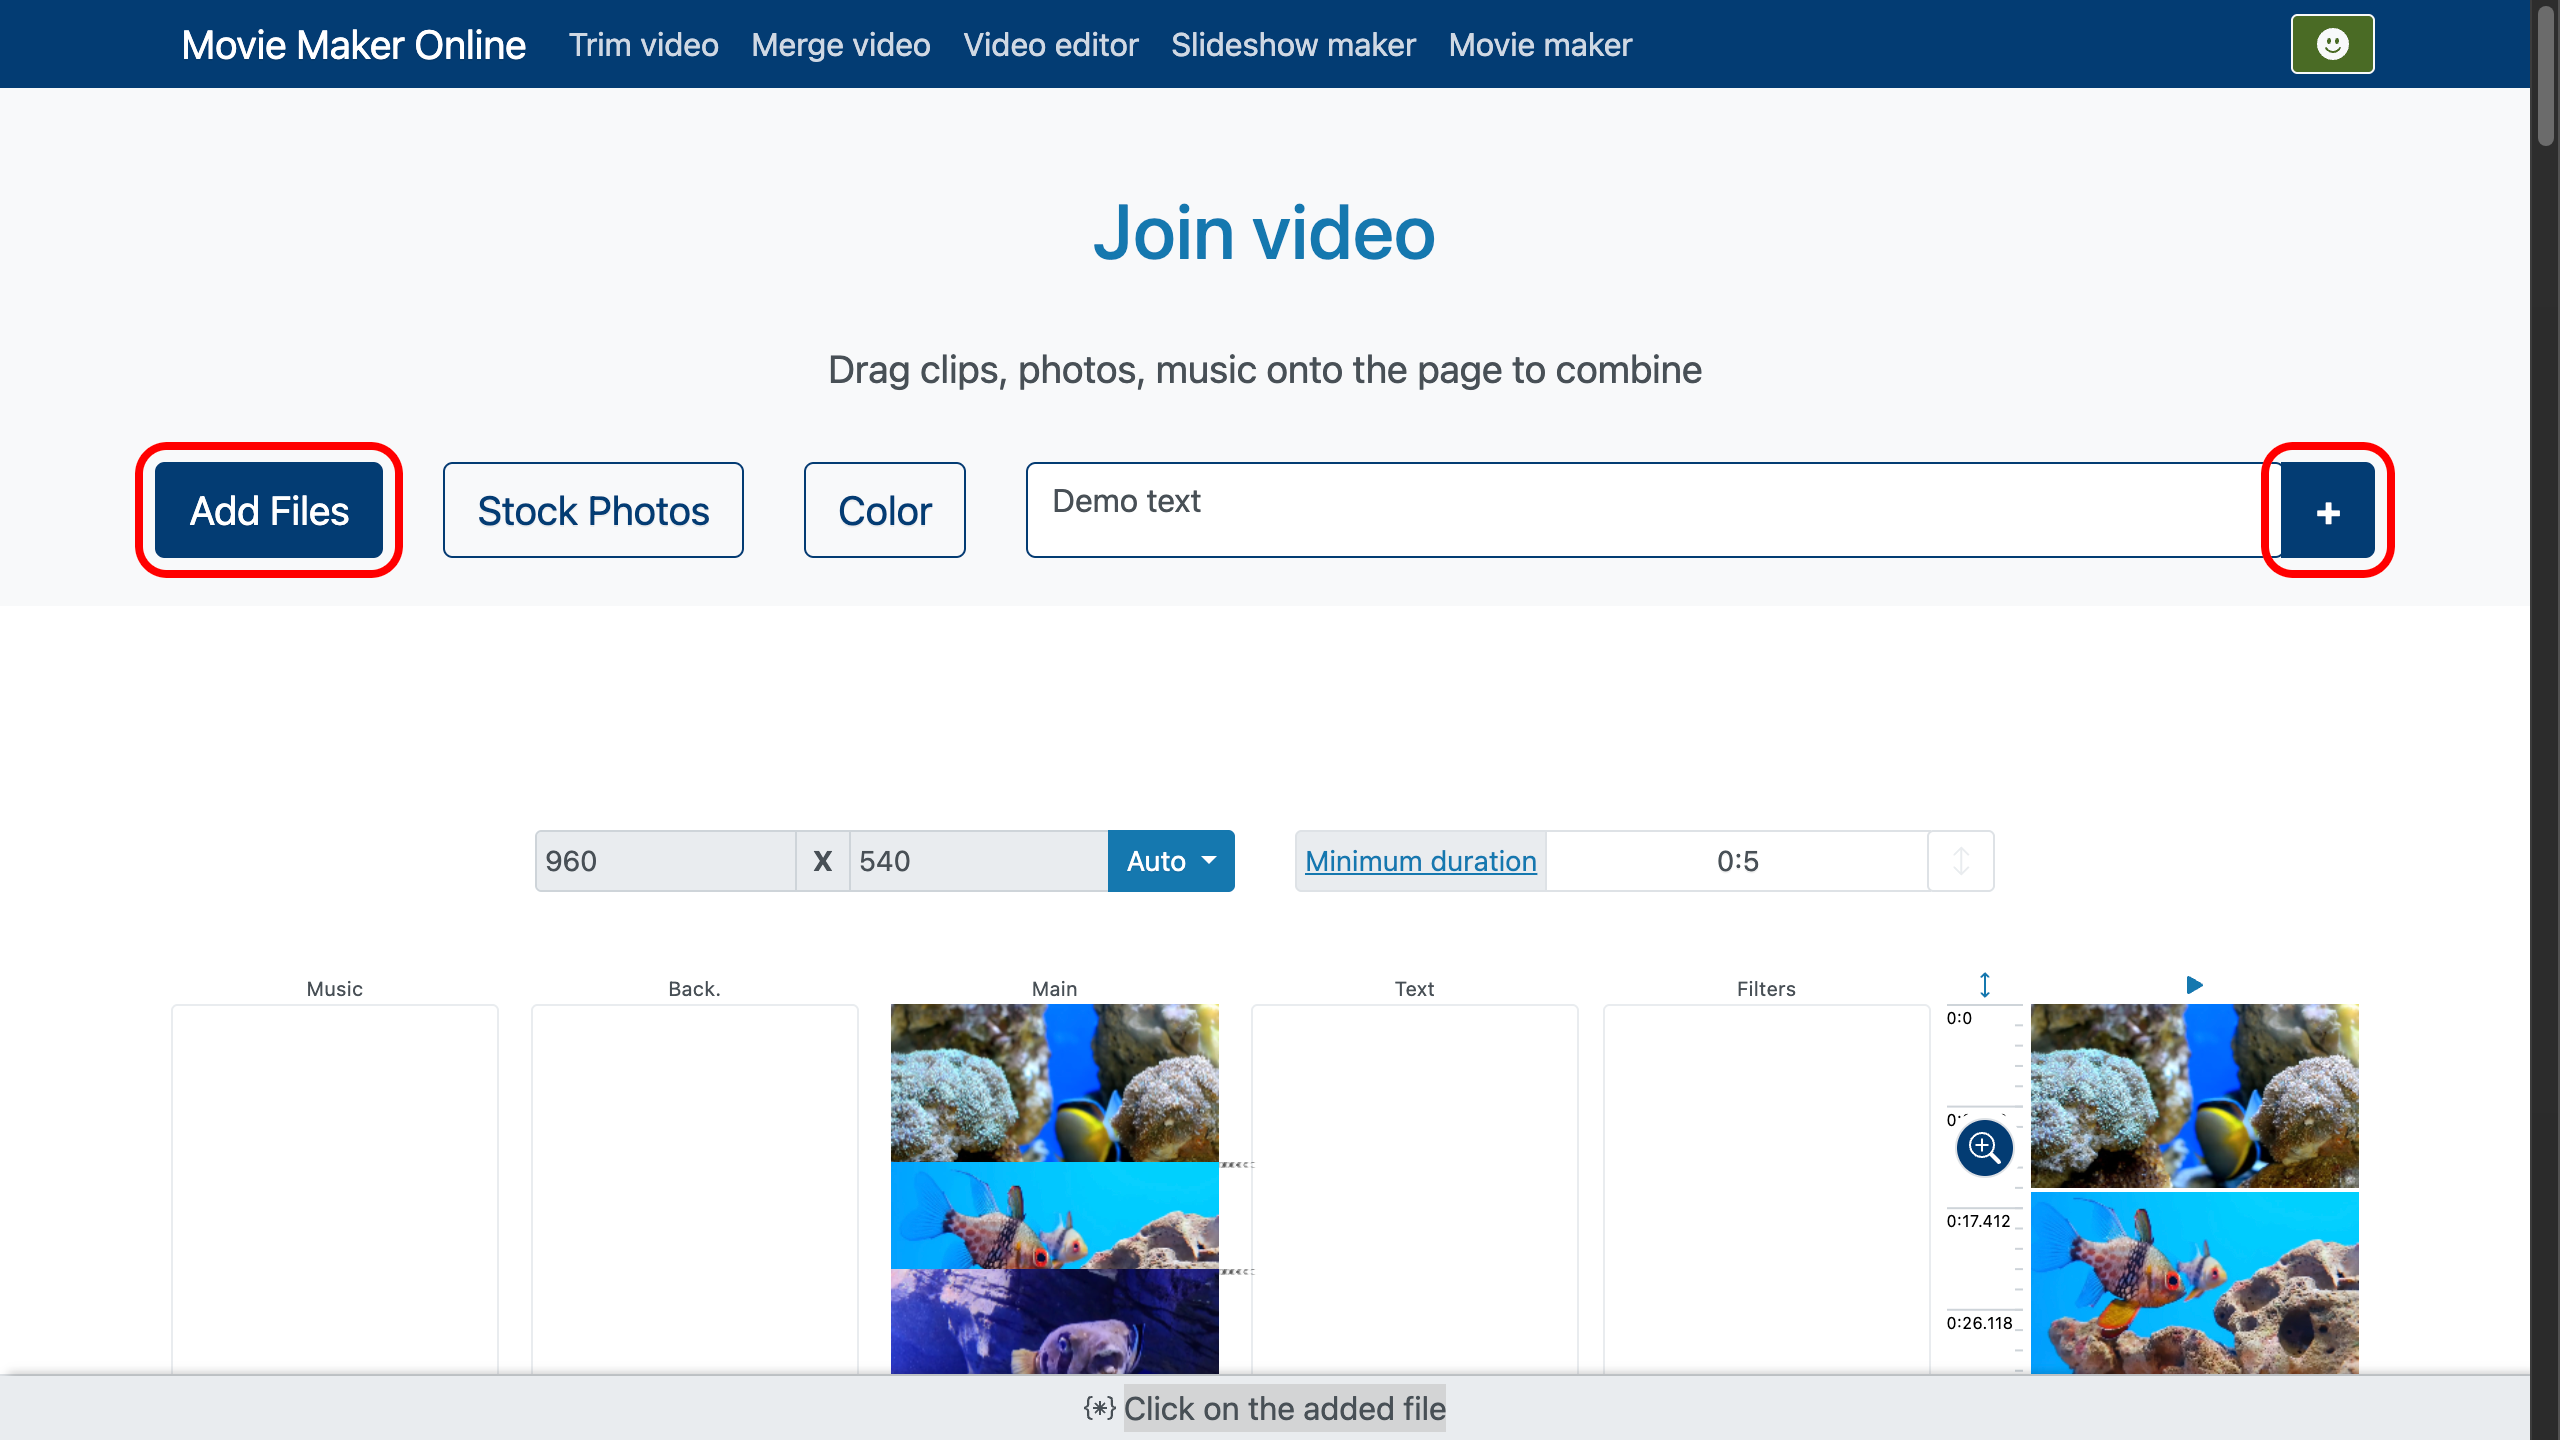
Step 1 — Add Your Files
Gather your materials. You can combine photos, music, video clips, and text in a single project without worrying about file types.
If you need more content, browse free stock photos or open music libraries for inspiration.
The video maker will recognize your files instantly, and if your browser can’t read a format, our smart system will convert it automatically so you can keep working without delay.
Files are placed on the timeline in the order you upload them. To change the order, simply drag and drop. On touch devices like iPhone or Android, press, hold, and move the file to its new place.
Adding text is just as simple — type it into the provided field, click “Add,” and it appears on the timeline, ready to adjust for timing and placement.
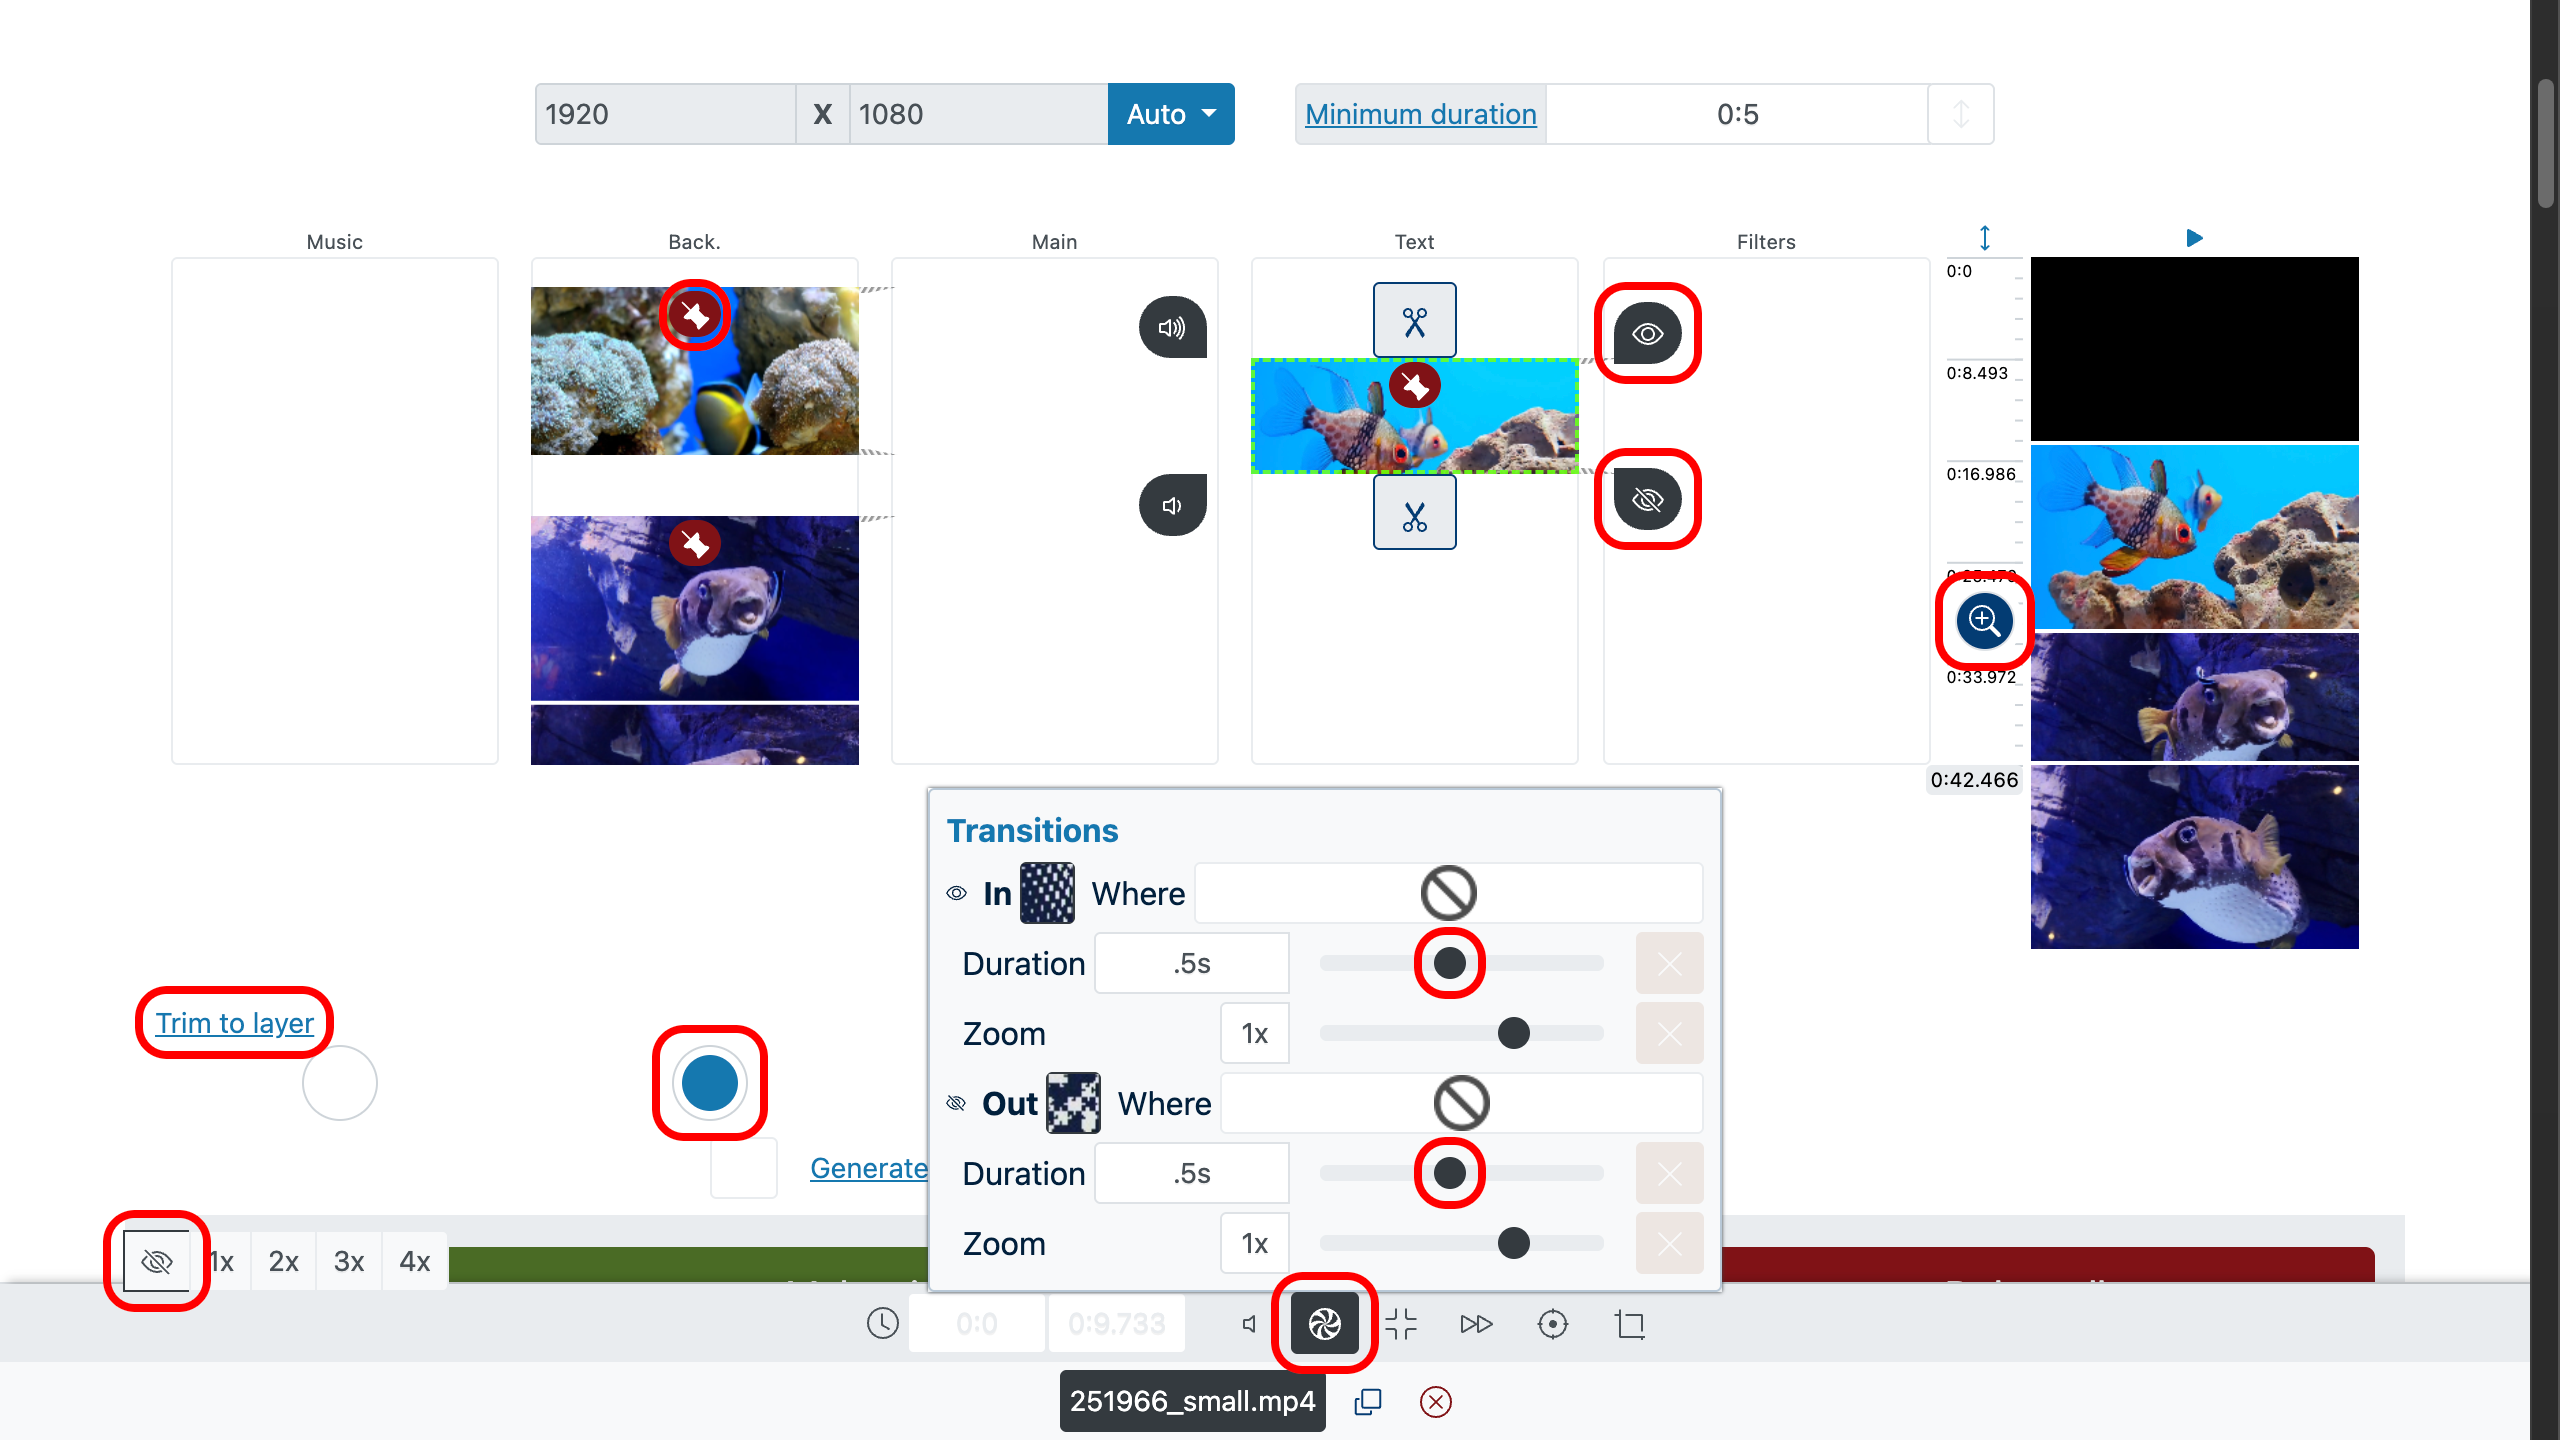
Step 2 — Adjust Transitions
This is where the separate moments start to merge into one smooth flow.
When you need to splice a clip exactly where the scene shifts, the timeline controls give you frame-accurate precision. For exact control, use the zoom tool on the right side of the timeline—drag the handle to zoom in or out.
Select a clip and move the sliders at its right edge for quick adjustments.
On the lower panel, click “Transitions” to set how your clip will appear, disappear, move, or scale. Adjust duration, direction, and even the start and end size.
- If you want a clean cut with no transition effect, set the duration to 0.
- To match all layers to one length, use the “Trim by layer” option under the editing area. Select your main track, and all other layers will stretch or shorten to fit.
Photos and text will expand as needed but will never be shorter than your minimum duration setting. - You can lock a clip in place once it’s positioned perfectly, or return to automatic alignment later.
The movie maker also gives you tools to trim clips, balance audio levels, add fade-ins and fade-outs, fine-tune transition behavior, and layer background music so your story sounds as good as it looks.
Step 3 — Preview and Export
Use the preview panel on the right to watch your work. Double-click a specific moment and hit “Play” to check how the timing feels.
When the pacing is right and the story flows, click “Make Video.” The slideshow maker will process your clips, music, and text into one polished file, ready to share.

Tips — Make Your Joined Clip Unforgettable
- Start with impact: movement or emotion in the first three seconds hooks attention before it drifts.
- Cut on motion: let a gesture carry the viewer over the splice so the change feels seamless.
- Match transitions to the rhythm of your soundtrack to make even simple edits feel intentional.
- Keep text short and clear—four to seven words per card—for easy reading on any screen.
- Let sound guide the mood: a slow build can heighten suspense, while a gentle fade-out tells the viewer the story is complete.
- End with something that lingers, a reveal, or a transformation that stays in the mind after the screen goes dark.