How to join videos online without transitions using MovieMakerOnline.com
If you just need to merge several video clips into one — without effects, animations, or transitions — this method is perfect for you. Our online video editor works right in your browser: no installation required, everything happens in a few clicks, whether you’re using iPhone, Mac, PC, or Android.
Step 1: Upload video files
Click the “Add Files” button and select the desired clips from your device. All popular formats are supported: MP4, MOV, AVI, WebM, and others. You can upload two files or a whole series of clips — order doesn’t matter.
Step 2: Arrange the clips
Once uploaded, the files will appear on the timeline. Simply drag them with your mouse or finger to arrange them in the desired order. Beginning, middle, end — arrange the clips as you envision them.
Step 3: Remove transitions and effects
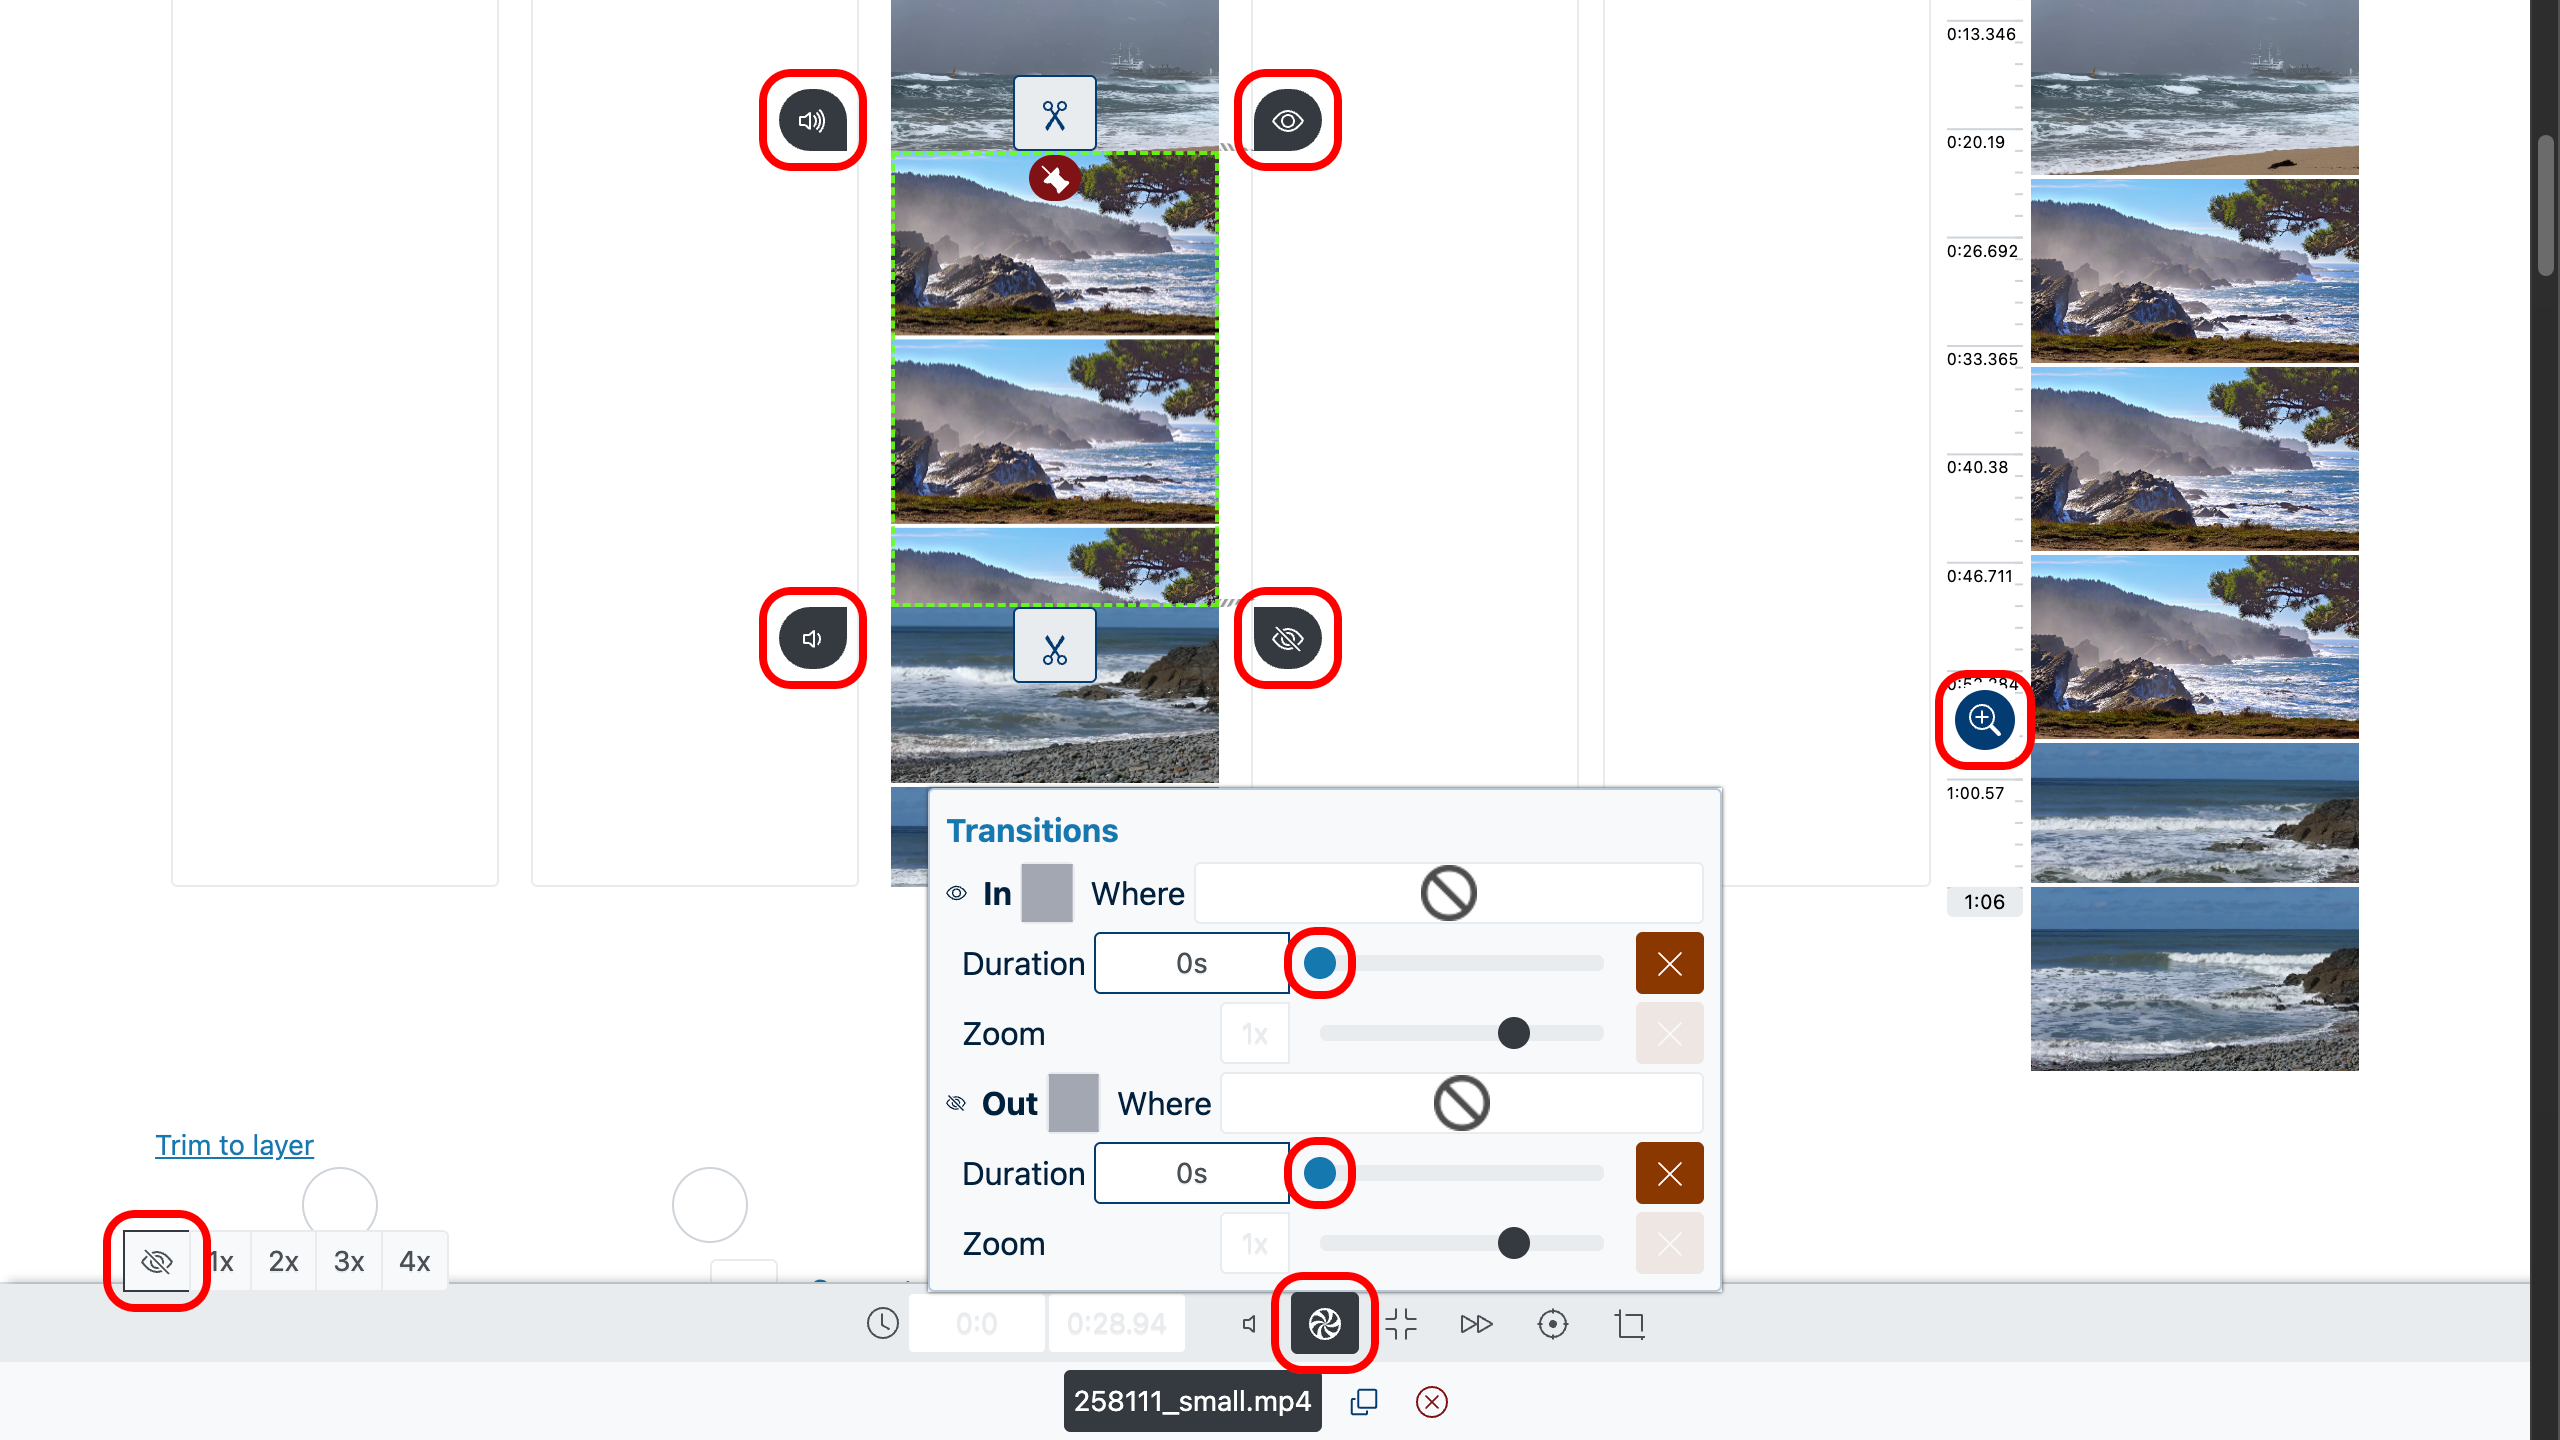
To get a clean cut without smooth transitions or fade-in effects, use the sliders on the right side of each clip — they control the duration of the fade-in and fade-out. Set these values to zero or manually adjust them until all visual effects are gone.
If you want to control audio, use the sliders to the left of the clip — they allow you to adjust audio fade-in and fade-out. For seamless audio, set both sliders to minimum or disable them completely.
For more precise editing, use the timeline scale control: drag the corresponding button up or down to zoom in or out. This is especially useful when trying to pinpoint the exact junction between clips or manually fine-tune the audio transitions.
To disable the frame editor, use the button.
Step 4: Preview the result
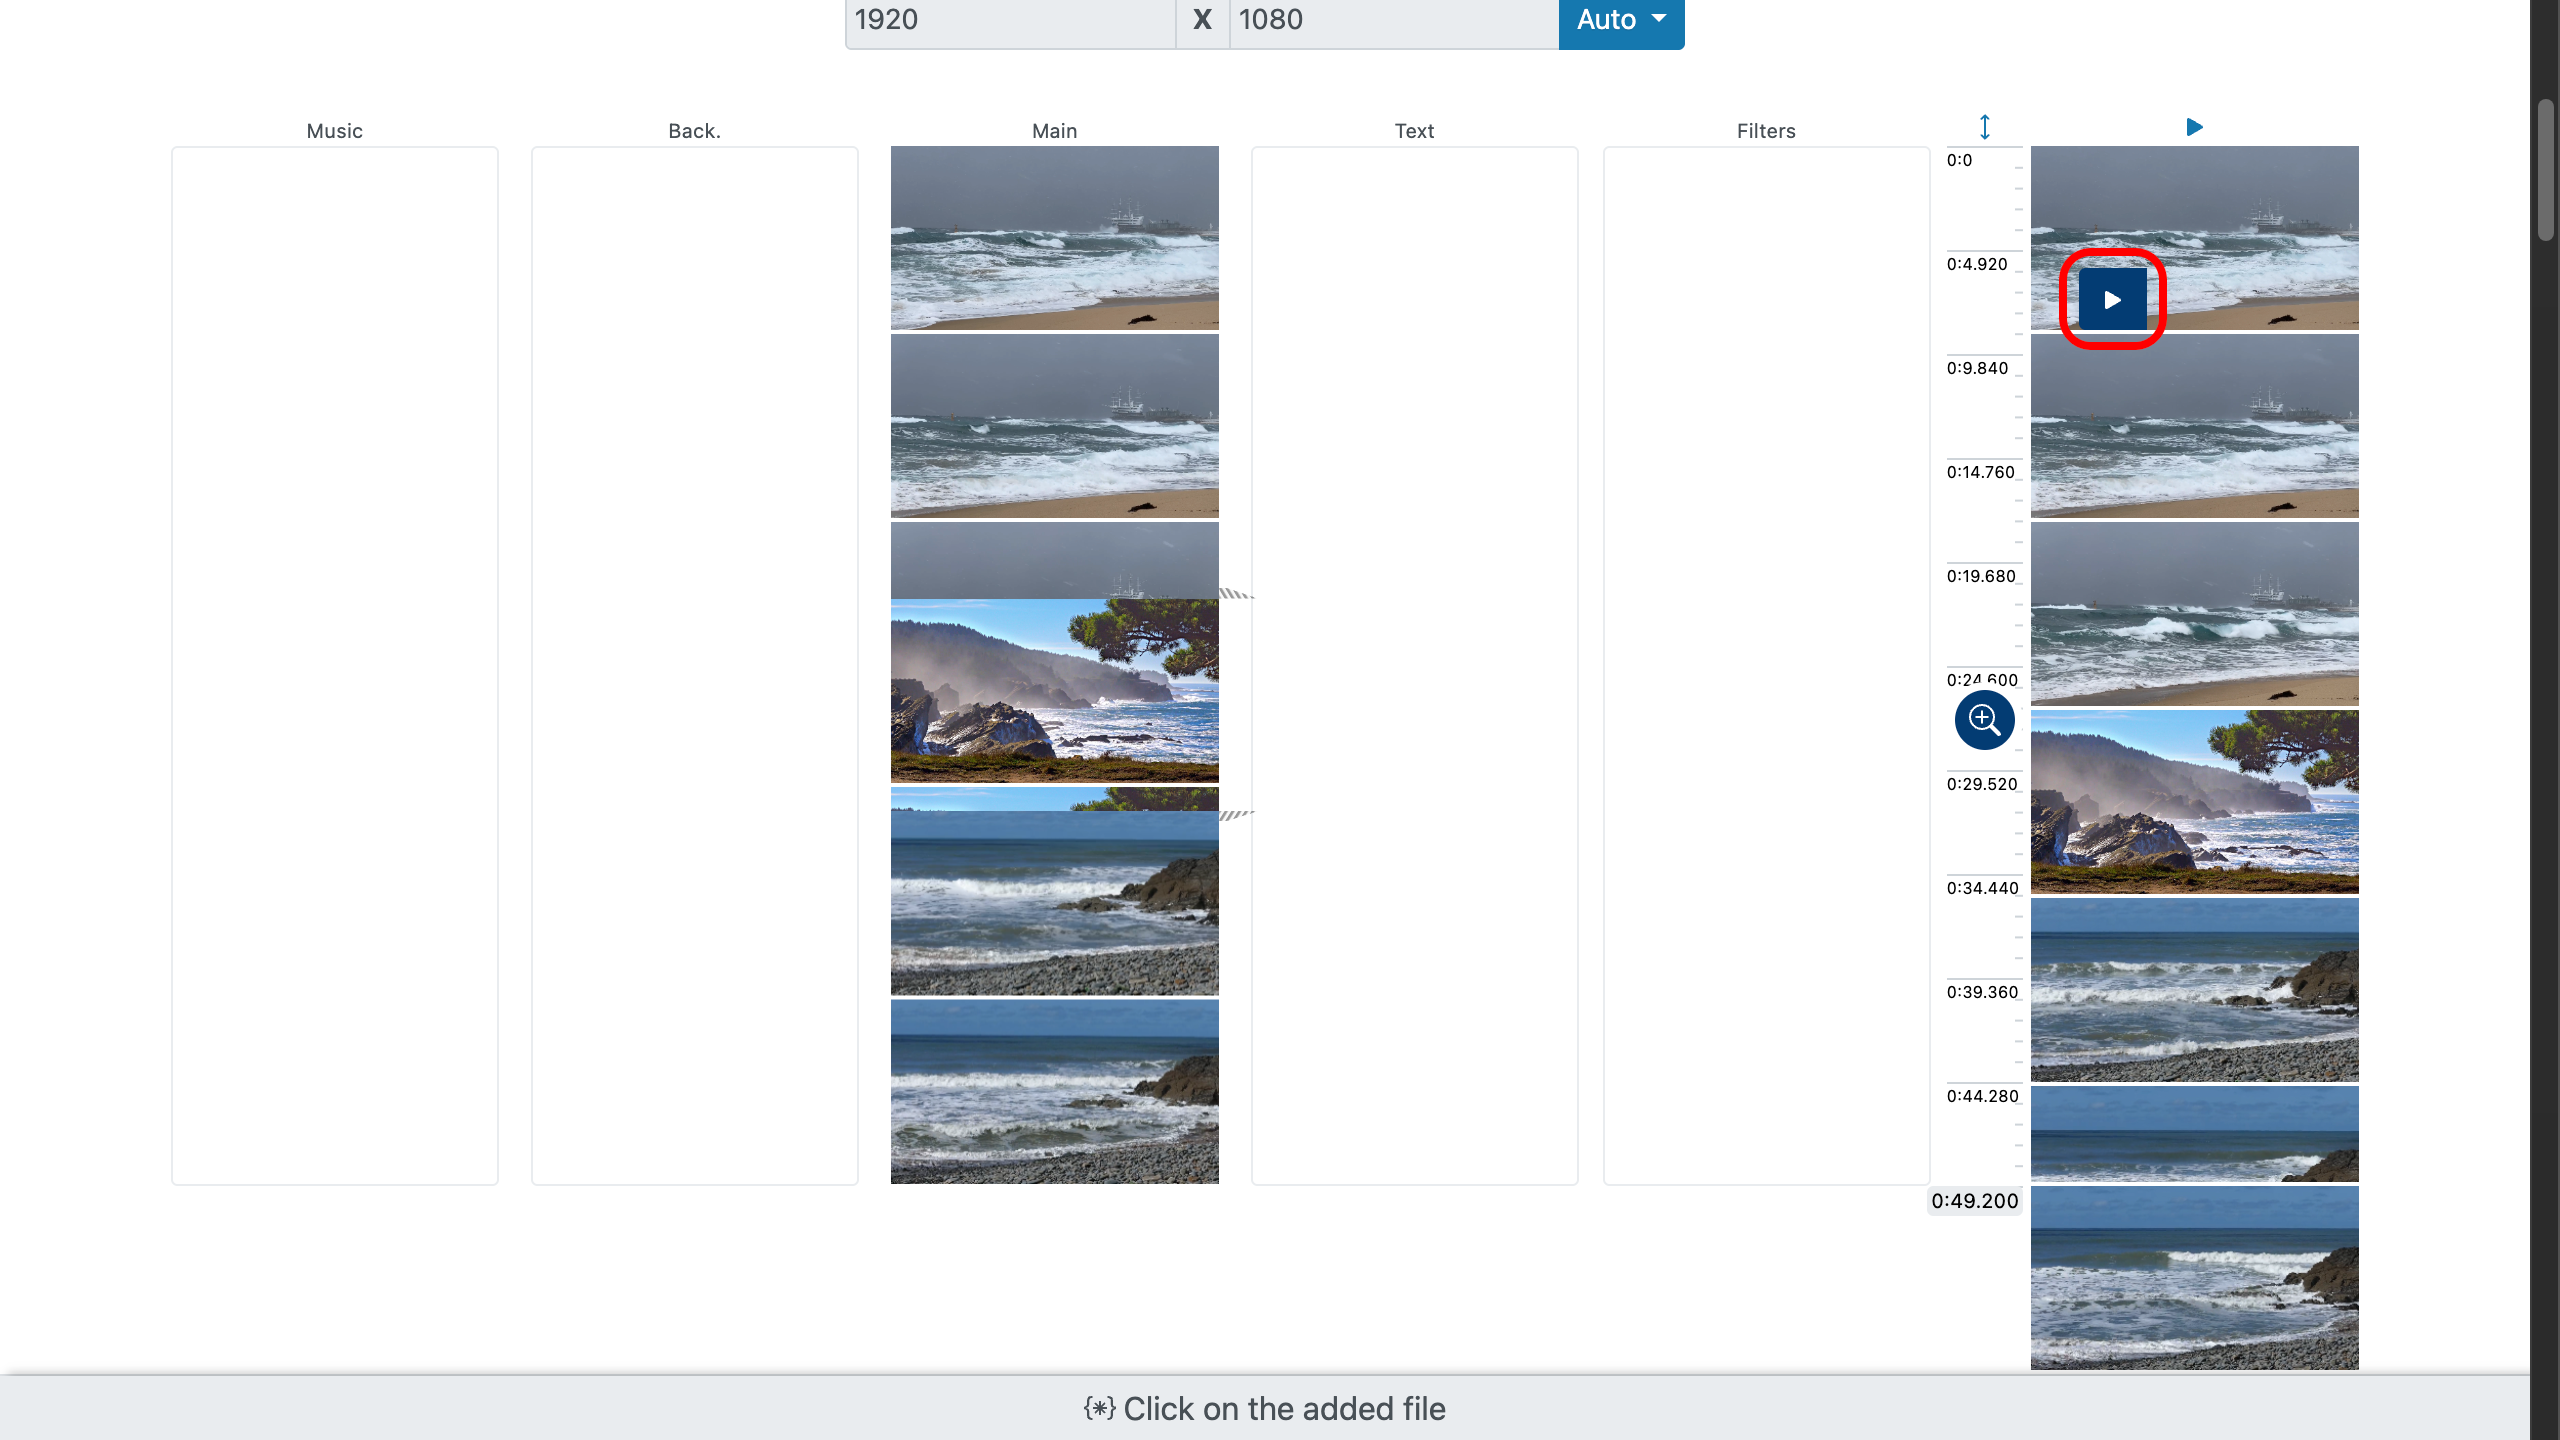
To preview how the scenes are connected, locate the video sequence on the right side of the editor. Double-click on the desired moment — a menu will open at the selected point. Then click the “Play” button , to evaluate the smoothness of the cut, absence of black screens, pauses, and other artifacts.
If something looks off — return to the timeline, change the order of the files, remove unnecessary fragments, or manually adjust the composition using the scale tool.
Step 5: Trim excess footage
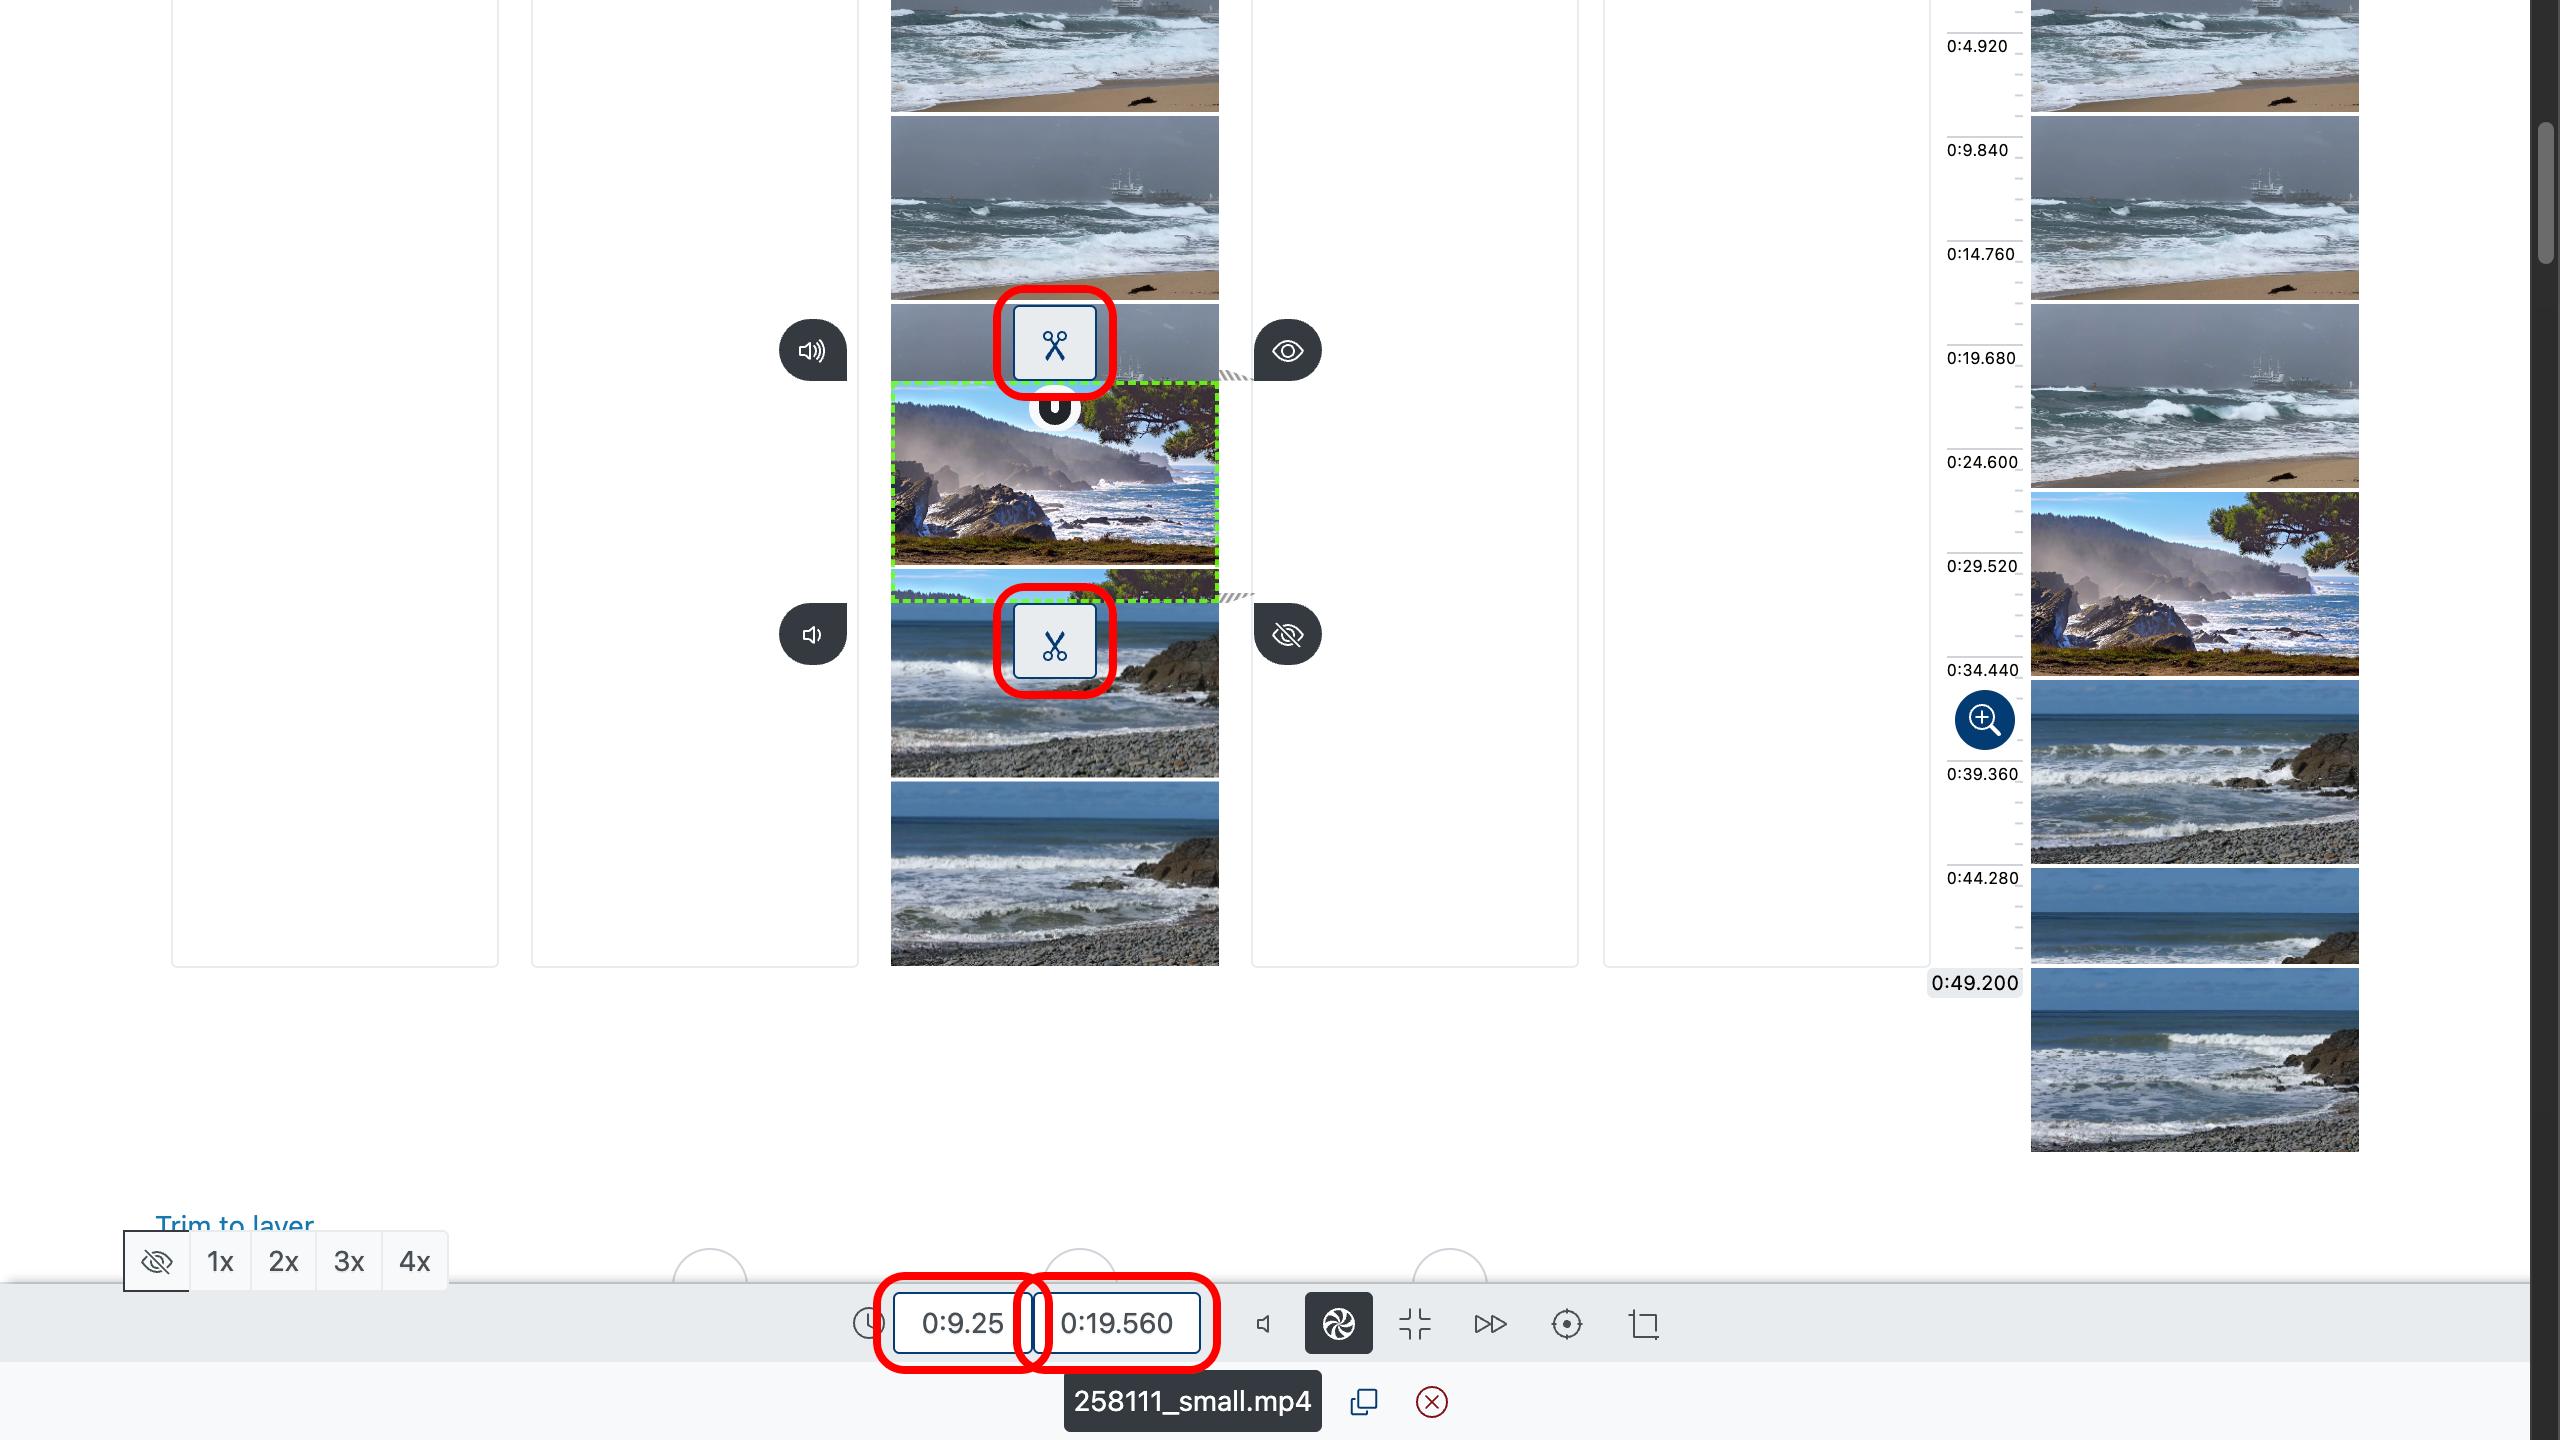
If you want to cut unwanted sections at the beginning or end of your video fragments, use the trim sliders on the file. Simply drag the top or bottom slider to the desired point — trimming will happen instantly.
You can also enter the exact start and end time manually if you know the exact seconds. This is especially useful when timing needs to be precise to the frame.
To find the desired fragment, double-click the video file — in the pop-up menu click the “Play” button , to start playback, then click on the file to start video from the chosen moment. This will help you quickly locate the trim point and apply it immediately.
Step 6: Save the final video
When everything is ready, choose the desired quality — for example, Full HD or 4K, if the source files allow — and click “Create Video”. After processing is complete, the video will be available for download.
Helpful tips
- Choose clips shot in the same lighting — this helps maintain video consistency.
- Check the format and resolution of all files to avoid sharp changes in quality.
- Remove unnecessary parts before joining to make the final video look seamless and dynamic.
- Remember the length of each fragment — it may help to shorten overly long scenes.
- Use the original audio if the volume levels match — that way no additional processing is needed.
Now you know how to easily join videos without transitions — quickly, clearly, and without quality loss. Work with files directly in your browser, wherever you are.