Quick Start: Change Video and Audio Speed
Sometimes a subtle change in speed can transform a video - whether it’s creating dramatic slow-motion for a family celebration, a high-energy fast-motion time-lapse for a weekend project, or dynamic pacing for product ads.
You can apply these effects not only to visuals but also to music and sounds, adjusting tempo to better fit the mood or sync perfectly with scene transitions.
Our online speed changer works in any browser on iPhone, Mac, PC, or Android, letting you upload videos or audio in any format and fine-tune playback right on the timeline:
- Speed up or slow down videos, music and sounds precisely.
- Create fast forward sequences for tutorials or timelapses.
- Craft smooth slow motion highlights.
- Trim, reverse (play backward), and apply visual effects.
- Export high-quality files ready to share.
1. Use Speed Controls and Recommended Recipes
Upload your video or audio (any format supported) to the timeline, then click the clip you want to adjust.
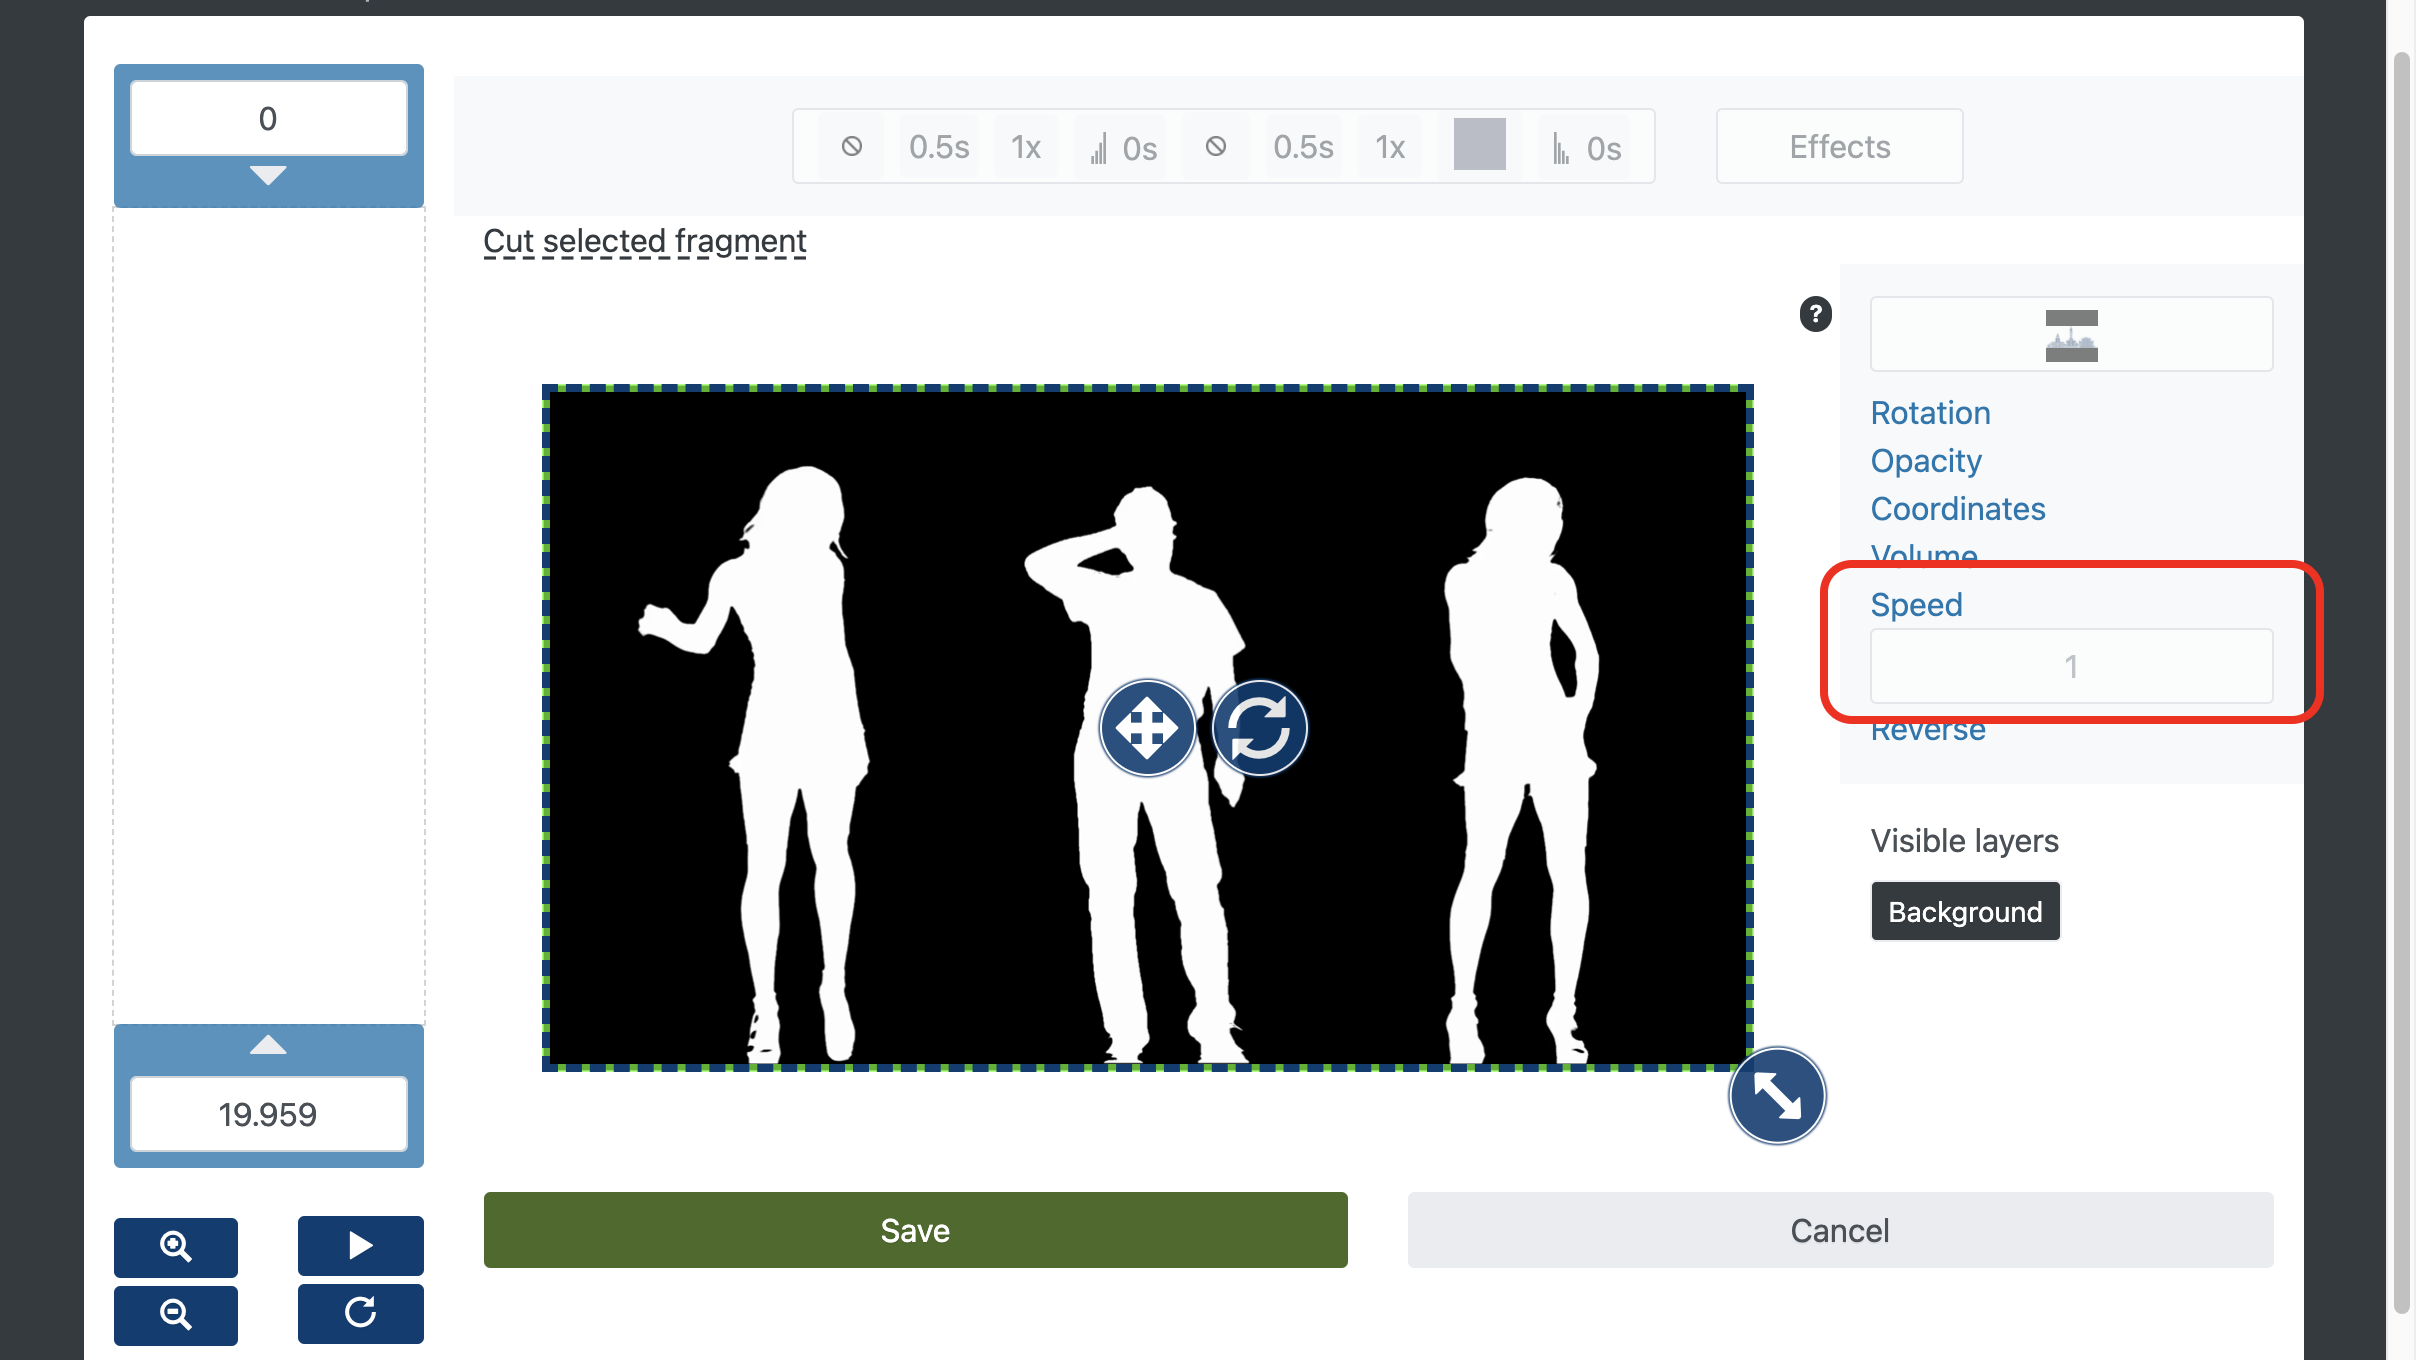
In the bottom toolbar, click “fast forward.” Adjust the Speed slider or type a value:
- 1 = normal speed
- Values under 1 = slow down (slow-motion / slower tempo)
- Values above 1 = speed up (fast-motion / faster tempo)
Recommended Speed Recipes:
- Cinematic slow motion: 0.5×–0.8×
- Lively fast motion: 1.25×–1.5×
- Timelapse: 4×–8×
- Subtle accents: Alternate 0.9×–1.1×
- Music tempo match: Adjust by small increments (±0.05×) for seamless sync
2. Apply to Specific Parts (Optional)
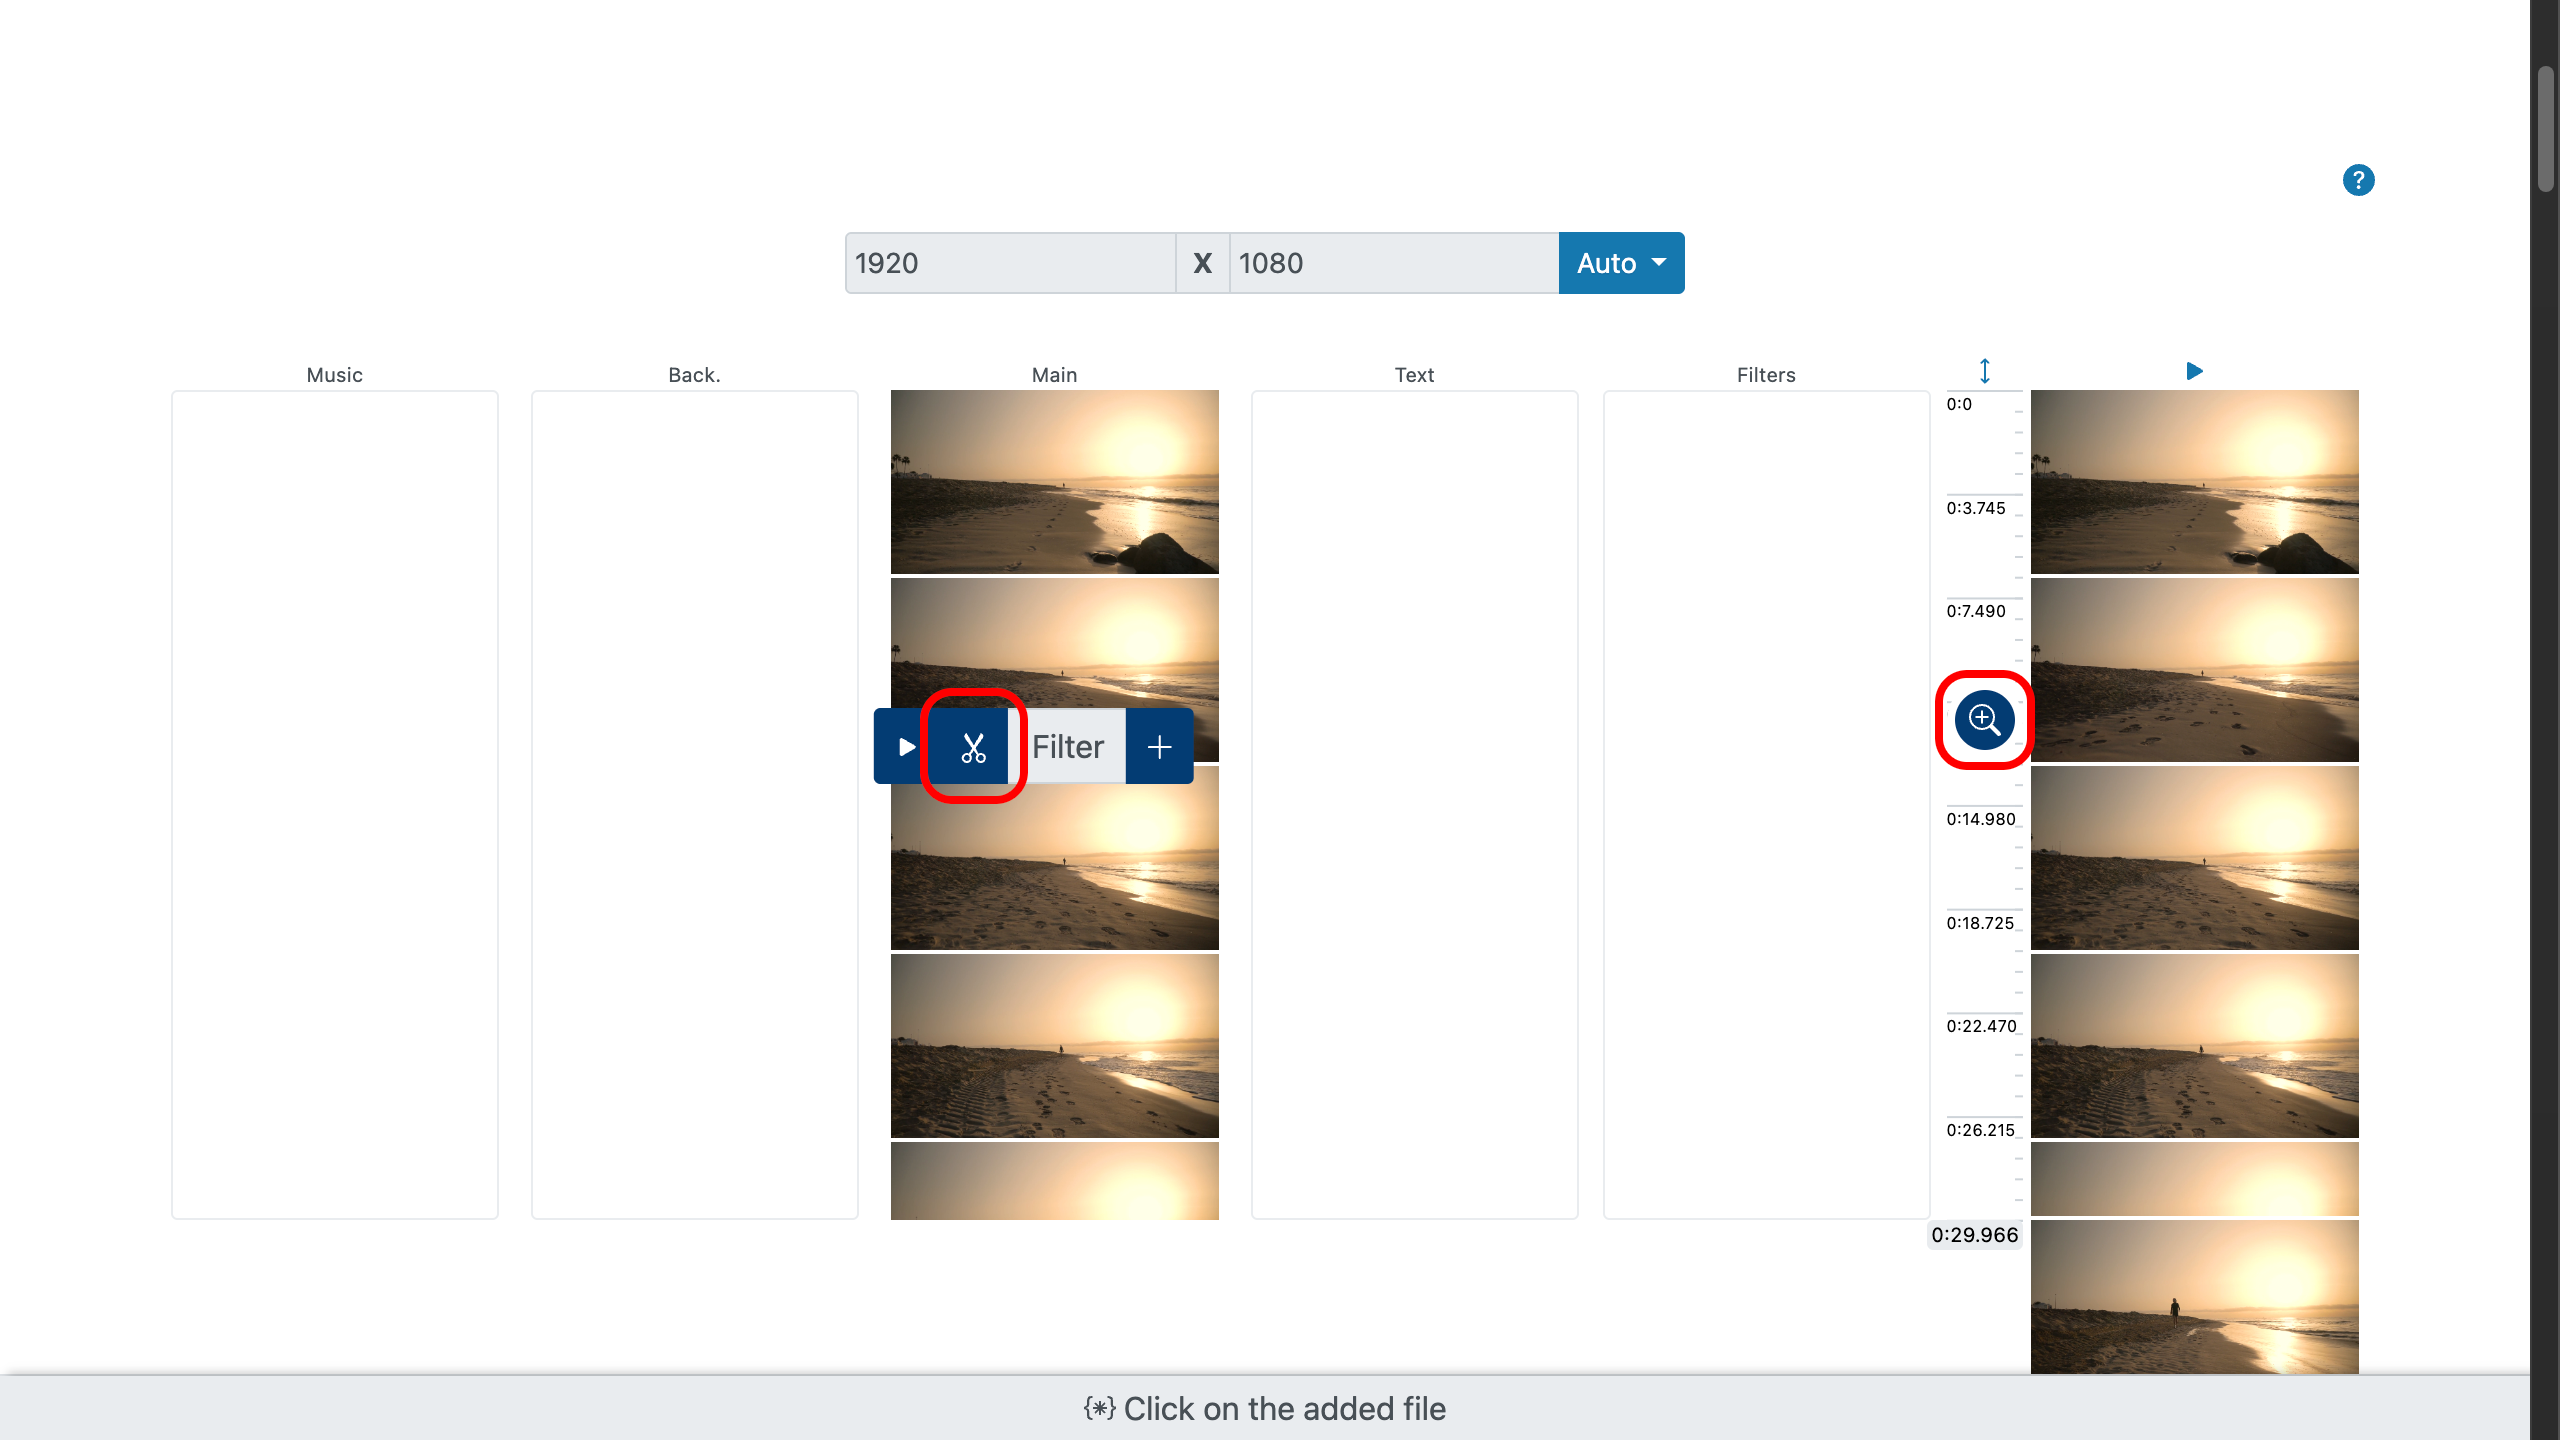
Double-click the file at the spot where you want to cut, then choose the scissors icon. This will split the clip so you can apply different speeds to different sections for varied pacing.
You can also split audio tracks to make some moments slower or faster, creating rhythmic accents or syncing beats with visual cuts.
For more precise control when locating the exact moment to cut, use the timeline zoom button on the right.
3. Preview & Refine
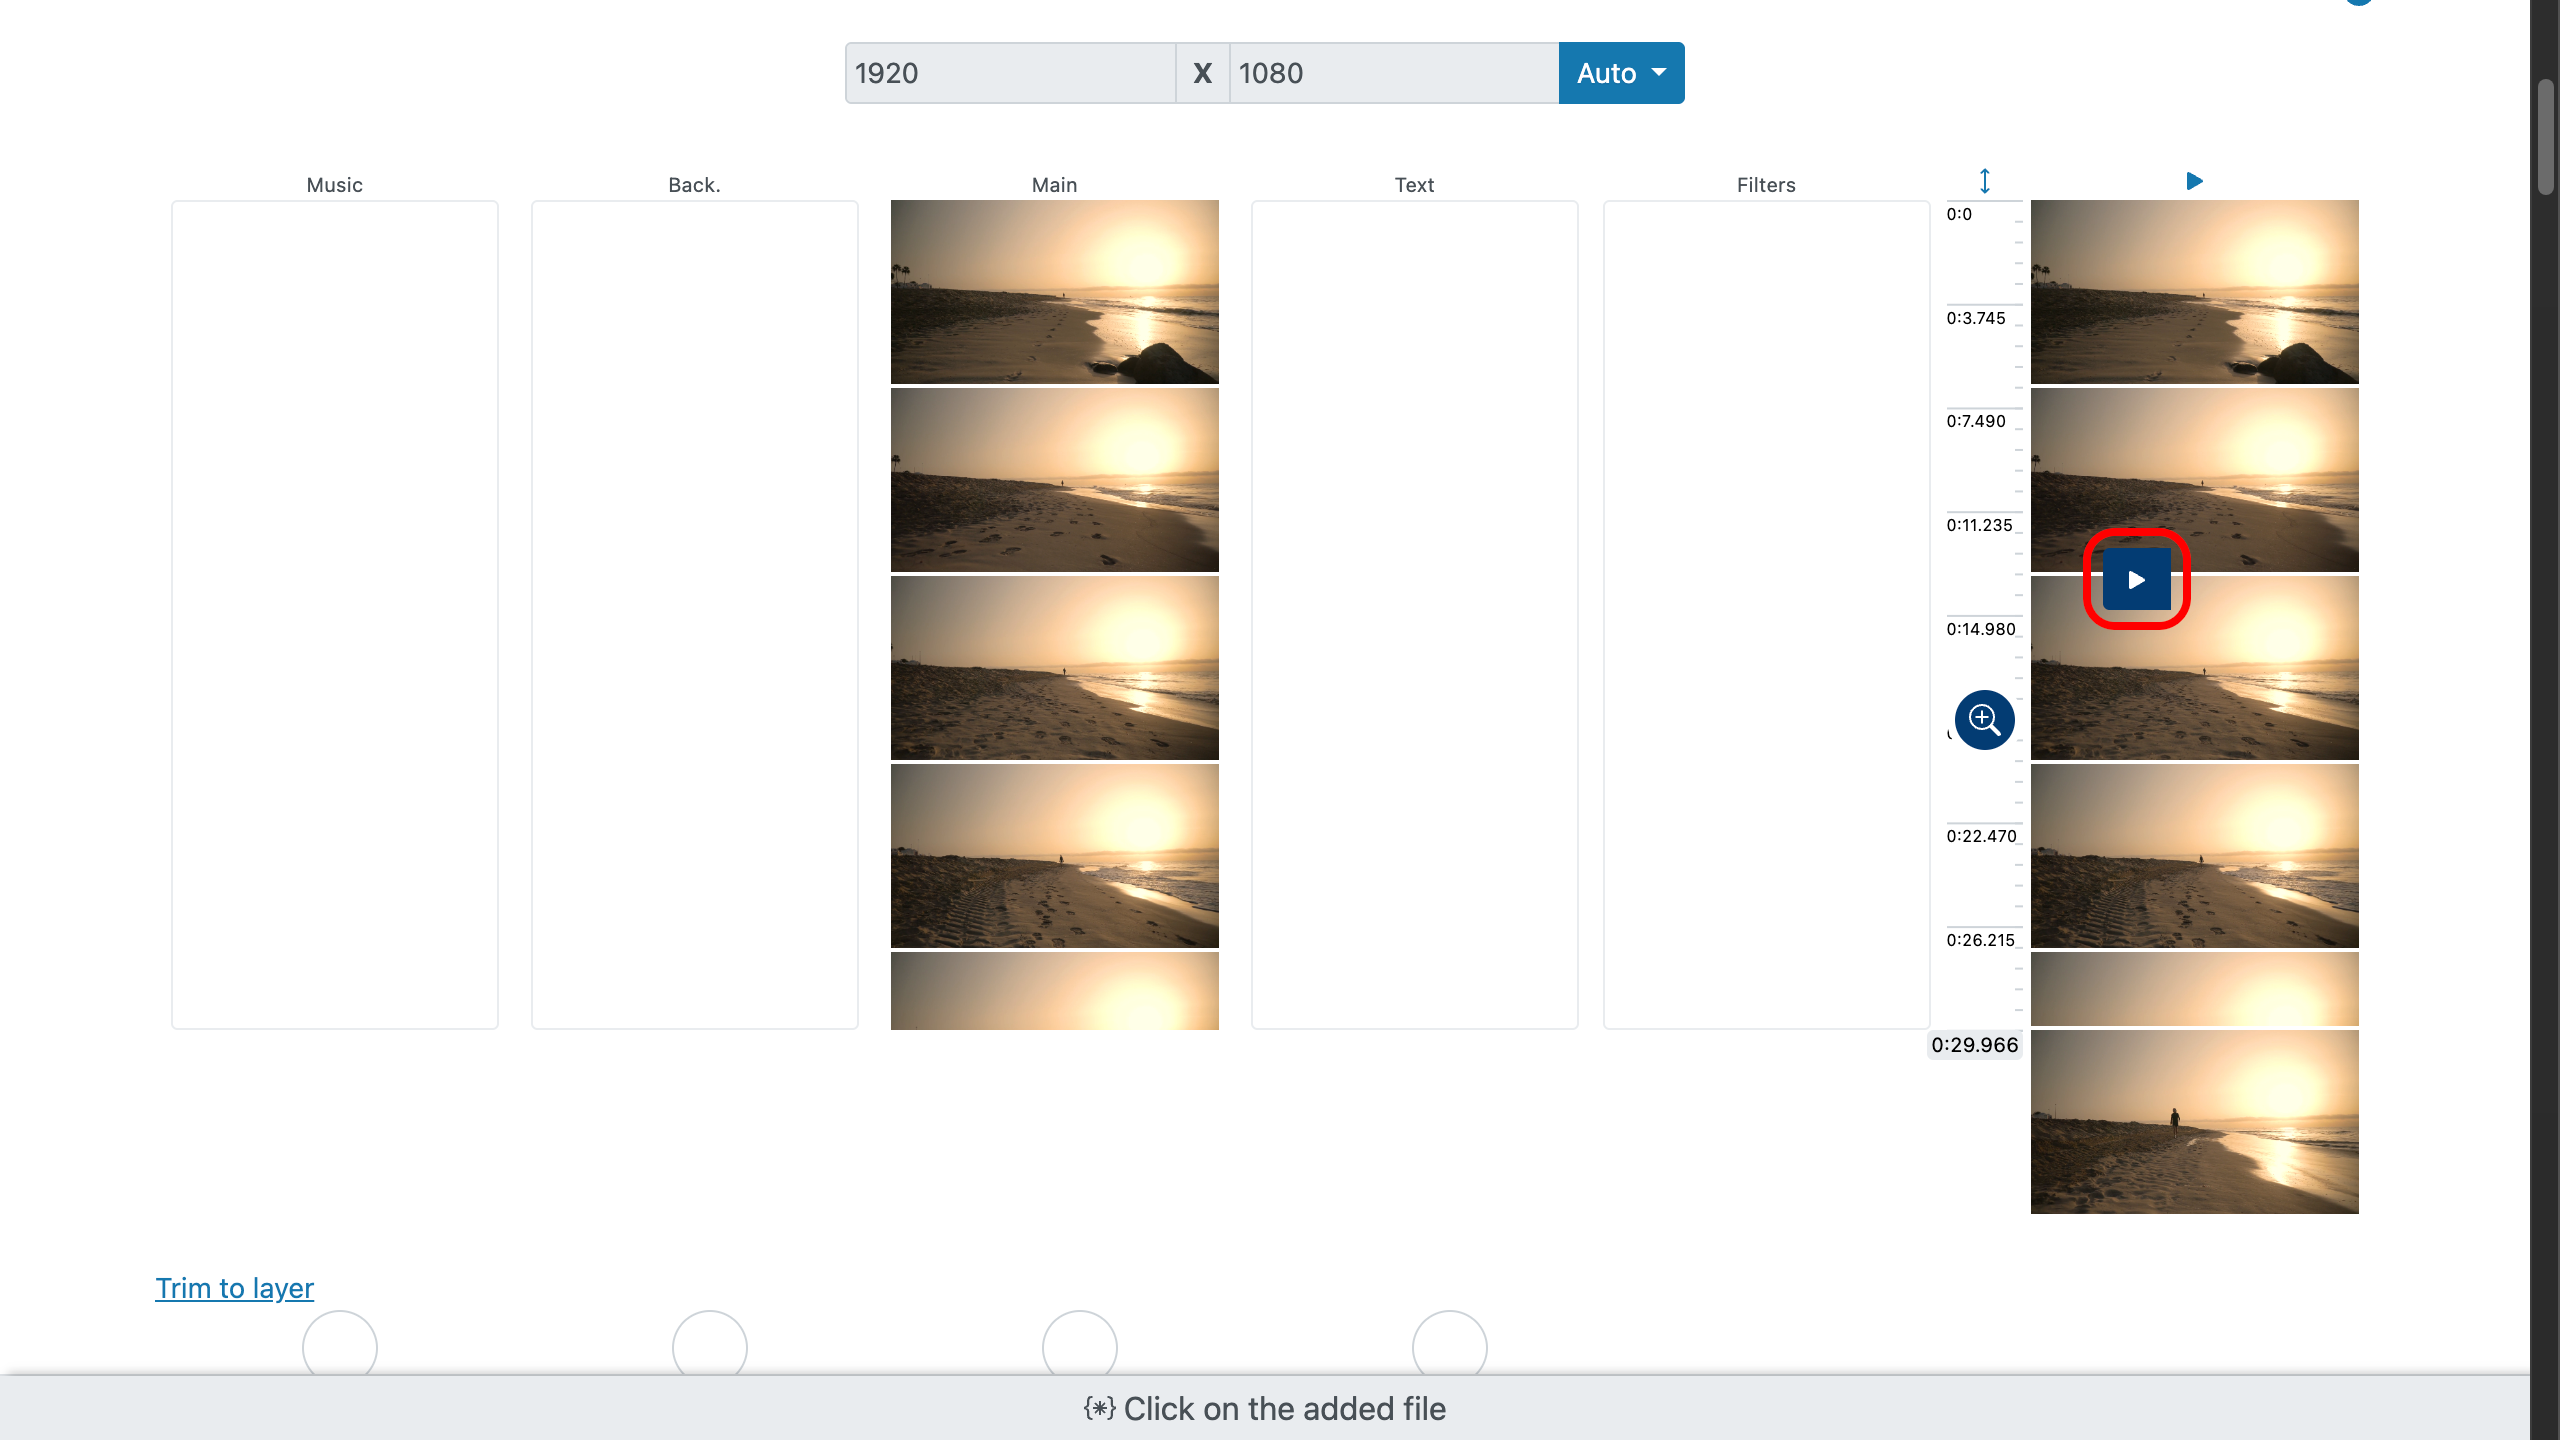
Play your clip to see the changes. For a quick preview, double-click the file at the point you want to check, then in the menu that appears use the play button. You can also use the general preview on the right side by double-clicking there.
Adjust the speed setting until it feels smooth, whether it’s a video scene or an audio track, and make sure it matches your vision.
4. Add Polish and Export
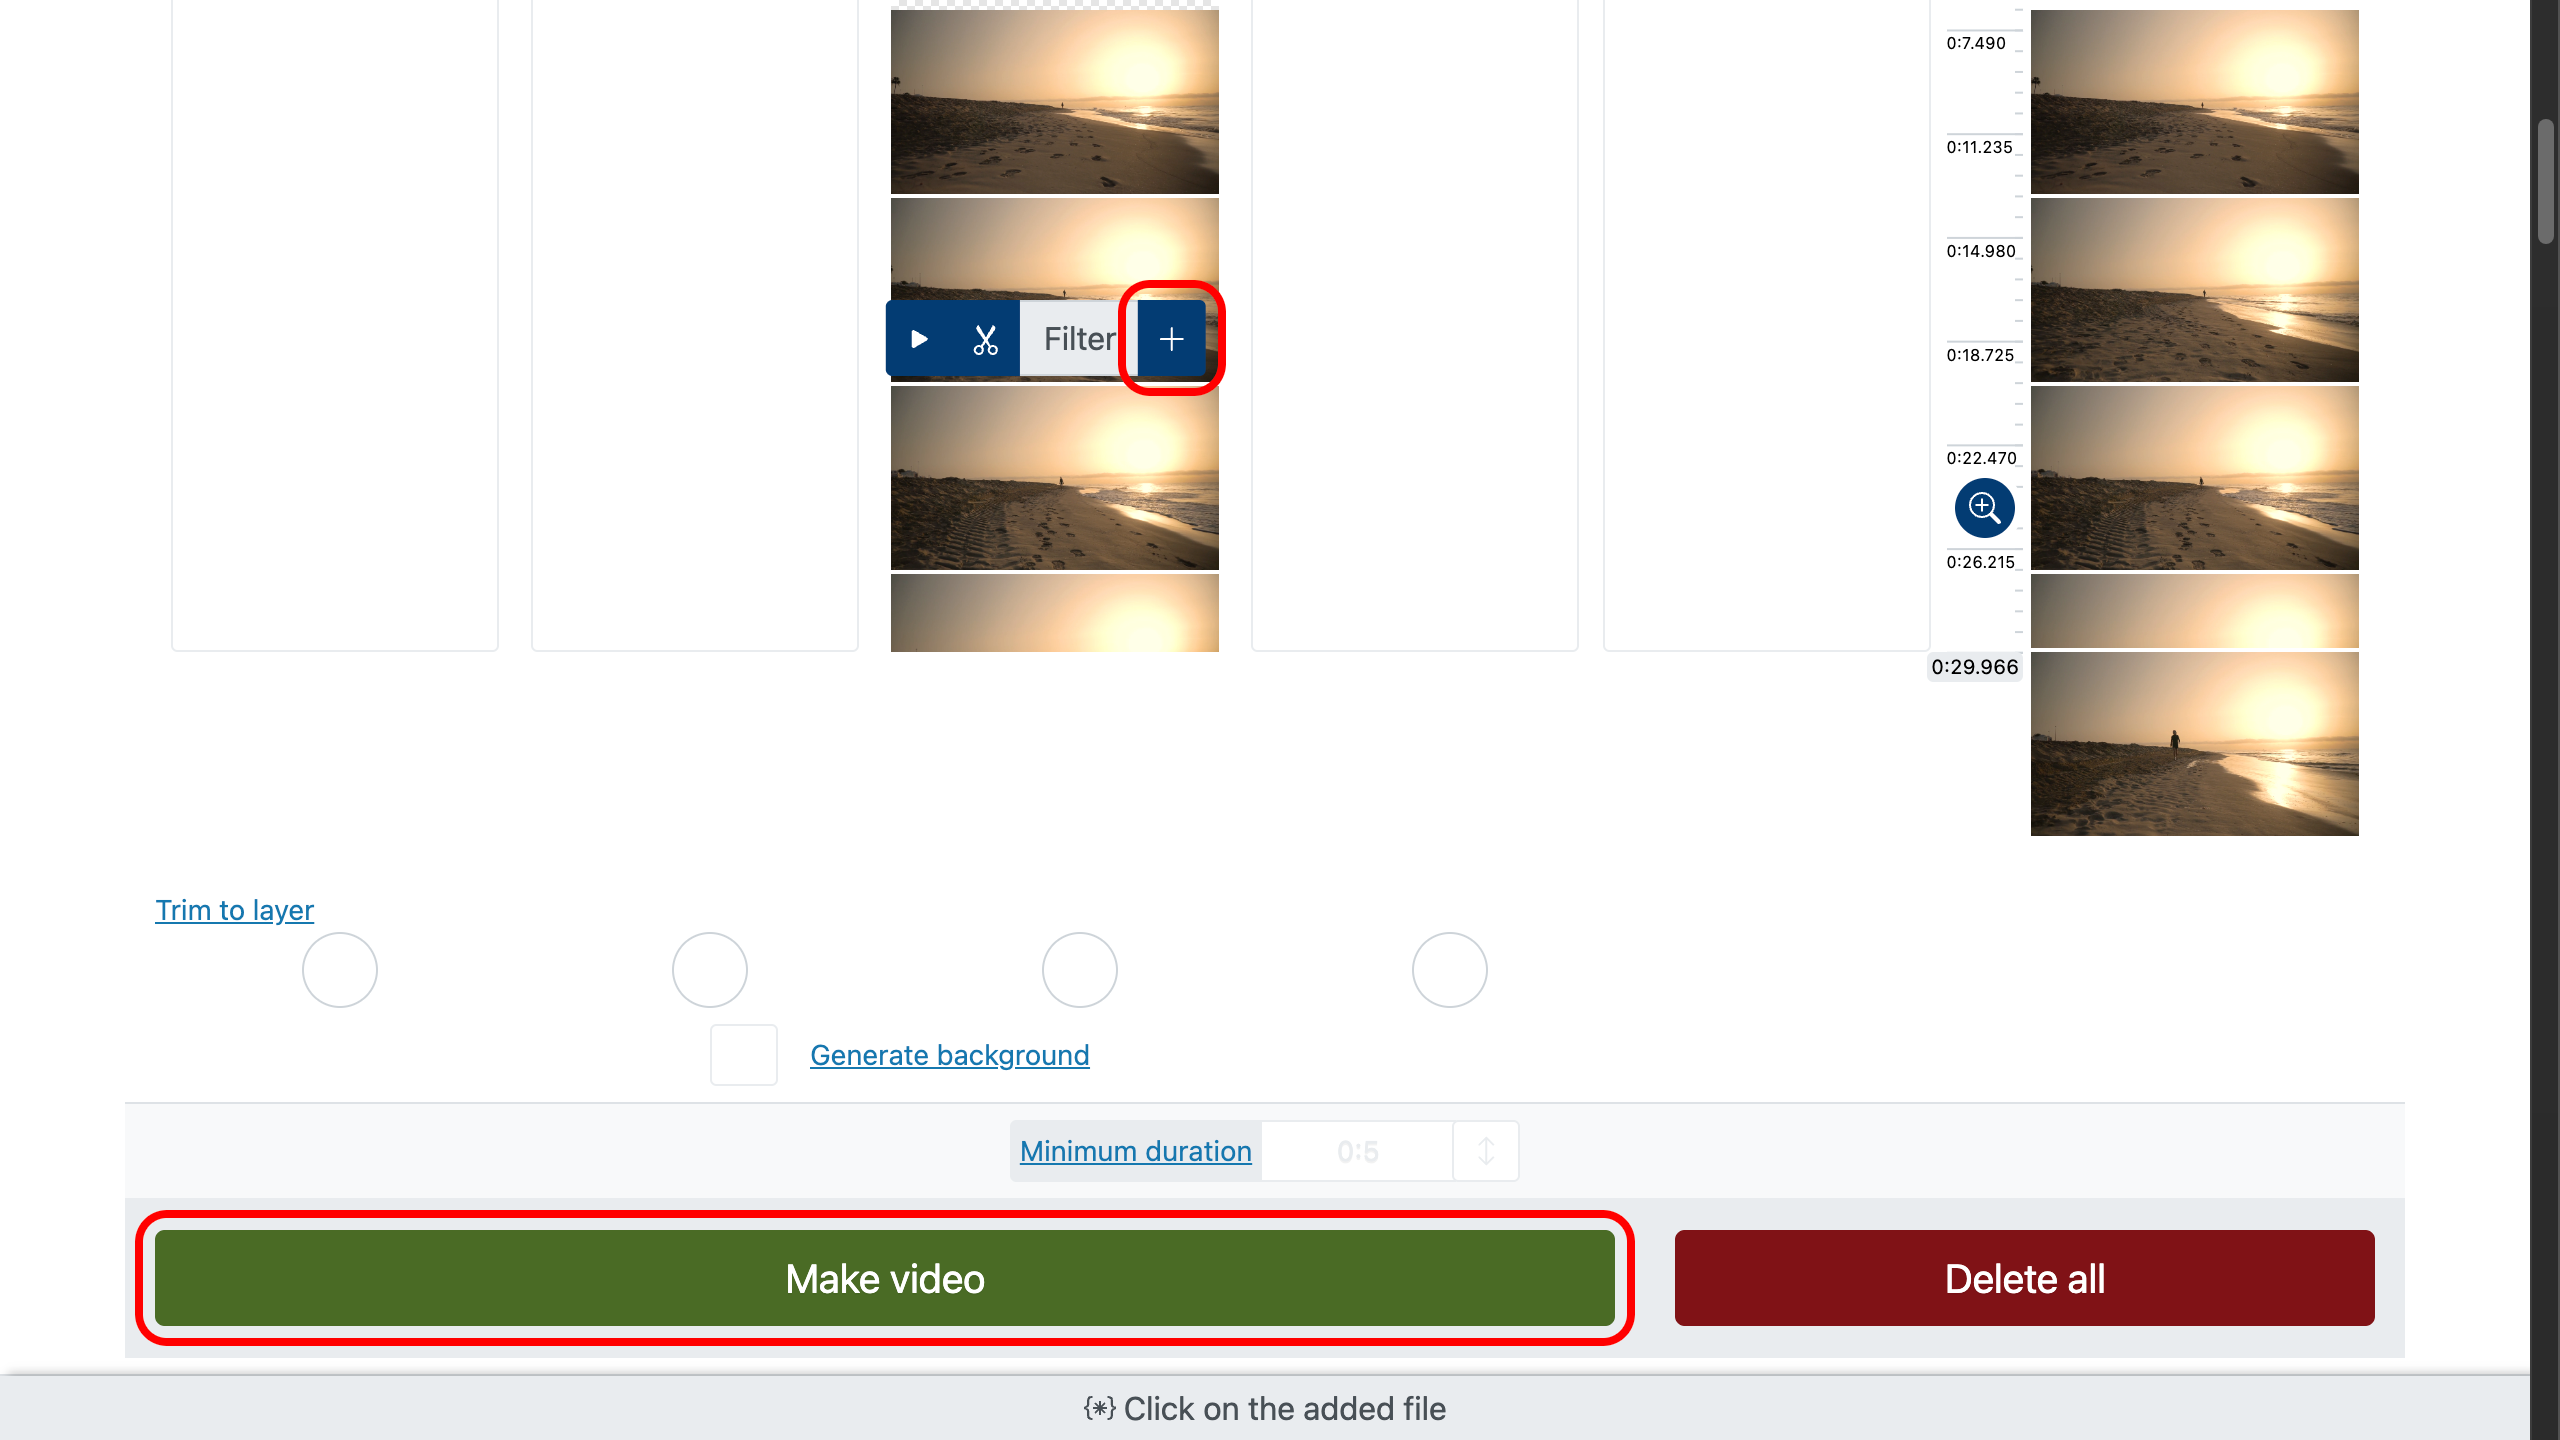
Trim excess footage, reverse short moments for fun effects, and apply filters or overlays for style. When satisfied with the final result, export your project in high quality and share it anywhere.
You can also fine-tune your soundtrack — matching audio speed to video pacing creates a more immersive, cinematic result.
Pro Tips for Smooth Results
- Keep voices natural by staying between 0.9×–1.25× or muting.
- Sync speed changes with music beats or sound effects.
- Stabilize shaky clips before fast motion.
- Use slow motion for key highlights, then return to normal speed.
- For audio, avoid extreme changes that distort pitch — use moderate adjustments for clarity.
Make Viewers Watch to the End
- Hook attention in the first 3–5 seconds.
- Remove filler and keep pacing tight.
- Alternate fast motion for routine and slow motion for impact.
- Change audio tempo to match mood shifts.
- Add captions for muted viewing.
- Tease the ending early and deliver it late.
- End with a clean, satisfying final shot.