Add Text to Video Online: Quick, Clear, and a Little Bit Cheeky
Some clips need a narrator, and sometimes that narrator is a sentence in a nice font. Whether you’re polishing a tender family memory or a punchy product spot for marketplaces, well-placed words can do the heavy lifting (they also work weekends).

You can upload any files — audio, video, or photos in any format — and create crisp overlays without downloads, installs, registrations, or watermarks. It runs in any modern browser on iPhone, Mac, PC, and Android (even on that tablet you swore you’d use for reading).
You’ll learn how to:
- add text to video (a clean text overlay on video)
- convert text to video (titles without any footage at all)
- add scrolling text to video (ticker or end credits)
- add aesthetic karaoke lyrics to video (a lightweight lyrics overlay maker)
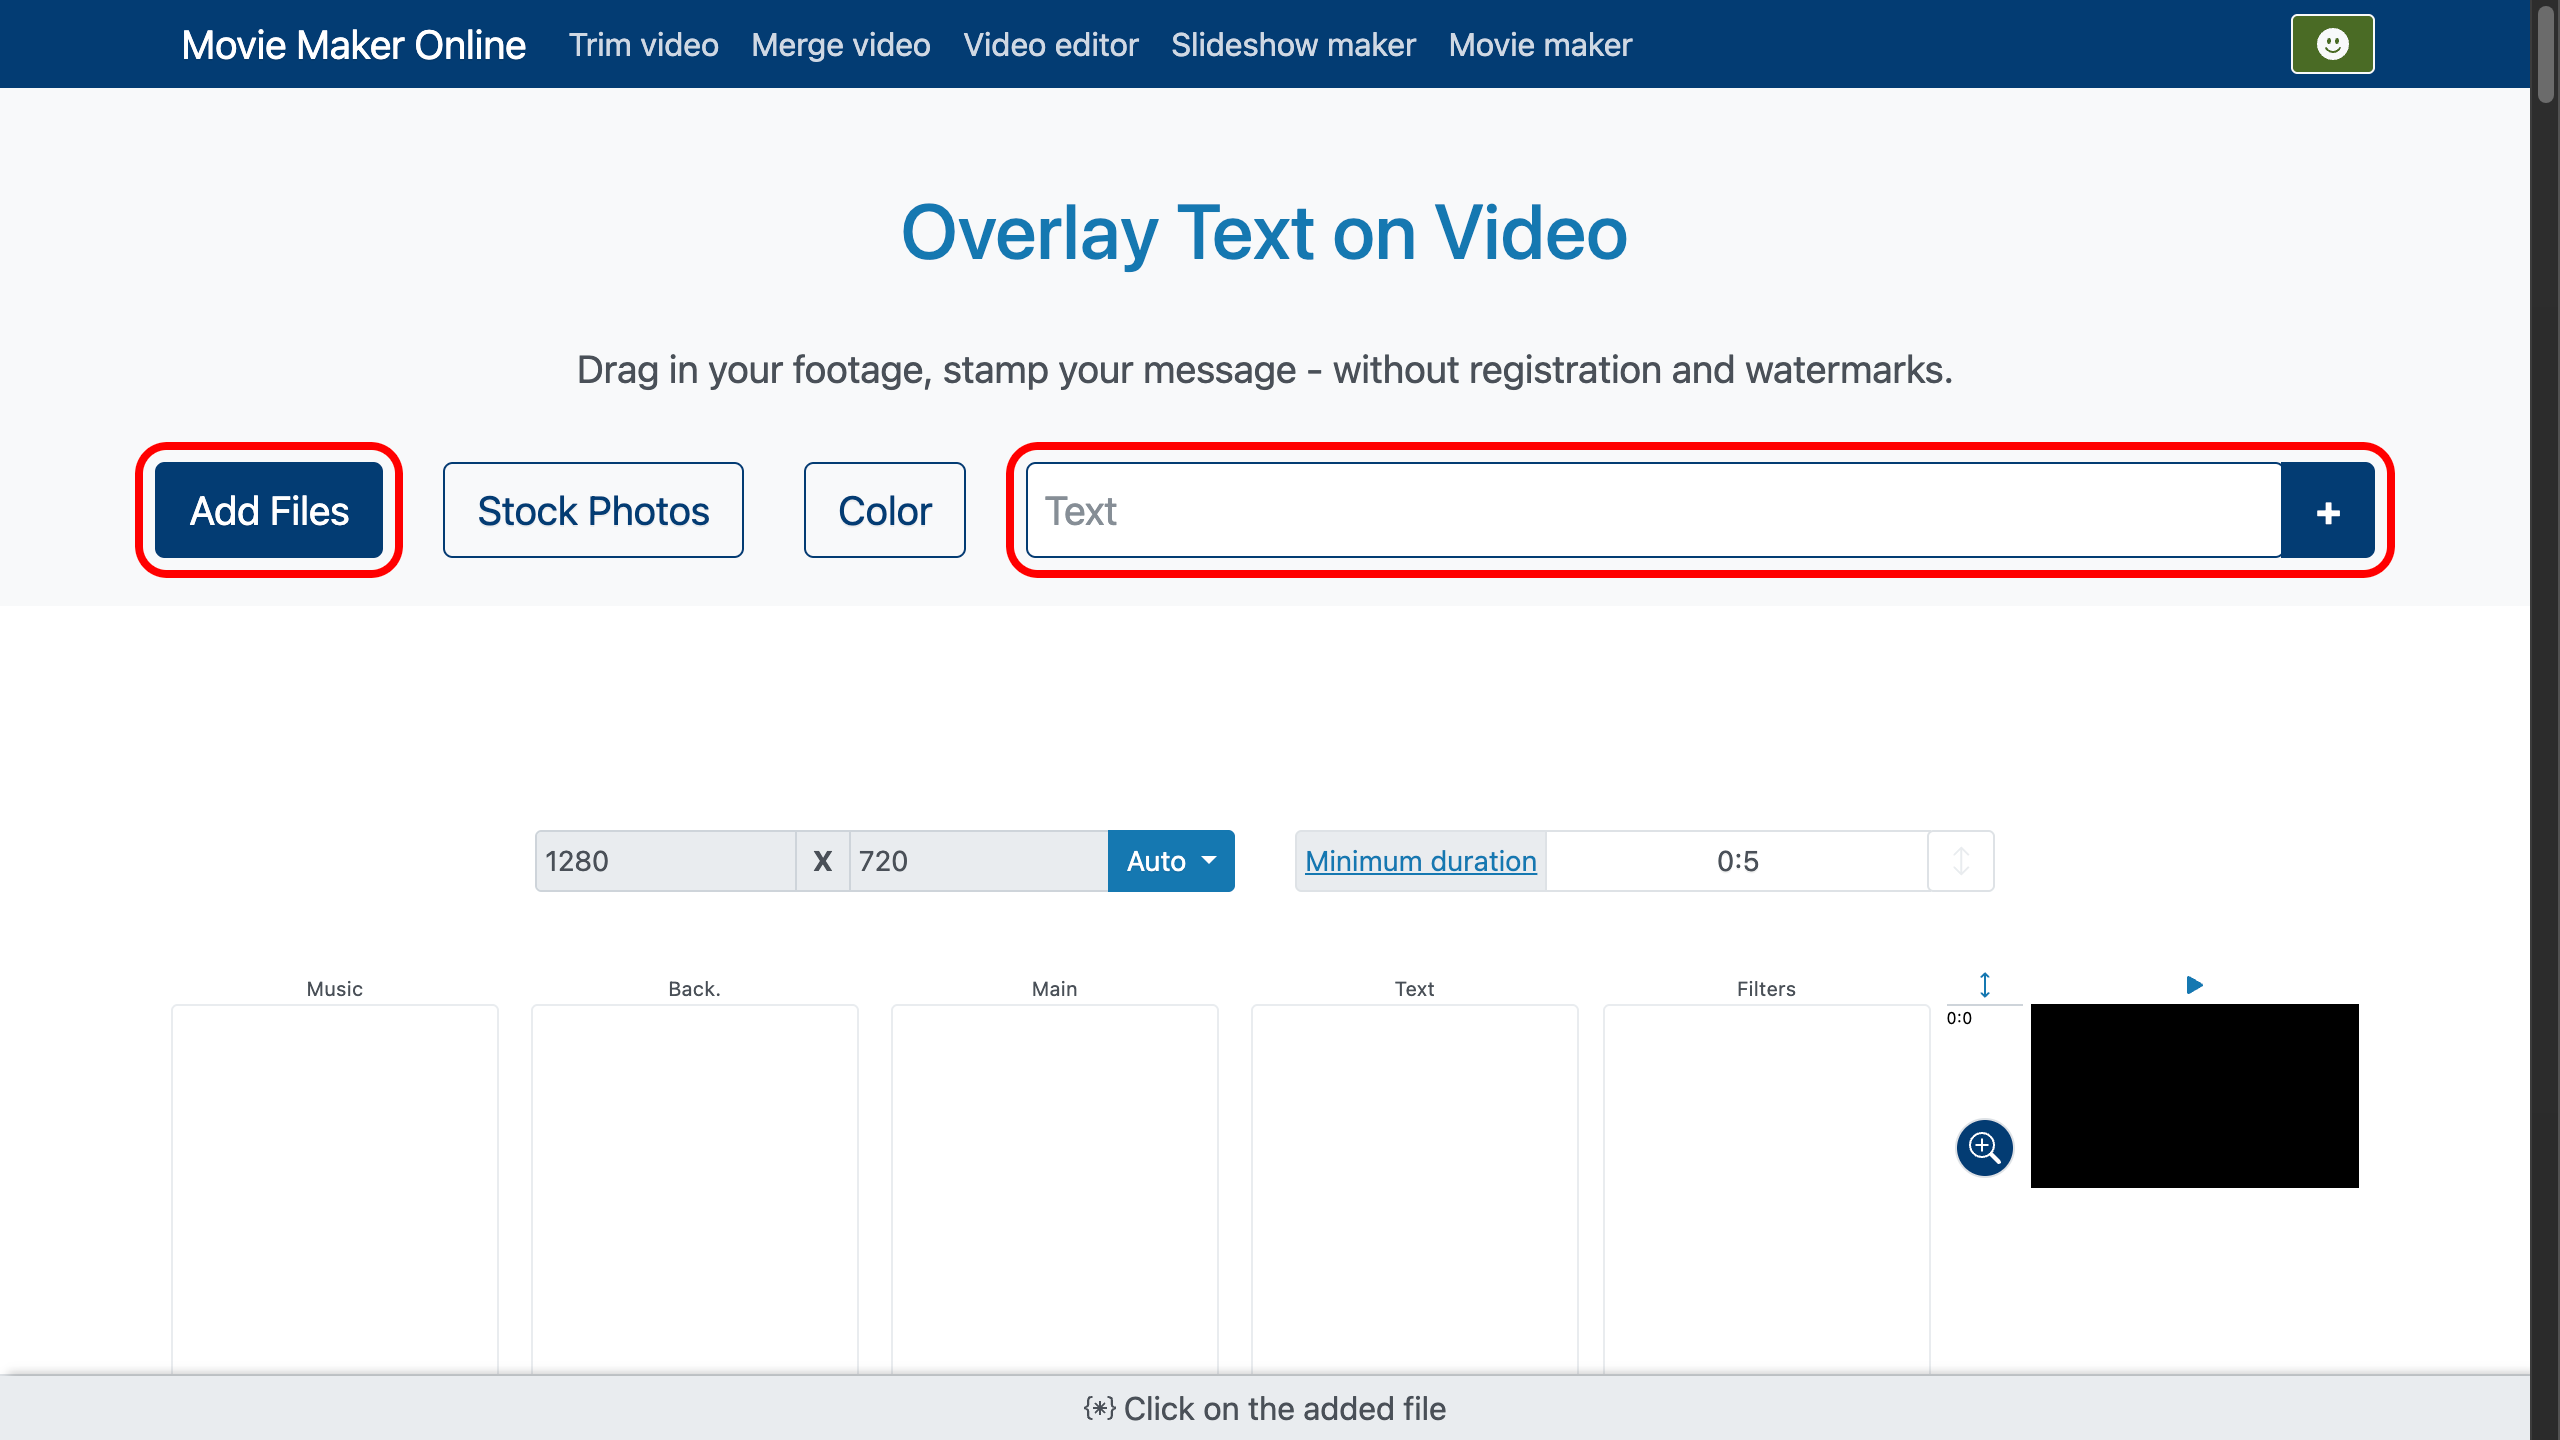
To place your first line, use the text field and then click . That’s the moment your words shake hands with your timeline (firm grip, good manners).
1. When Text Appears (and Disappears)
- Drag your text block to the exact spot where it should start. Precision beats luck.
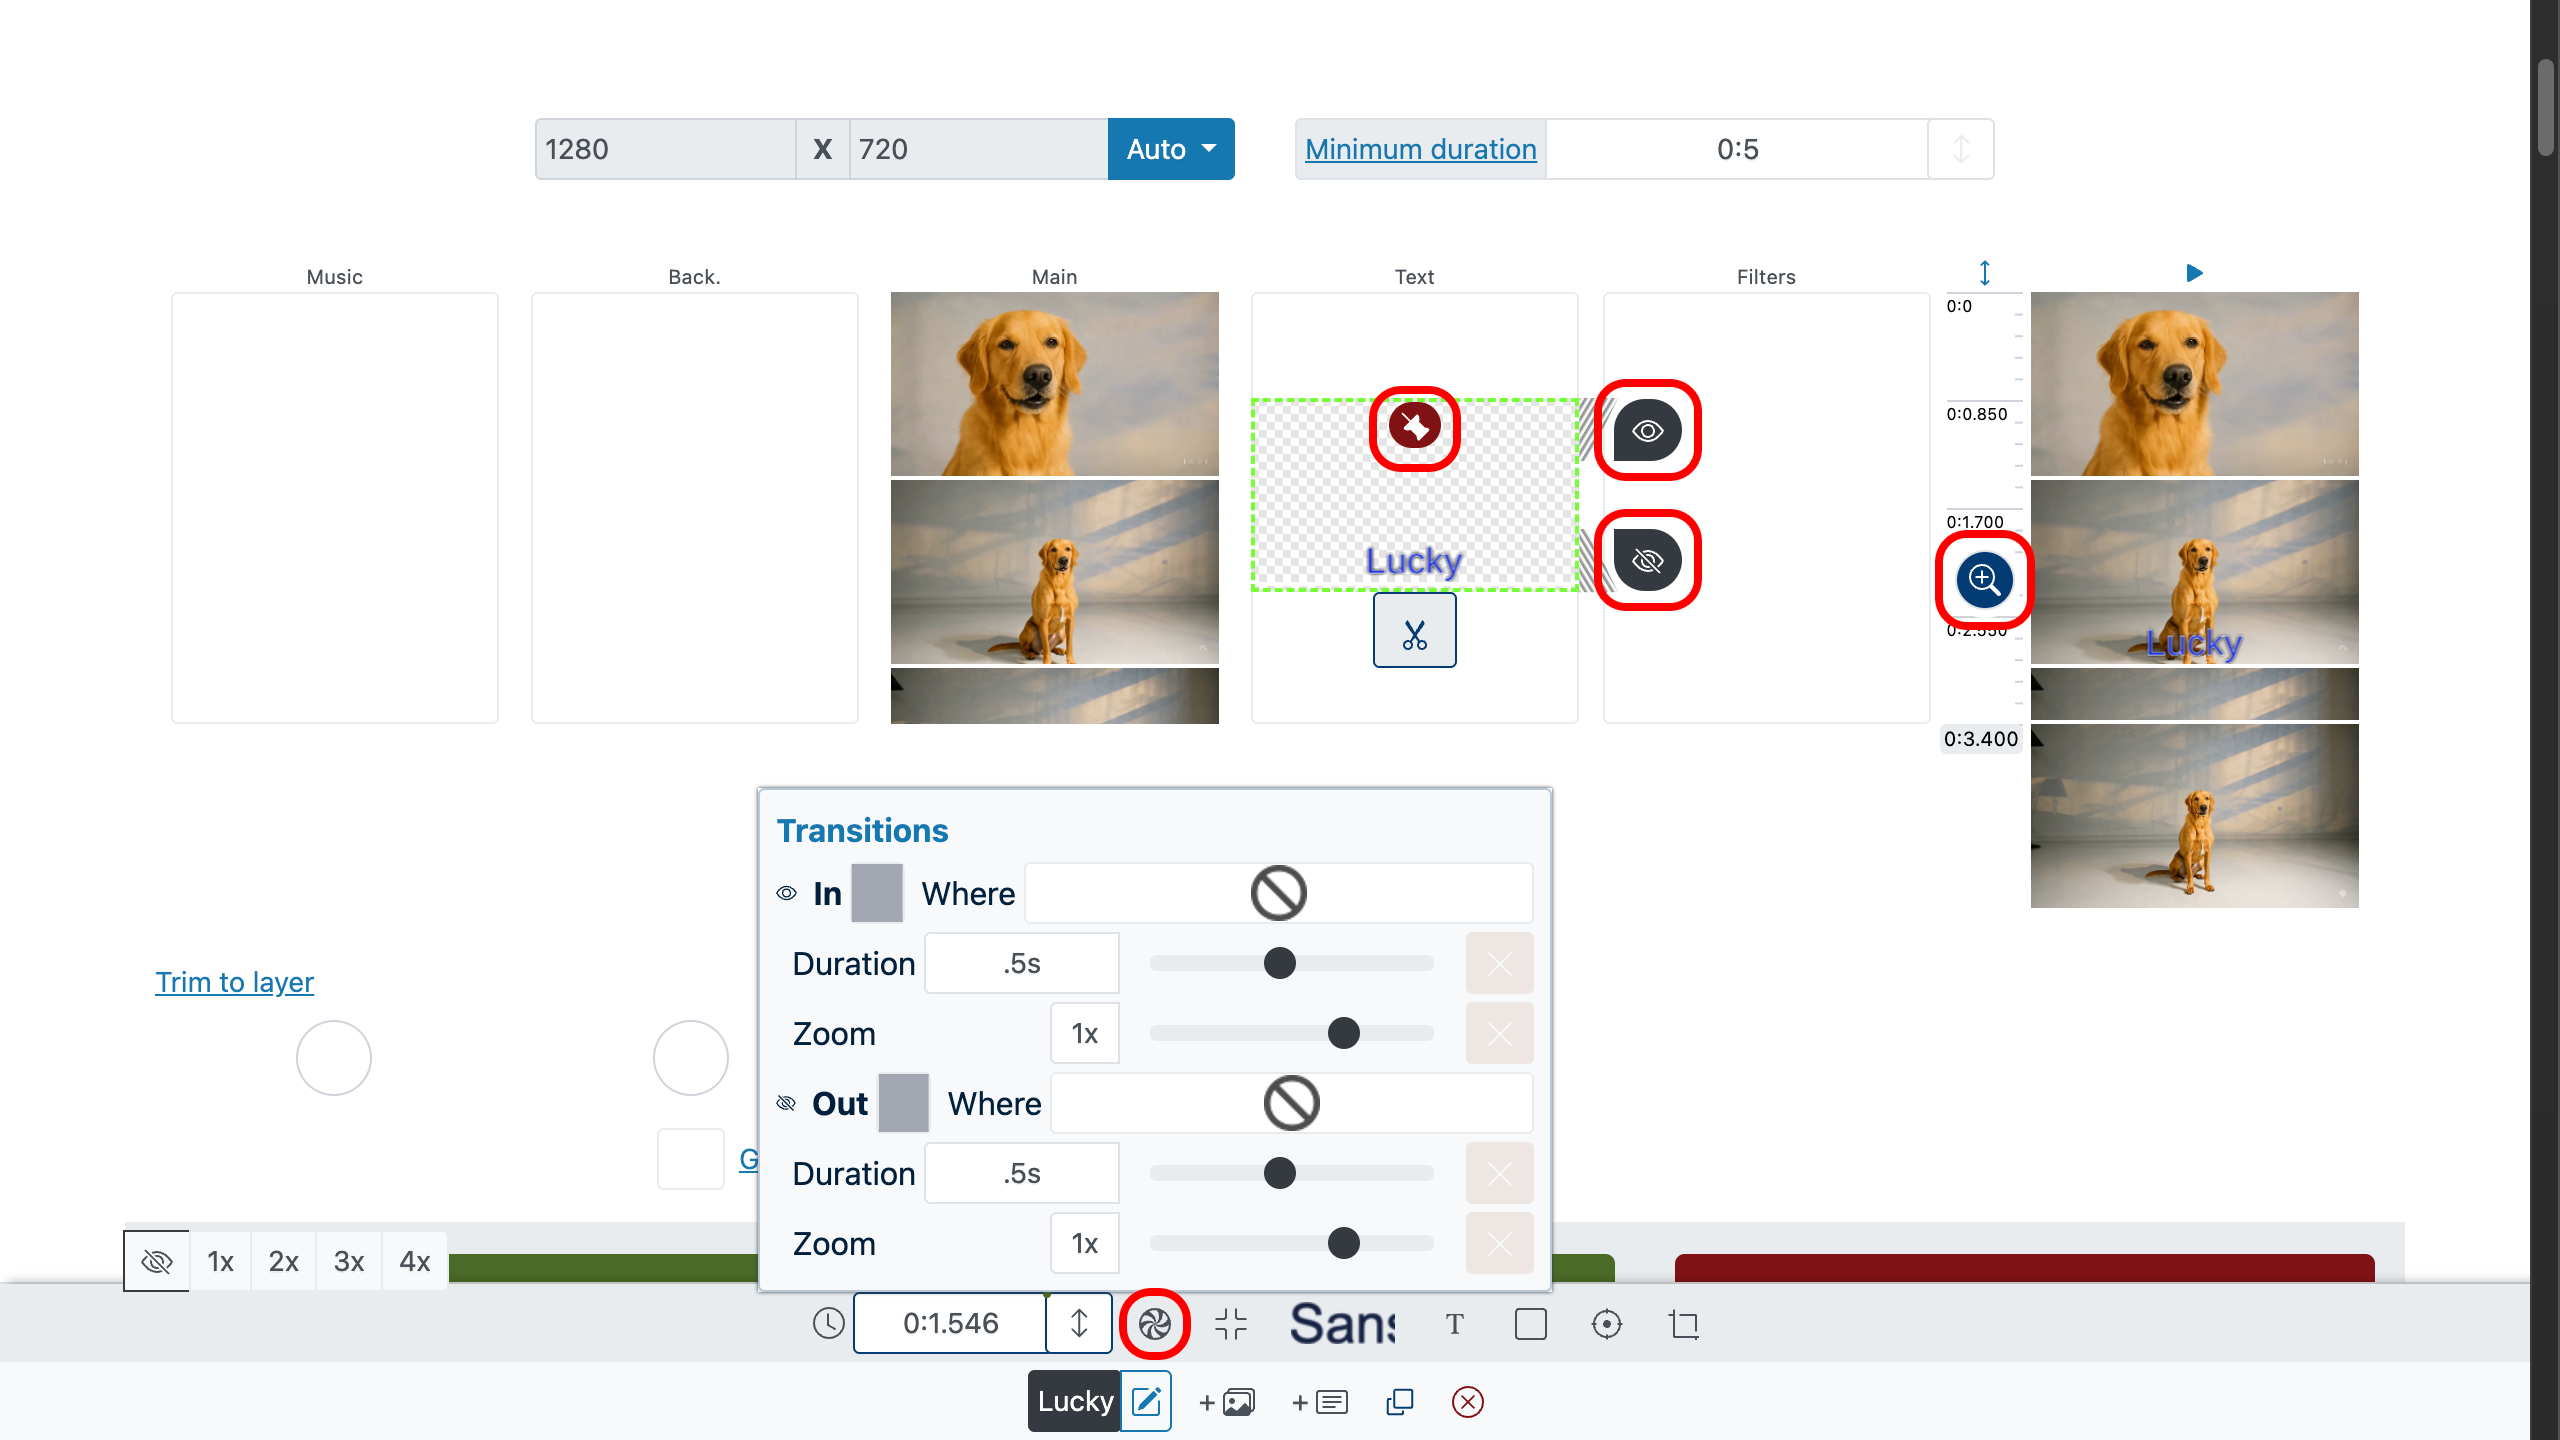
- Lock or unlock its screen position with (so it stays put while the world spins).
- Use to zoom the timeline for frame-accurate placement.
- Control entrance/exit style and duration with or the effect panel on the bottom bar: choose fade-in/out length, scale on appear/disappear, and the specific reveal style. (A grand entrance is optional; a clean one is mandatory.)
2. Set the Text Duration
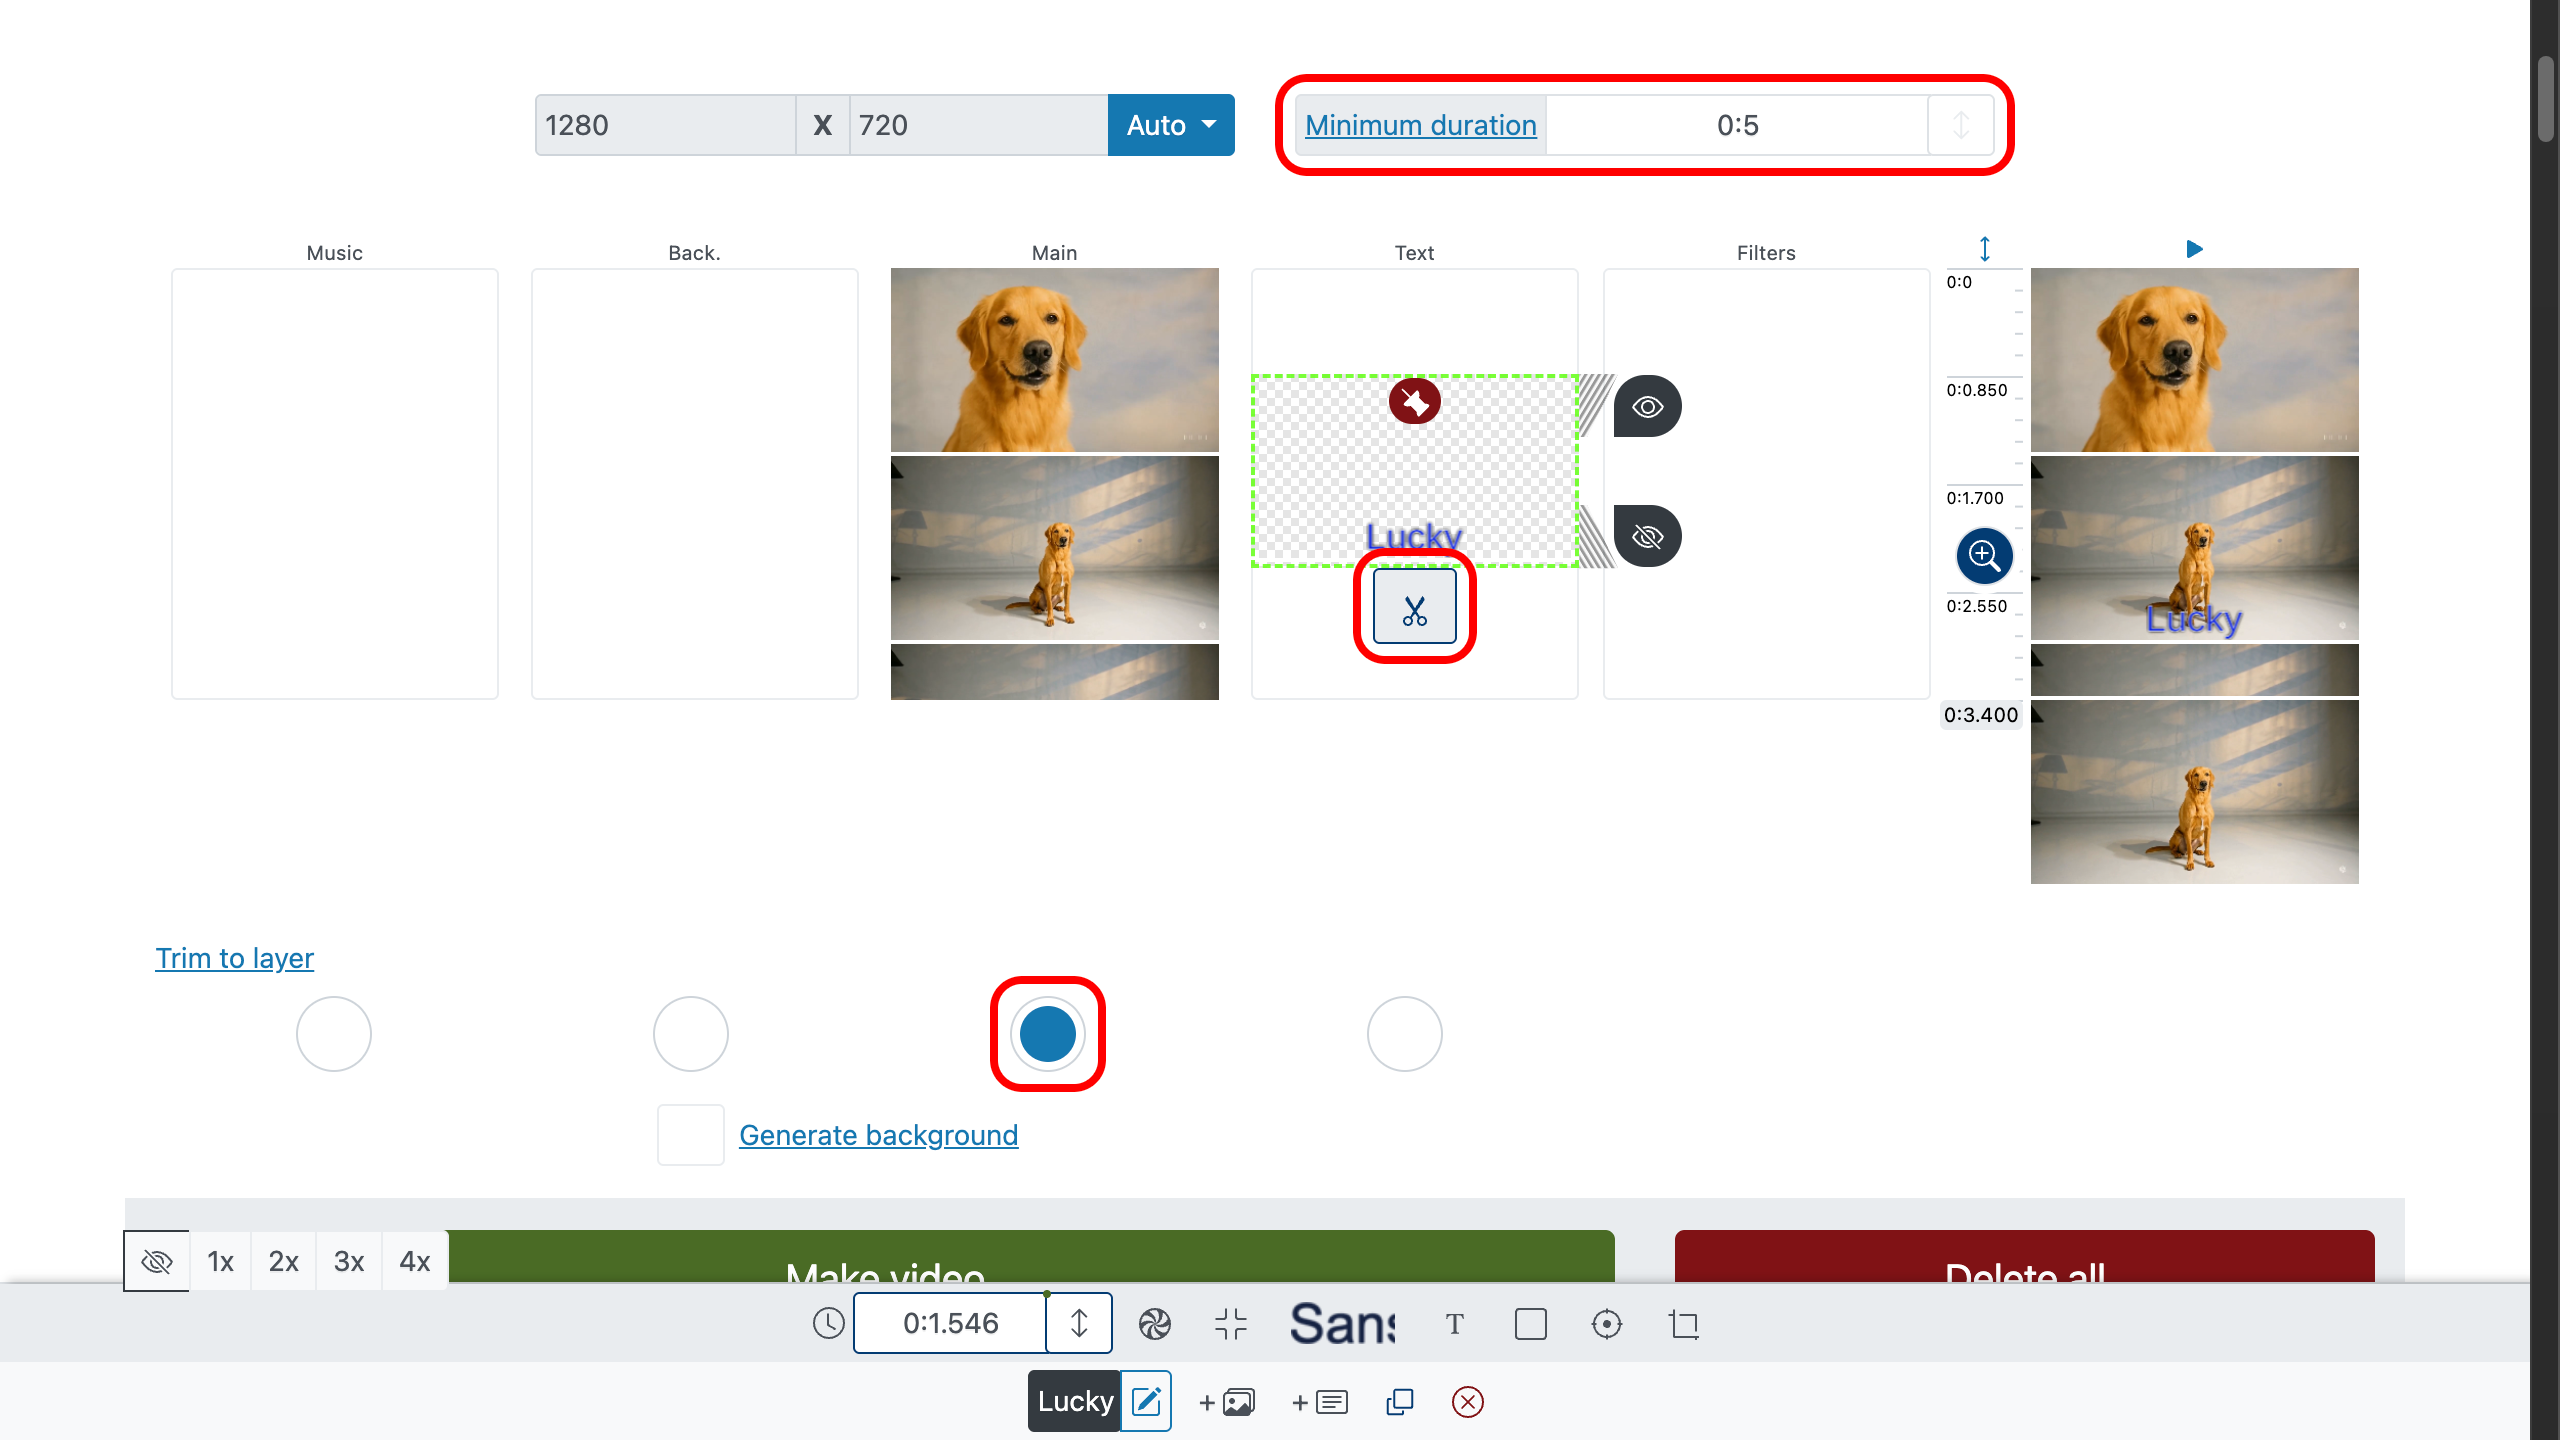
By default, a minimum duration prevents blink-and-you-miss-it moments. For each text item:
- Enter an exact value in the duration field (precision is the cousin of elegance).
- Drag the handle at the bottom edge of the text block to stretch or trim.
- If your text overlays a video layer, enable “crop to layer” under that layer to make the text match its length automatically. The overlay behaves like a polite houseguest—leaves when the host does.
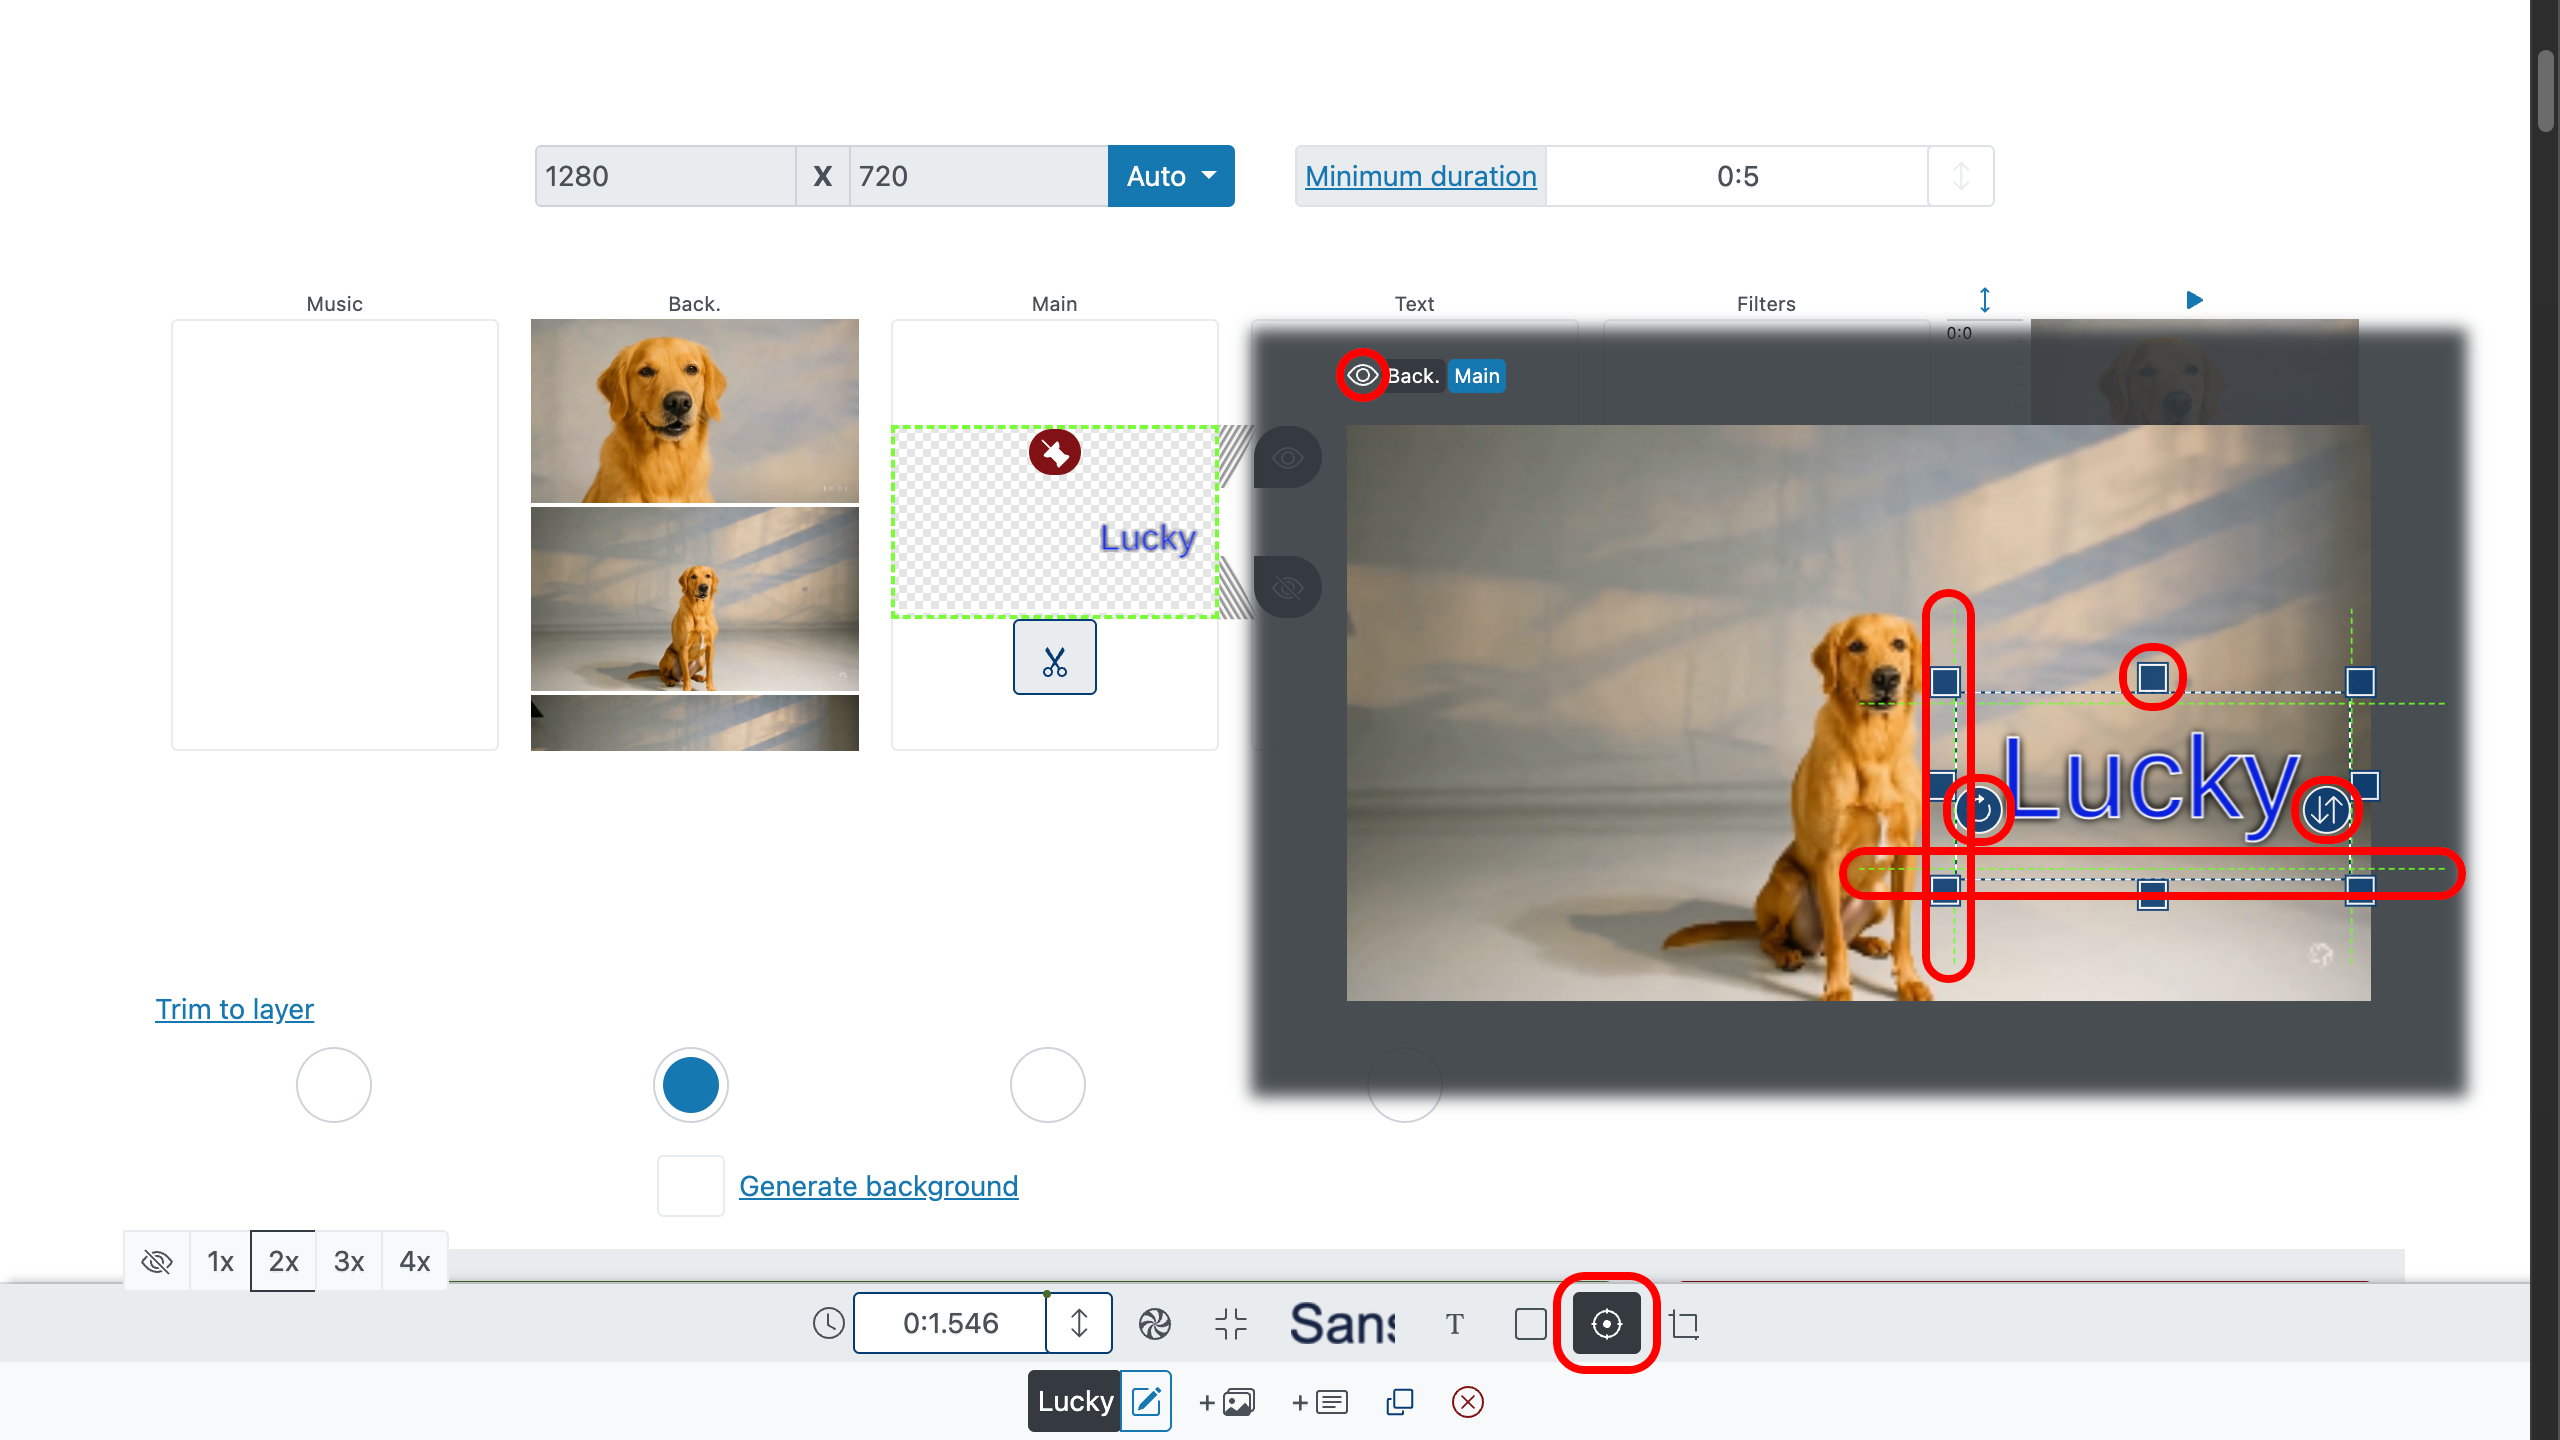
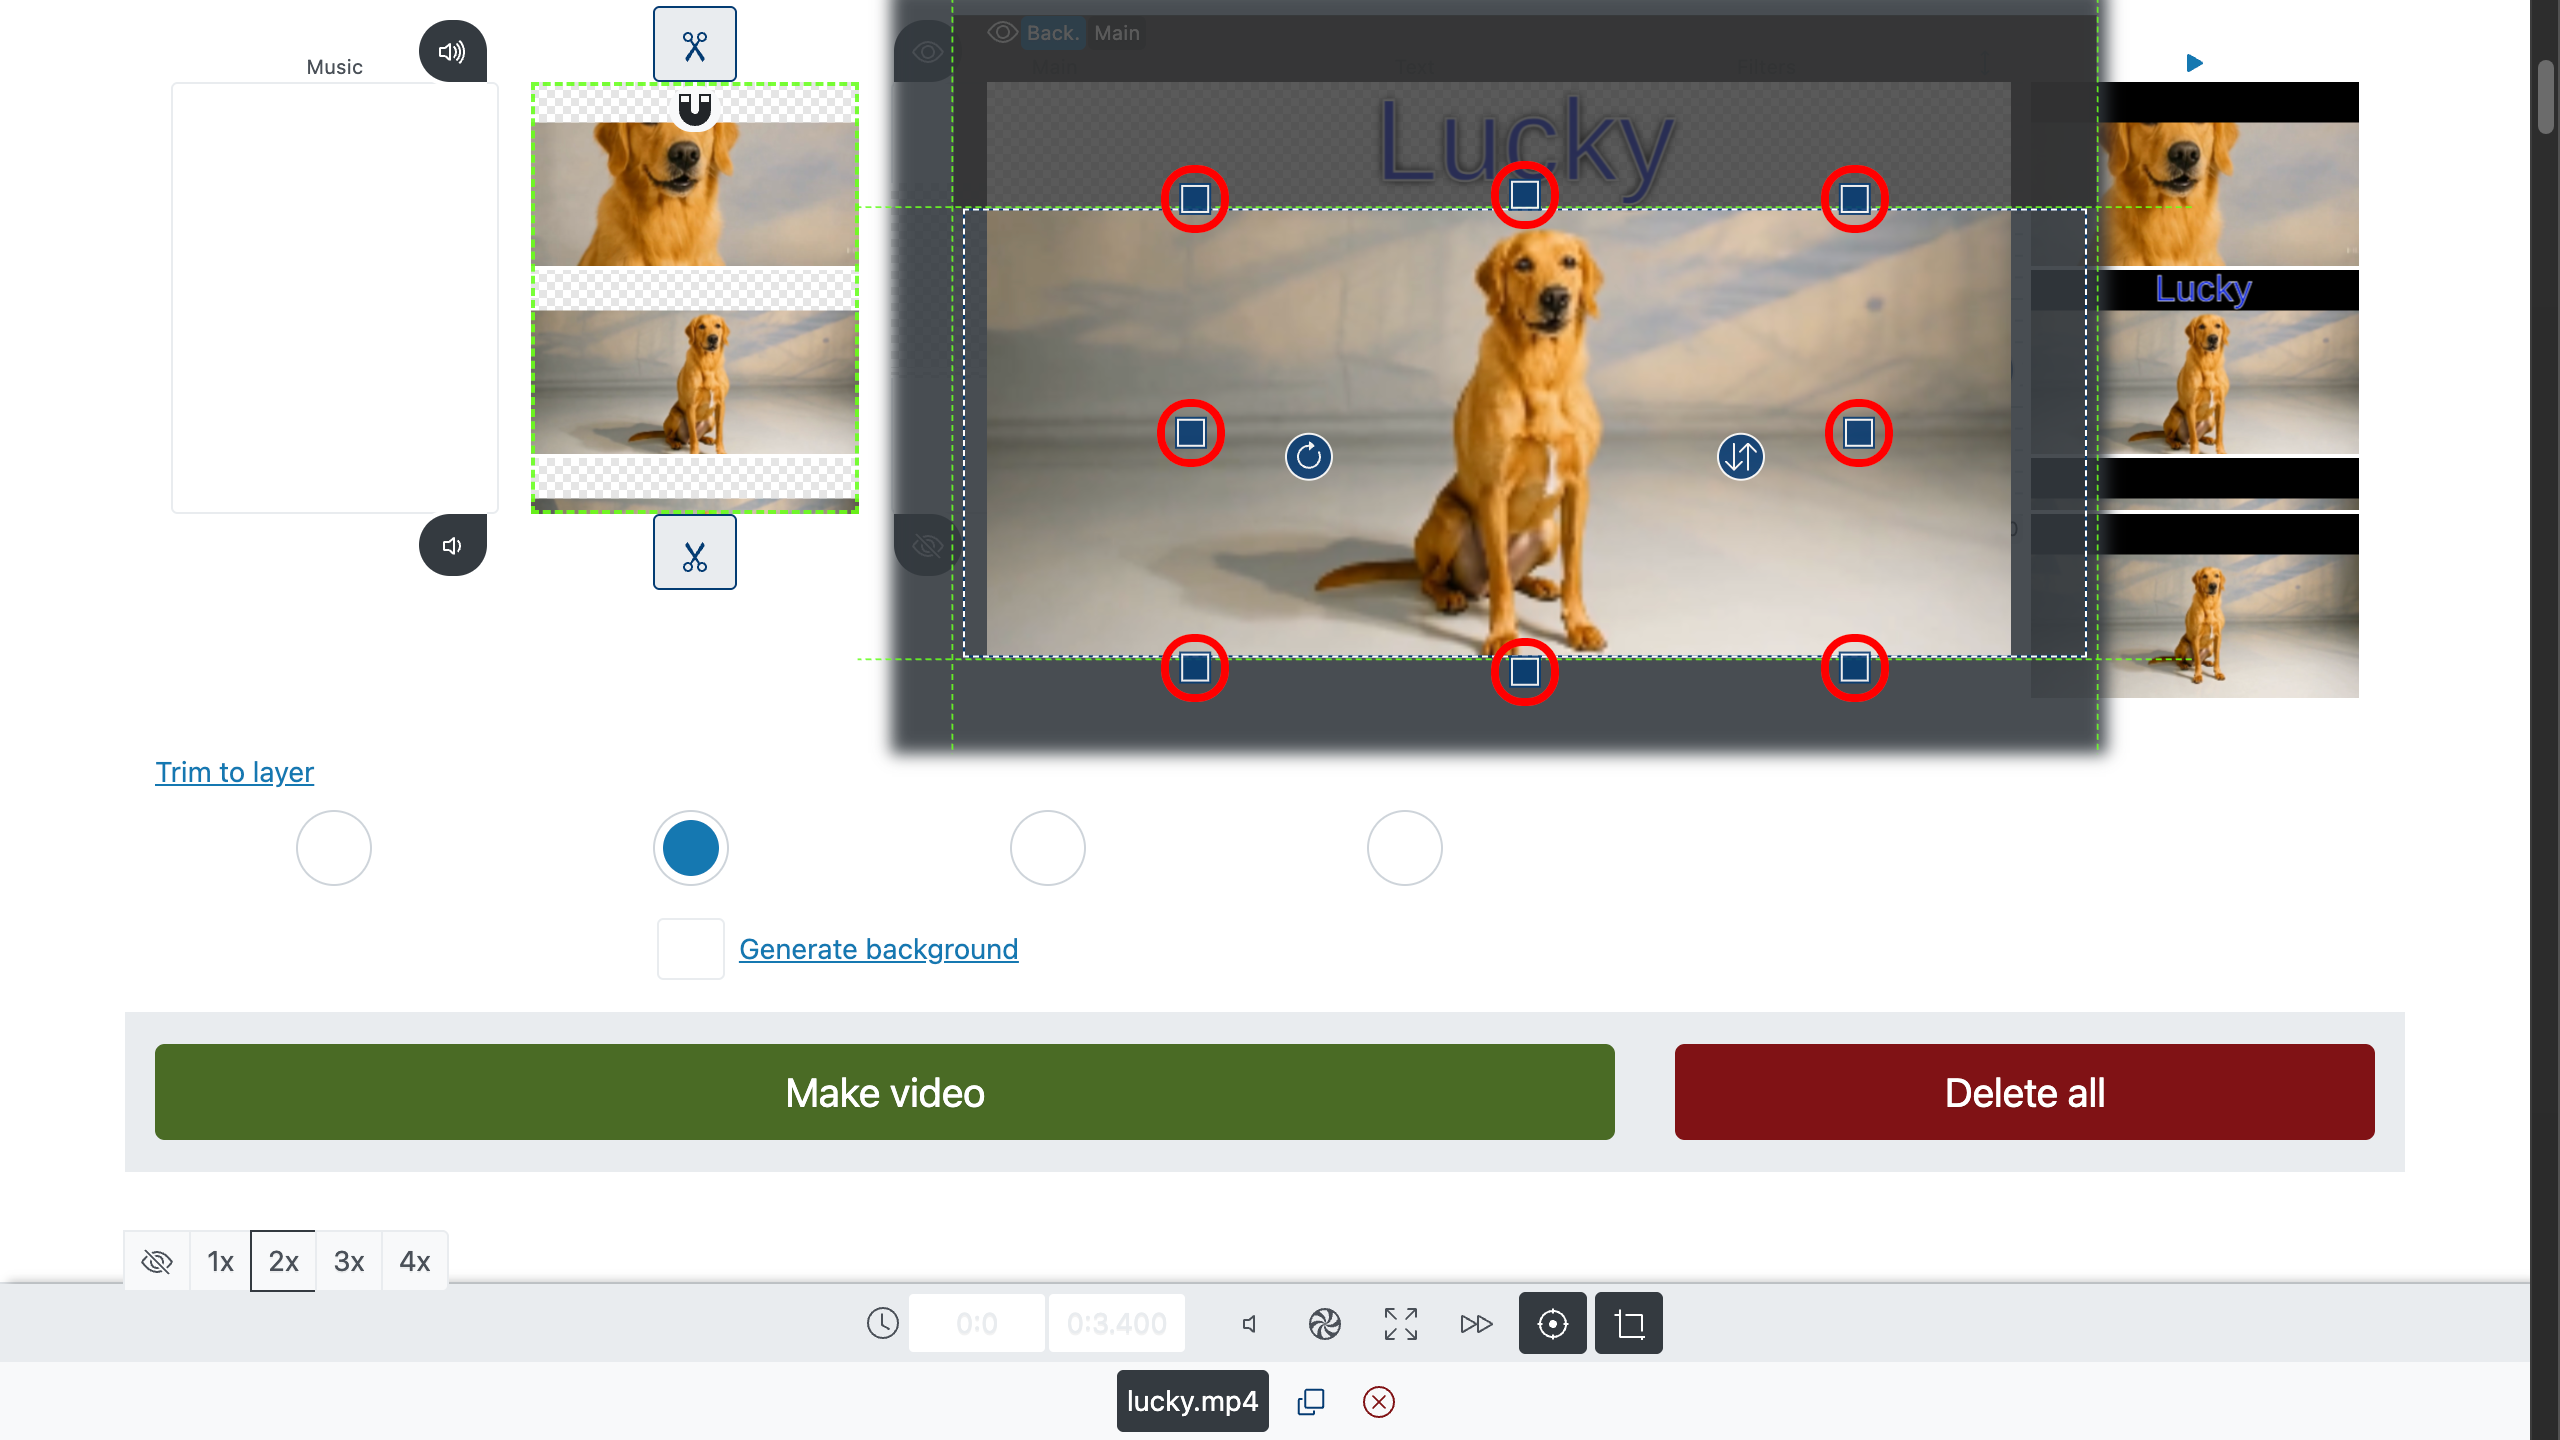
3. Frame, Move, Rotate, Crop
Open the editor with , then drag the text where it works best—you won’t hurt its feelings. Accuracy is style wearing work boots.
- — resize the region that holds your text.
- — rotate the selected region (a little tilt never hurt a headline).
- — adjust the text’s incline for a dynamic slant.
- — drag the edges to crop the text; or use on the parameter panel.
- — opens the control panel for exact X/Y and other framing parameters.
- — temporarily hides distracting layers while you adjust (no impact on the final video).
Want to put text above the video?
Set the region near the top and let the picture breathe below. Also shrink the video itself so it’s smaller than the frame using , leaving clear space for the caption to sit above. It’s the difference between shouting and a well-timed whisper.
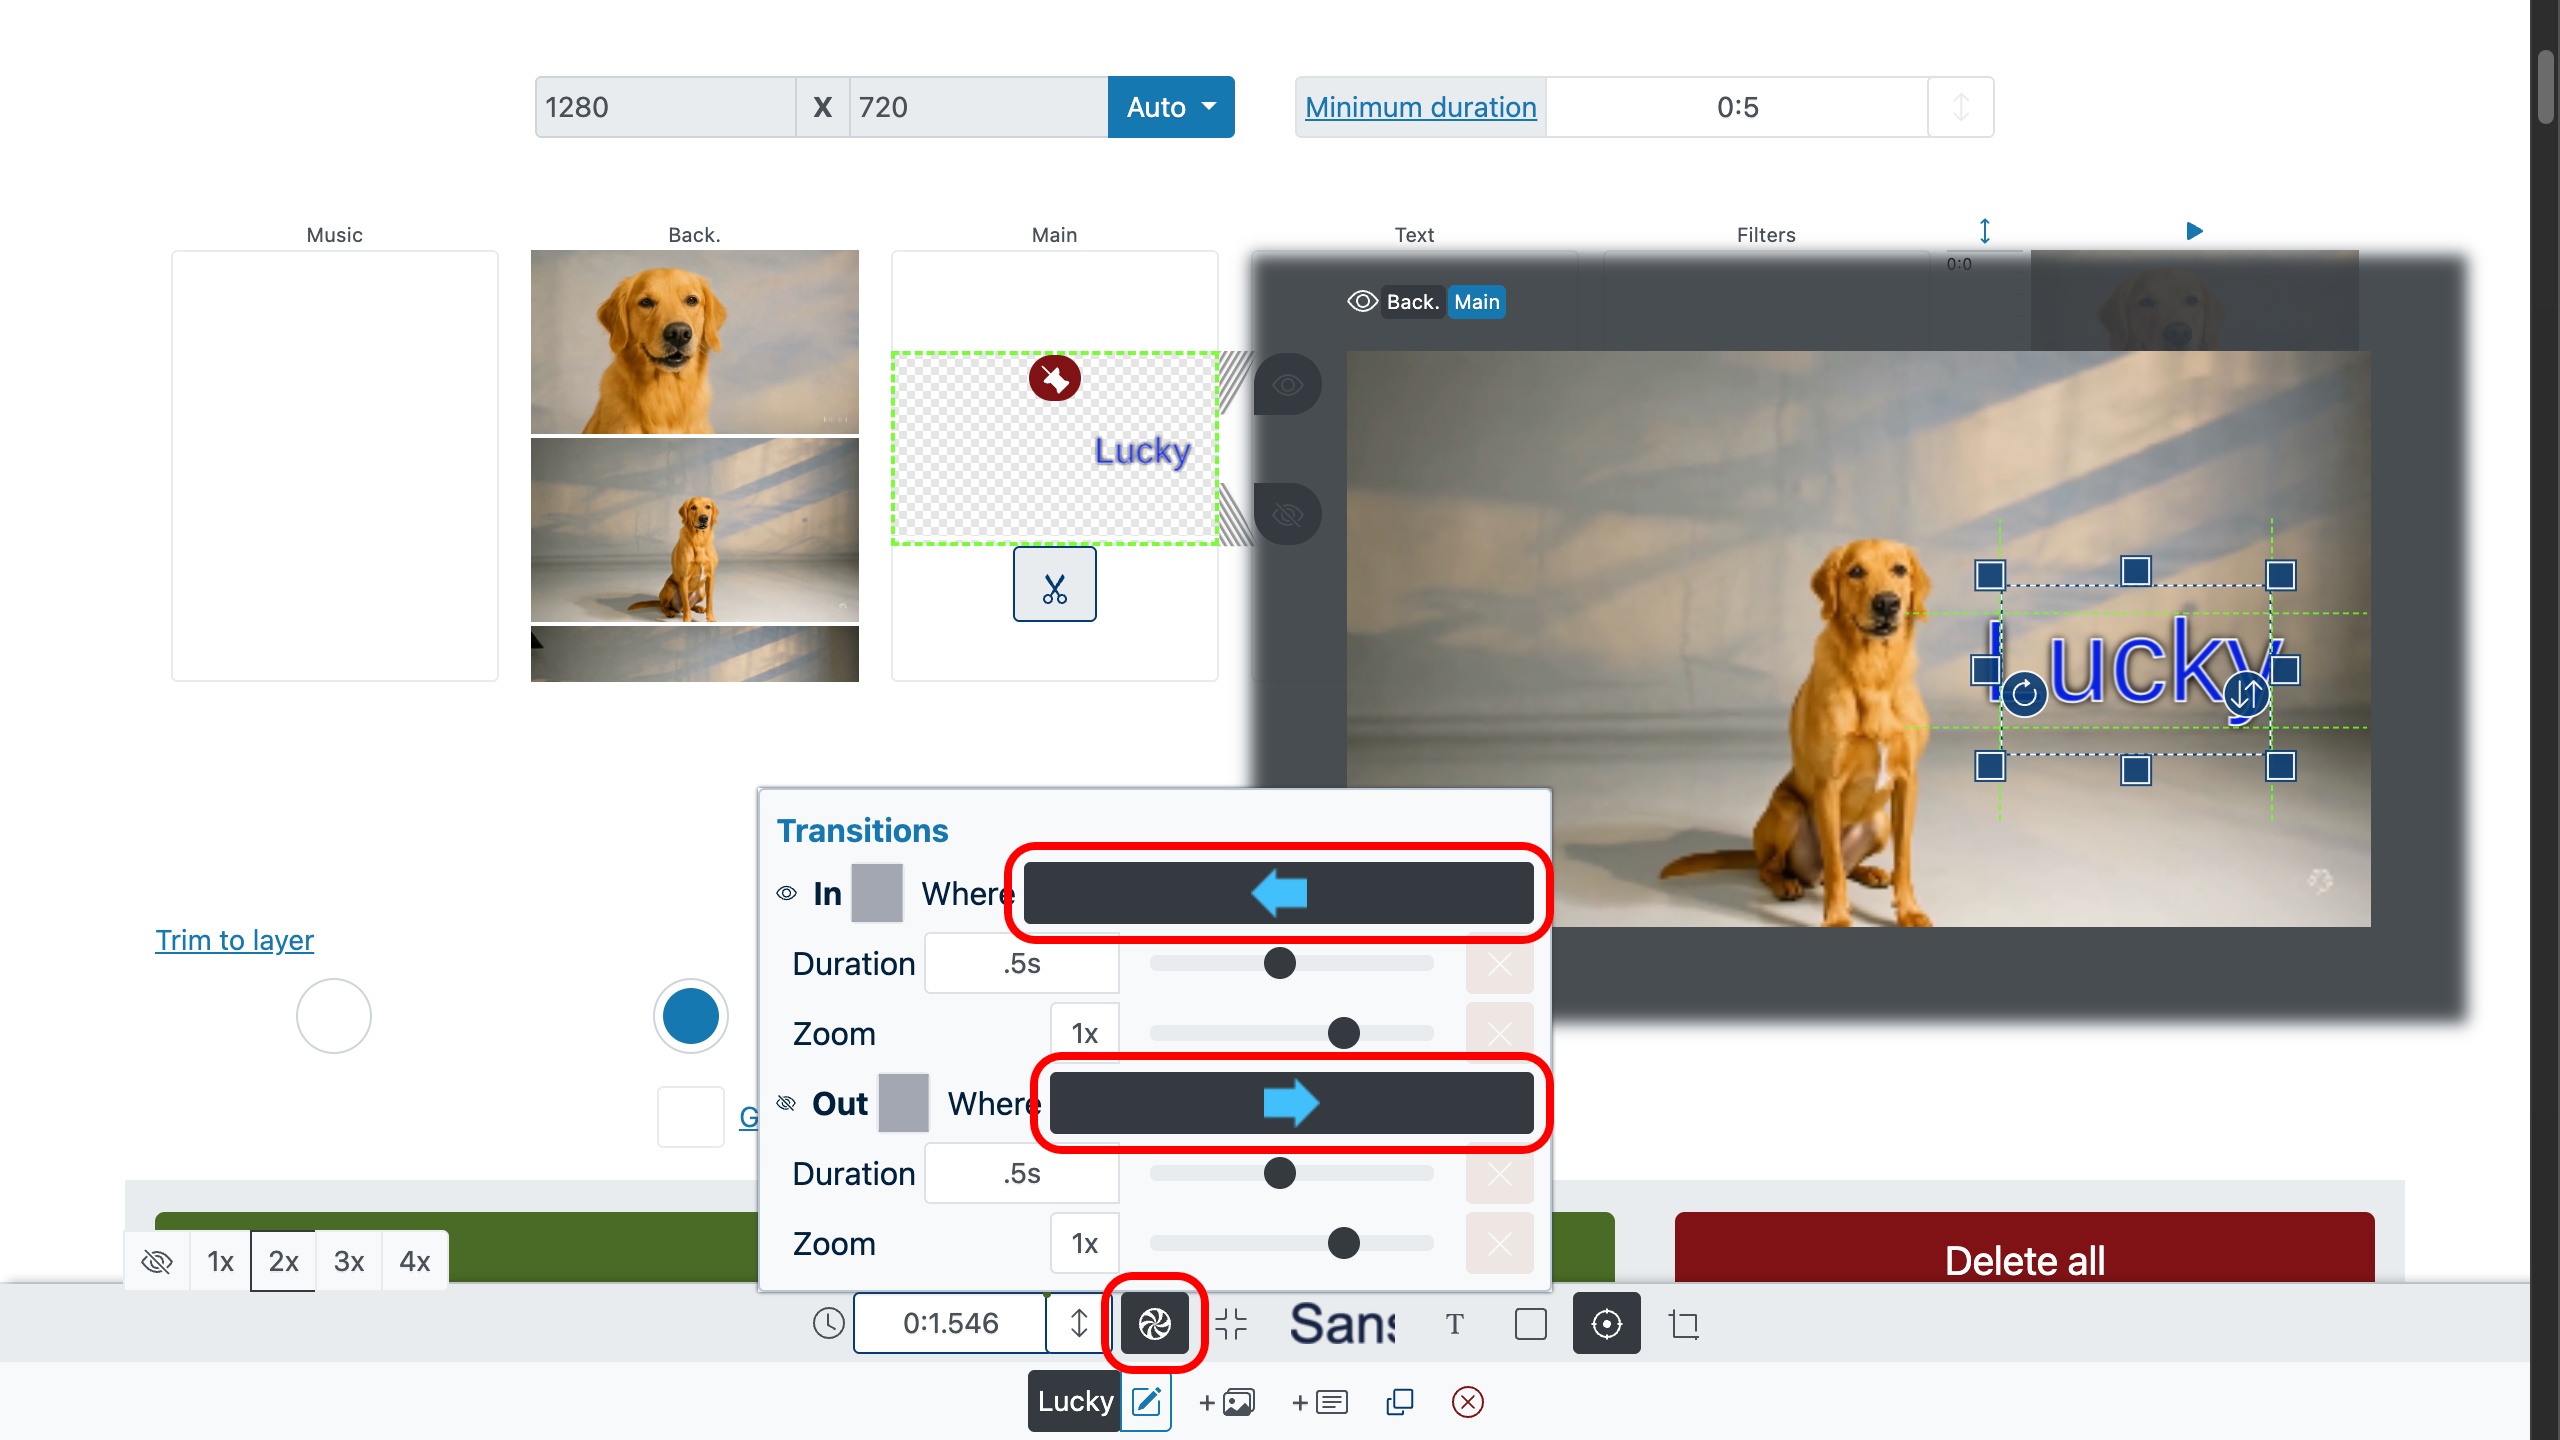
4. Scrolling Text & Tickers
For crawls, tickers, and end credits, use transition direction to define where the text comes from and where it travels to:
- Left → Right: classic news ticker.
- Right → Left: meme captions that mean business.
- Bottom → Top: rolling credits with dignity.
- Top → Bottom: dramatic reveals (handle with care).
Combine direction with entrance/exit duration for smooth motion. No bumpers, no hiccups, just words on a mission.
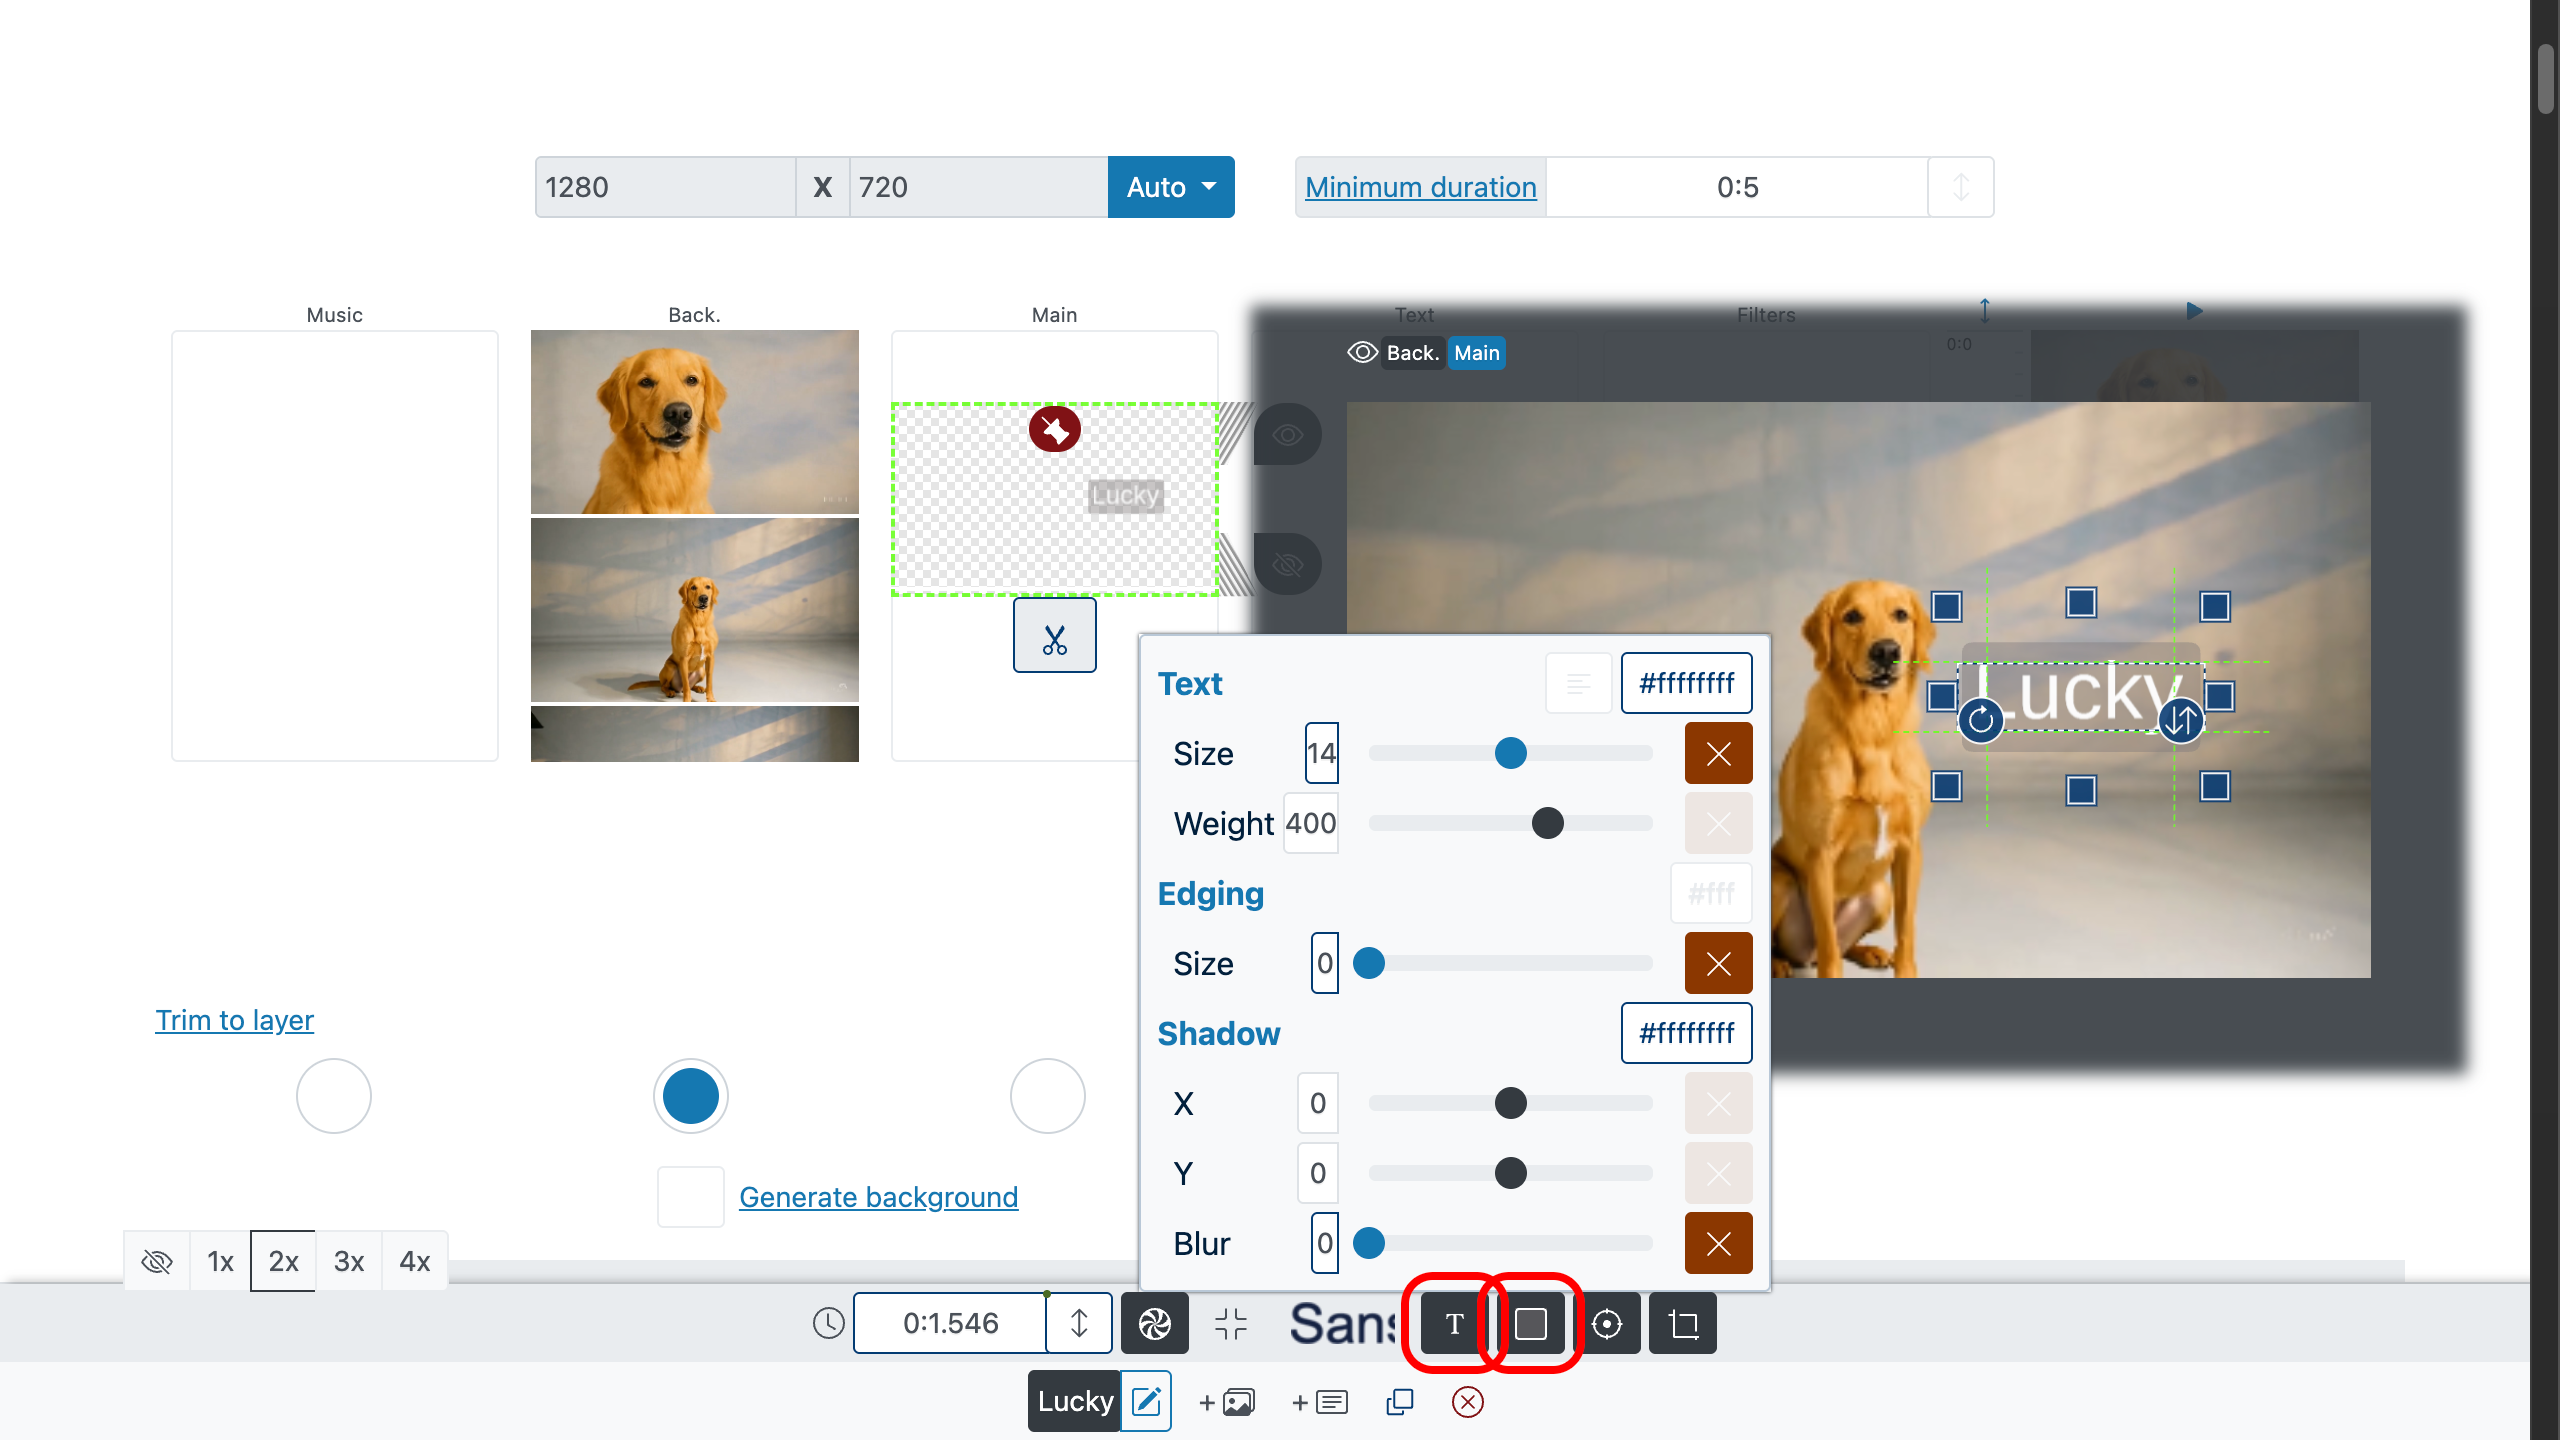
5. Style: Fonts, Colors, Borders
Choose any aesthetic for your text overlay on video: pick a font from the library and fine-tune color, outline, background, and the size of the background panel—all from the control bar. Short and sweet:
- Fonts & basics. Choose a typeface, adjust size, line spacing, letter spacing, and alignment. Contrast is your best friend.
- Color & legibility. Use a solid fill or a semi-transparent panel behind text if the footage is busy. Readability before heroics.
- Outline & shadows. A light outline and a soft shadow help on tricky backgrounds—season to taste, don’t drown the dish.
- — set font size, weight, color, outline, and text shadow.
- — control the background panel behind the text, the border around the block, and the border shadow.
Pro tip: reuse the same style for titles and lower-thirds. Consistency makes the whole edit feel like a well-rehearsed band—no solos stepping on toes.
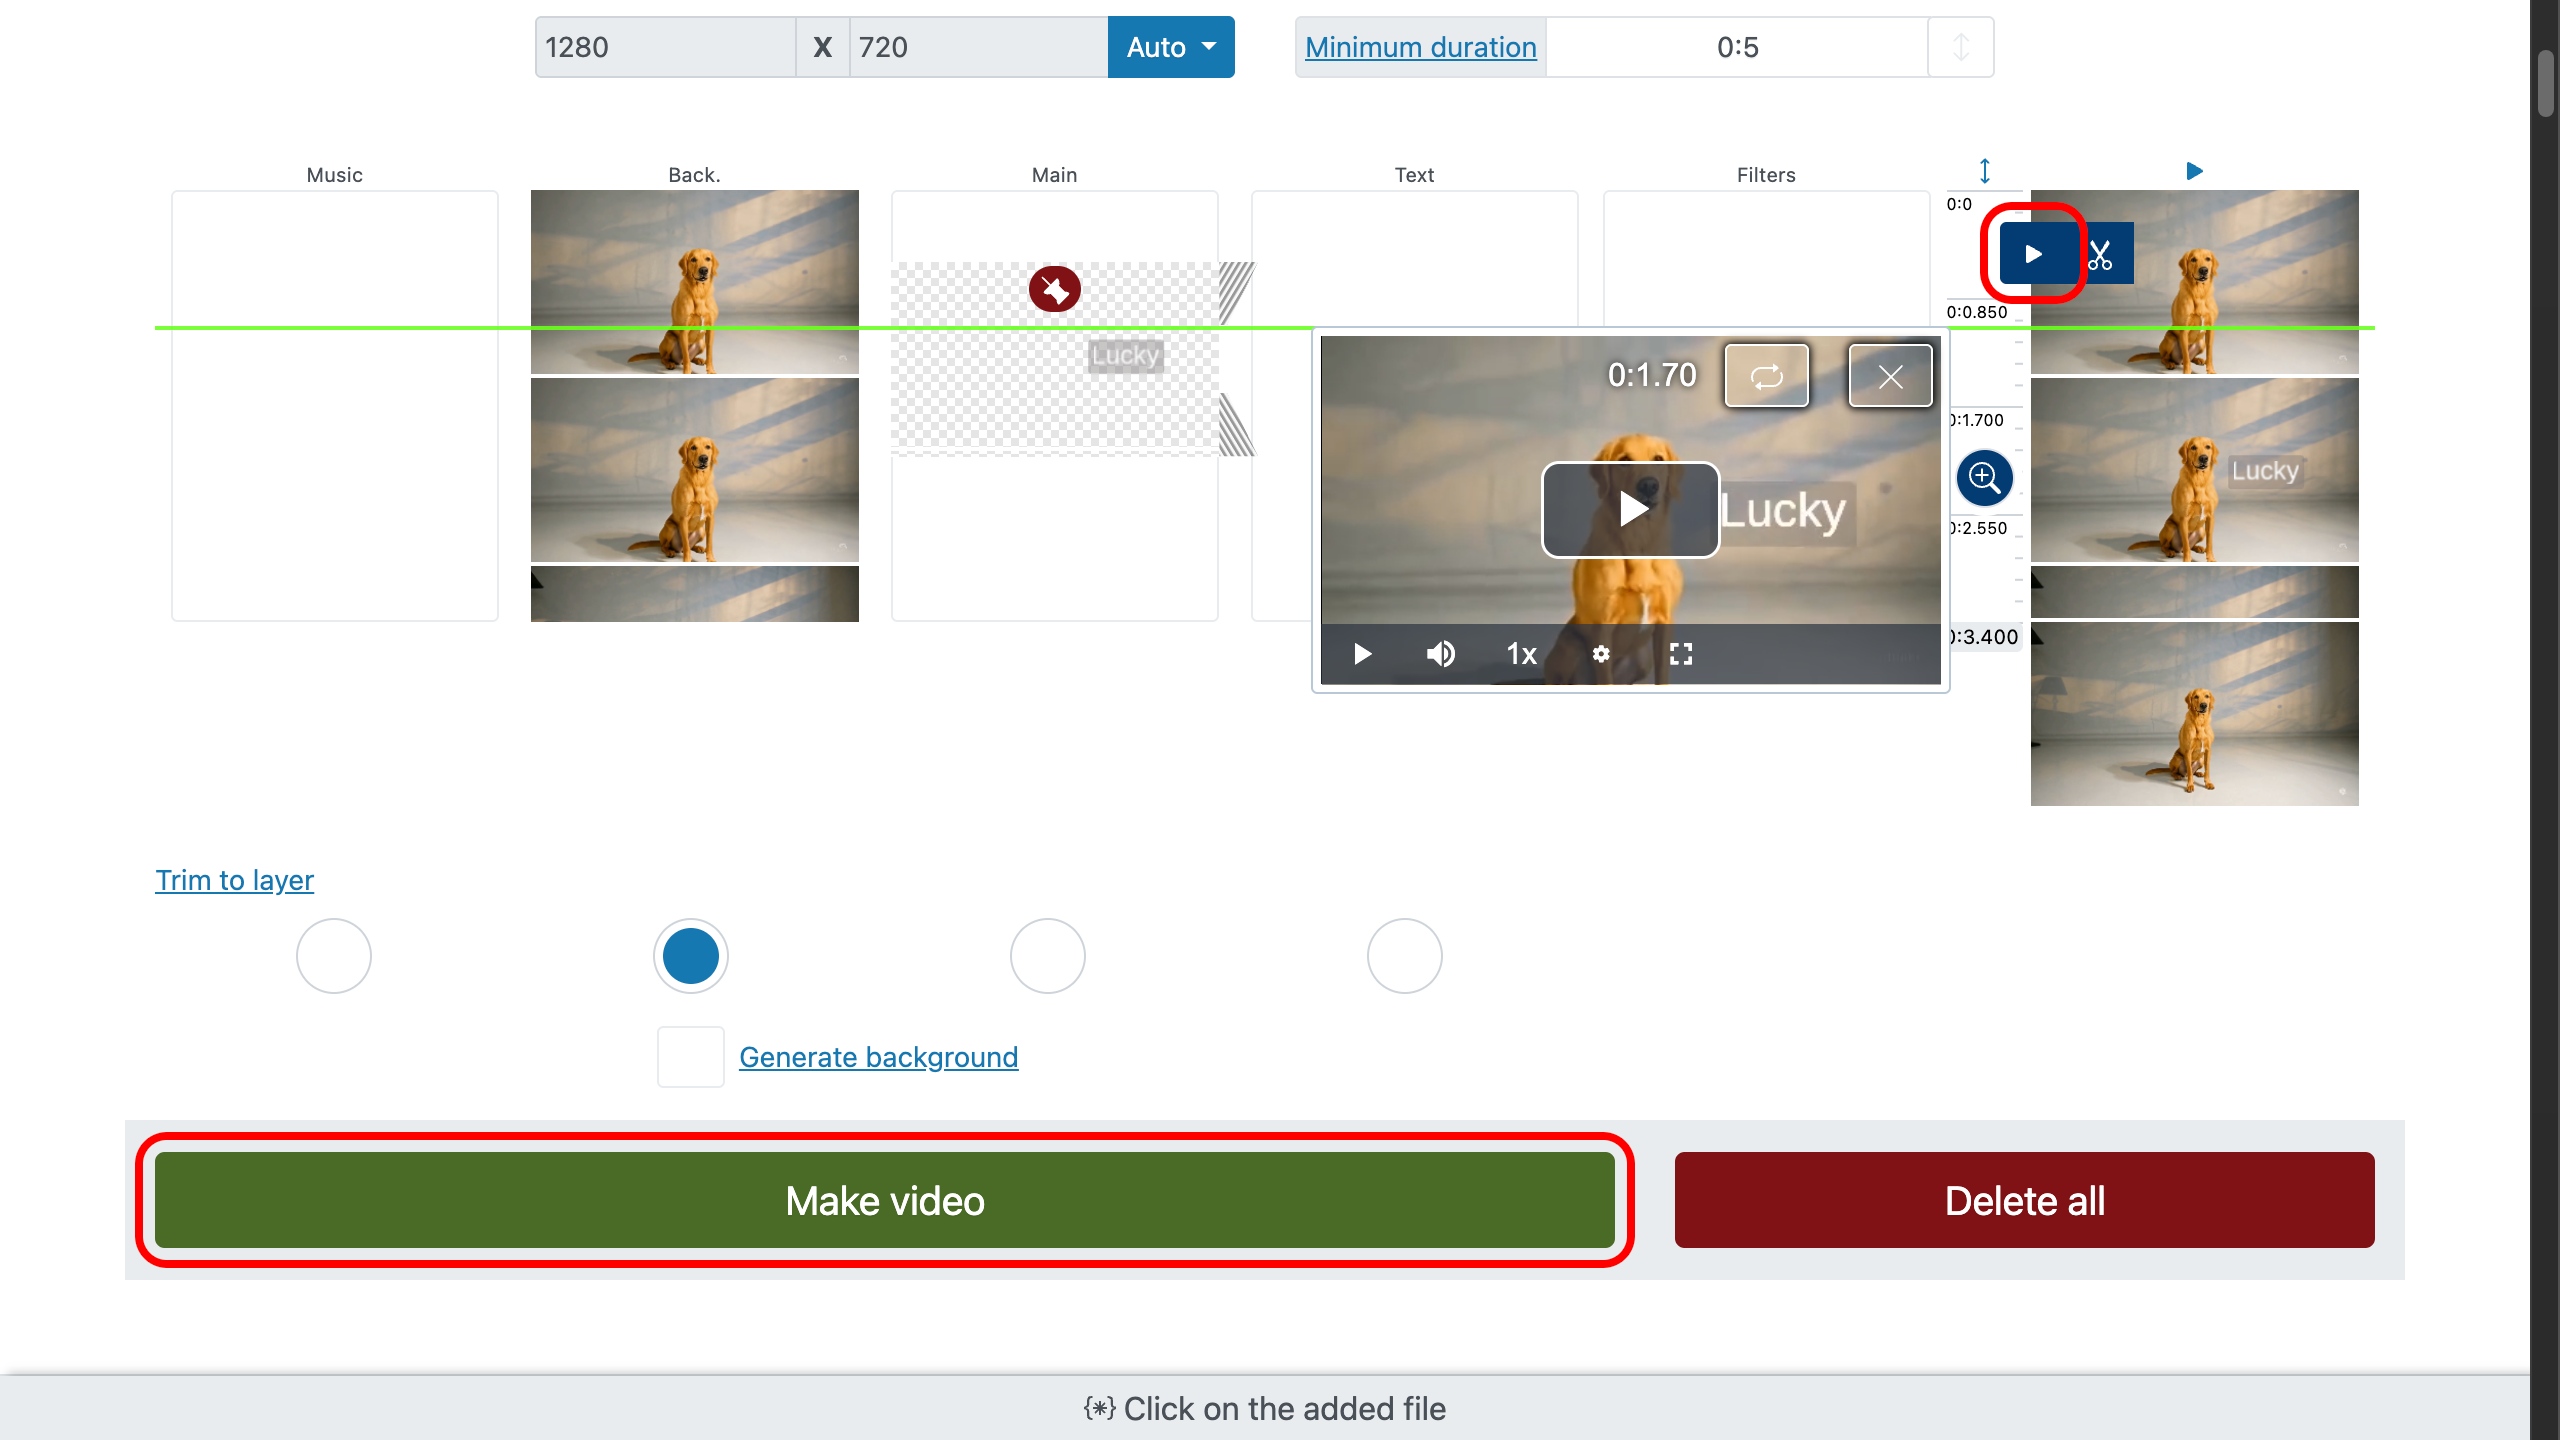
6. Preview & Create
Double-click the preview area to focus, then press to test your timing, fades, and motion. If a line arrives late, nudge it; if it over-stays, trim it. (Punctuality is the soul of captions.)
Happy with the cut? Create the final video. You’ll have clean results—add text to MP4 video, WebM, or your chosen format—no watermark, no surprises, just tidy pixels.
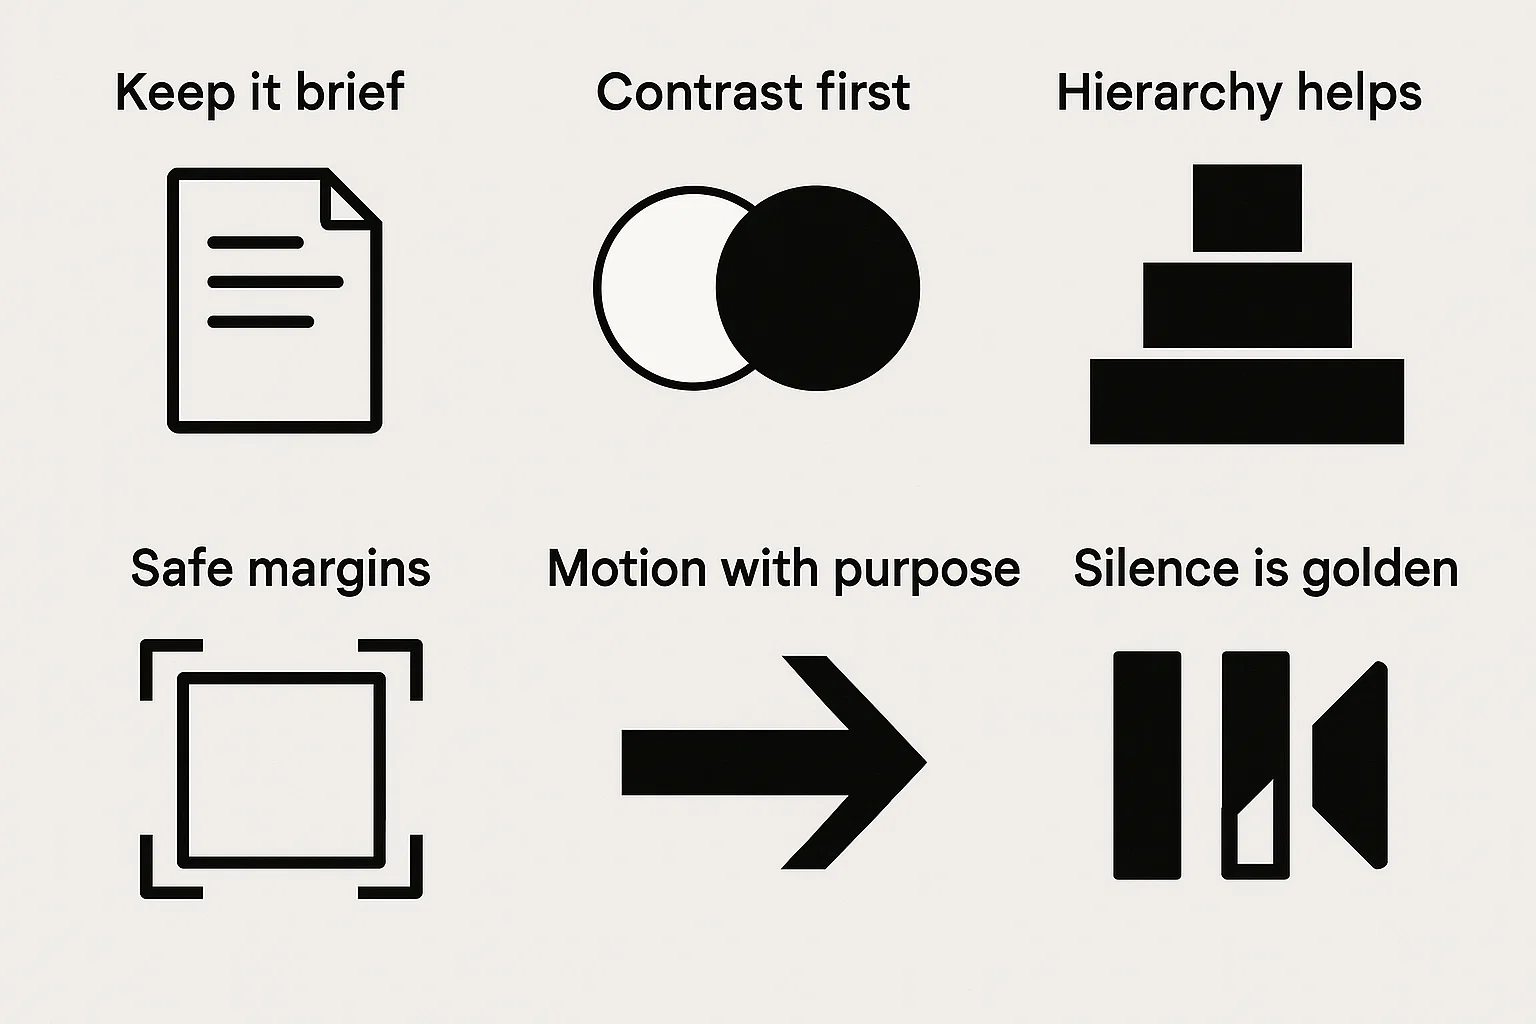
Tips for Beautiful, Interesting Text
- Keep it brief. Viewers read faster than you think, but not that fast.
- Contrast first. If the background is busy, add a semi-opaque panel.
- Hierarchy helps. Big headline, smaller subhead, body that knows its place.
- Safe margins. Avoid edges; give your words elbow room.
- Motion with purpose. If it moves, it should explain, not distract.
- Consistency. Reuse fonts and effects across scenes; your brand will thank you.
- Silence is golden. Not every shot needs a caption (mystery is legal in all states).
You can also put text on video as watermarks or subtle lower-thirds. For more polish, apply effects to text just like any other visual layer.
FAQ
Can I create a video from text only?
Yes. Add your text blocks and arrange them on the timeline like any other media. The editor renders the visuals automatically—think slides, but stylish (no footage required).
Can I add effects to text?
Yes—any effect that works for images works for text, too. See effects for fades, blurs, glows, motion, and more.
Is it really free with no watermark?
Yes: add text to video online free, no watermark. Your words, your brand, your finish.
Does this work with MP4?
It does. You can add text to MP4 video or just as easily to MOV, WEBM, and others.
Can I add a scrolling caption or ticker?
Use the transition direction settings to create left-to-right tickers or bottom-to-top credits. Adjust speed with duration (slow reads win hearts).
Quick Start (Recap)
- Upload your media (any audio/video/photo format).
- Use the text field, then click .
- Place it, lock with , fine-tune timing with .
- Set in/out with and choose your reveal style.
- Shape it with , , , , .
- Preview with ; adjust until it reads like you intended.
- Create the final video—clean overlay, no watermark, any device.
That’s all it takes to add text over video with confidence. Short, sharp, and legible—like a good punchline (and yes, this one fits on one line).