Convert GIF to Video Online
Animated GIFs are fun for quick reactions, but they lack sound, modern compression, and compatibility. The best way to share them widely is to convert a GIF into video.
Why MP4 is better than GIF:
- Smaller size: H.264/AAC compression makes the file lighter.
- With sound: you can add music, voice, or audio effects.
- Compatibility: MP4 plays smoothly on iPhone, Android, Windows, macOS, and social media platforms.
Below is a clear path: upload your GIF into the movie maker, adjust canvas and speed, add background, music, and captions, then export. This gif to video workflow creates lighter, more versatile, and shareable clips.
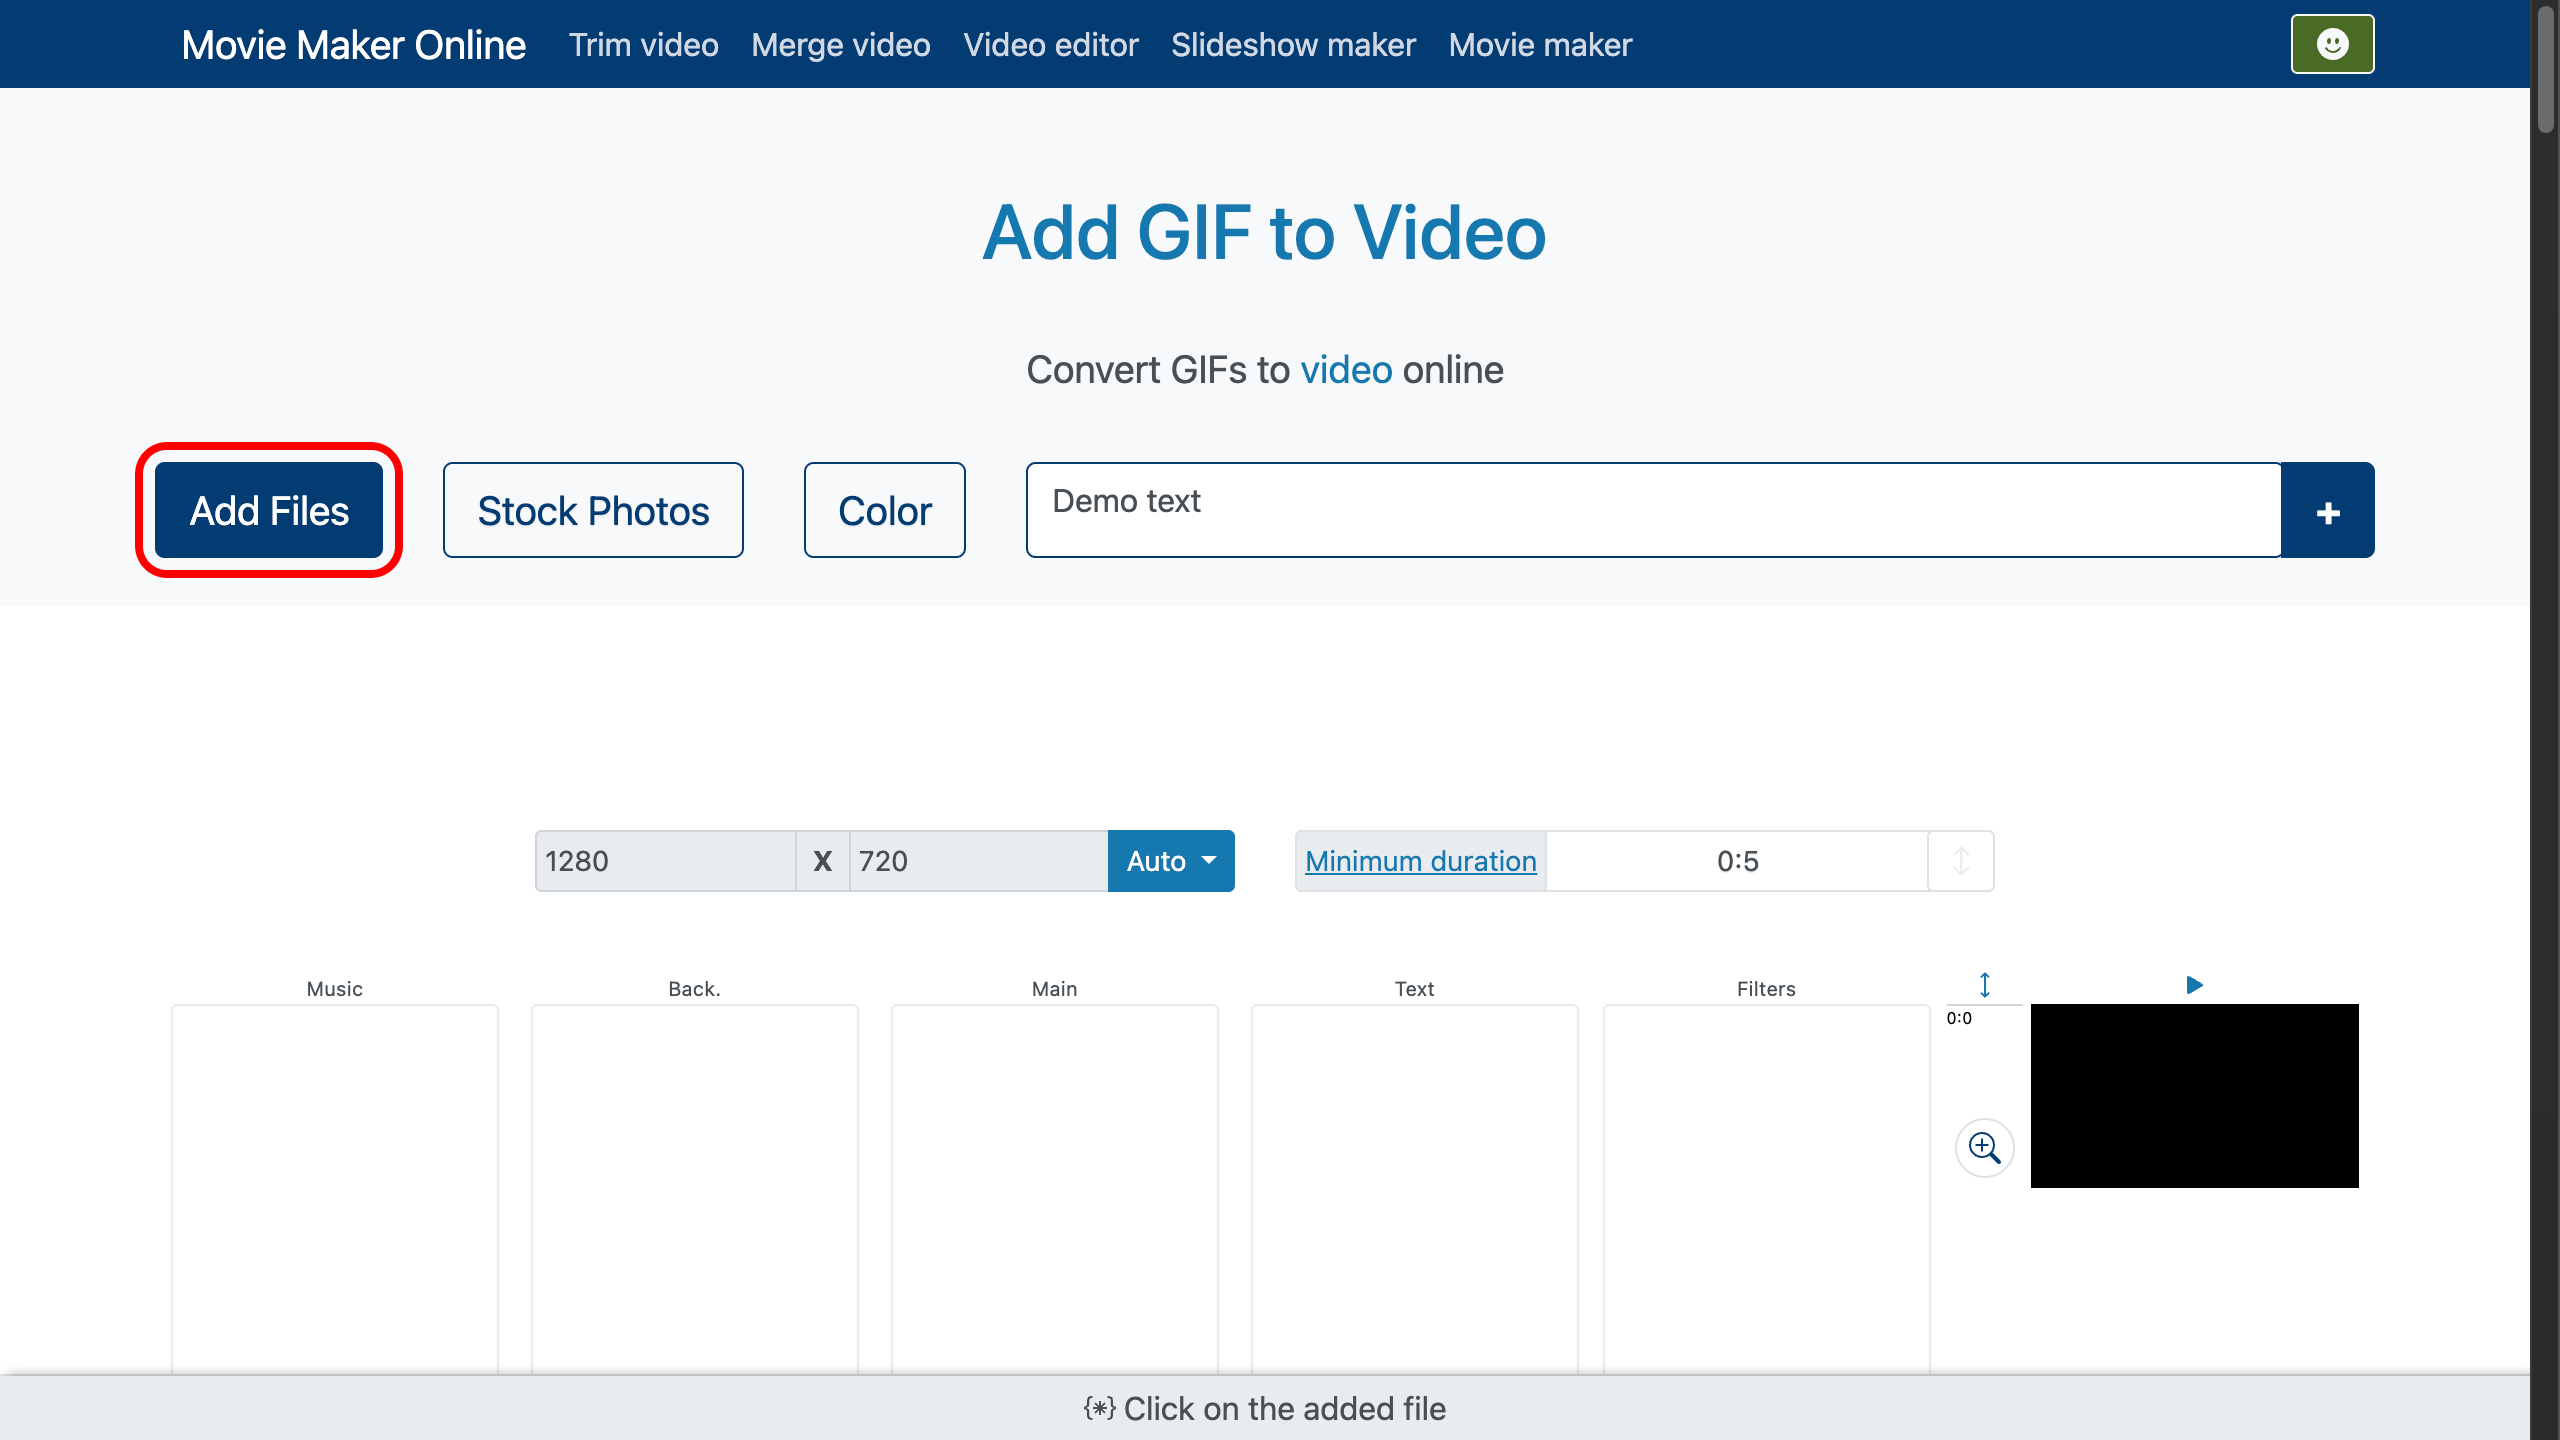
Step 1: Upload Your GIF
Open the free video editor in your browser on any device (iPhone, Mac, PC, Android). Drag and drop your GIF to the upload area or select it from disk. Other media such as JPG, PNG, or music files are supported too.
Once uploaded, your GIF will instantly appear on the editing timeline for further adjustments.
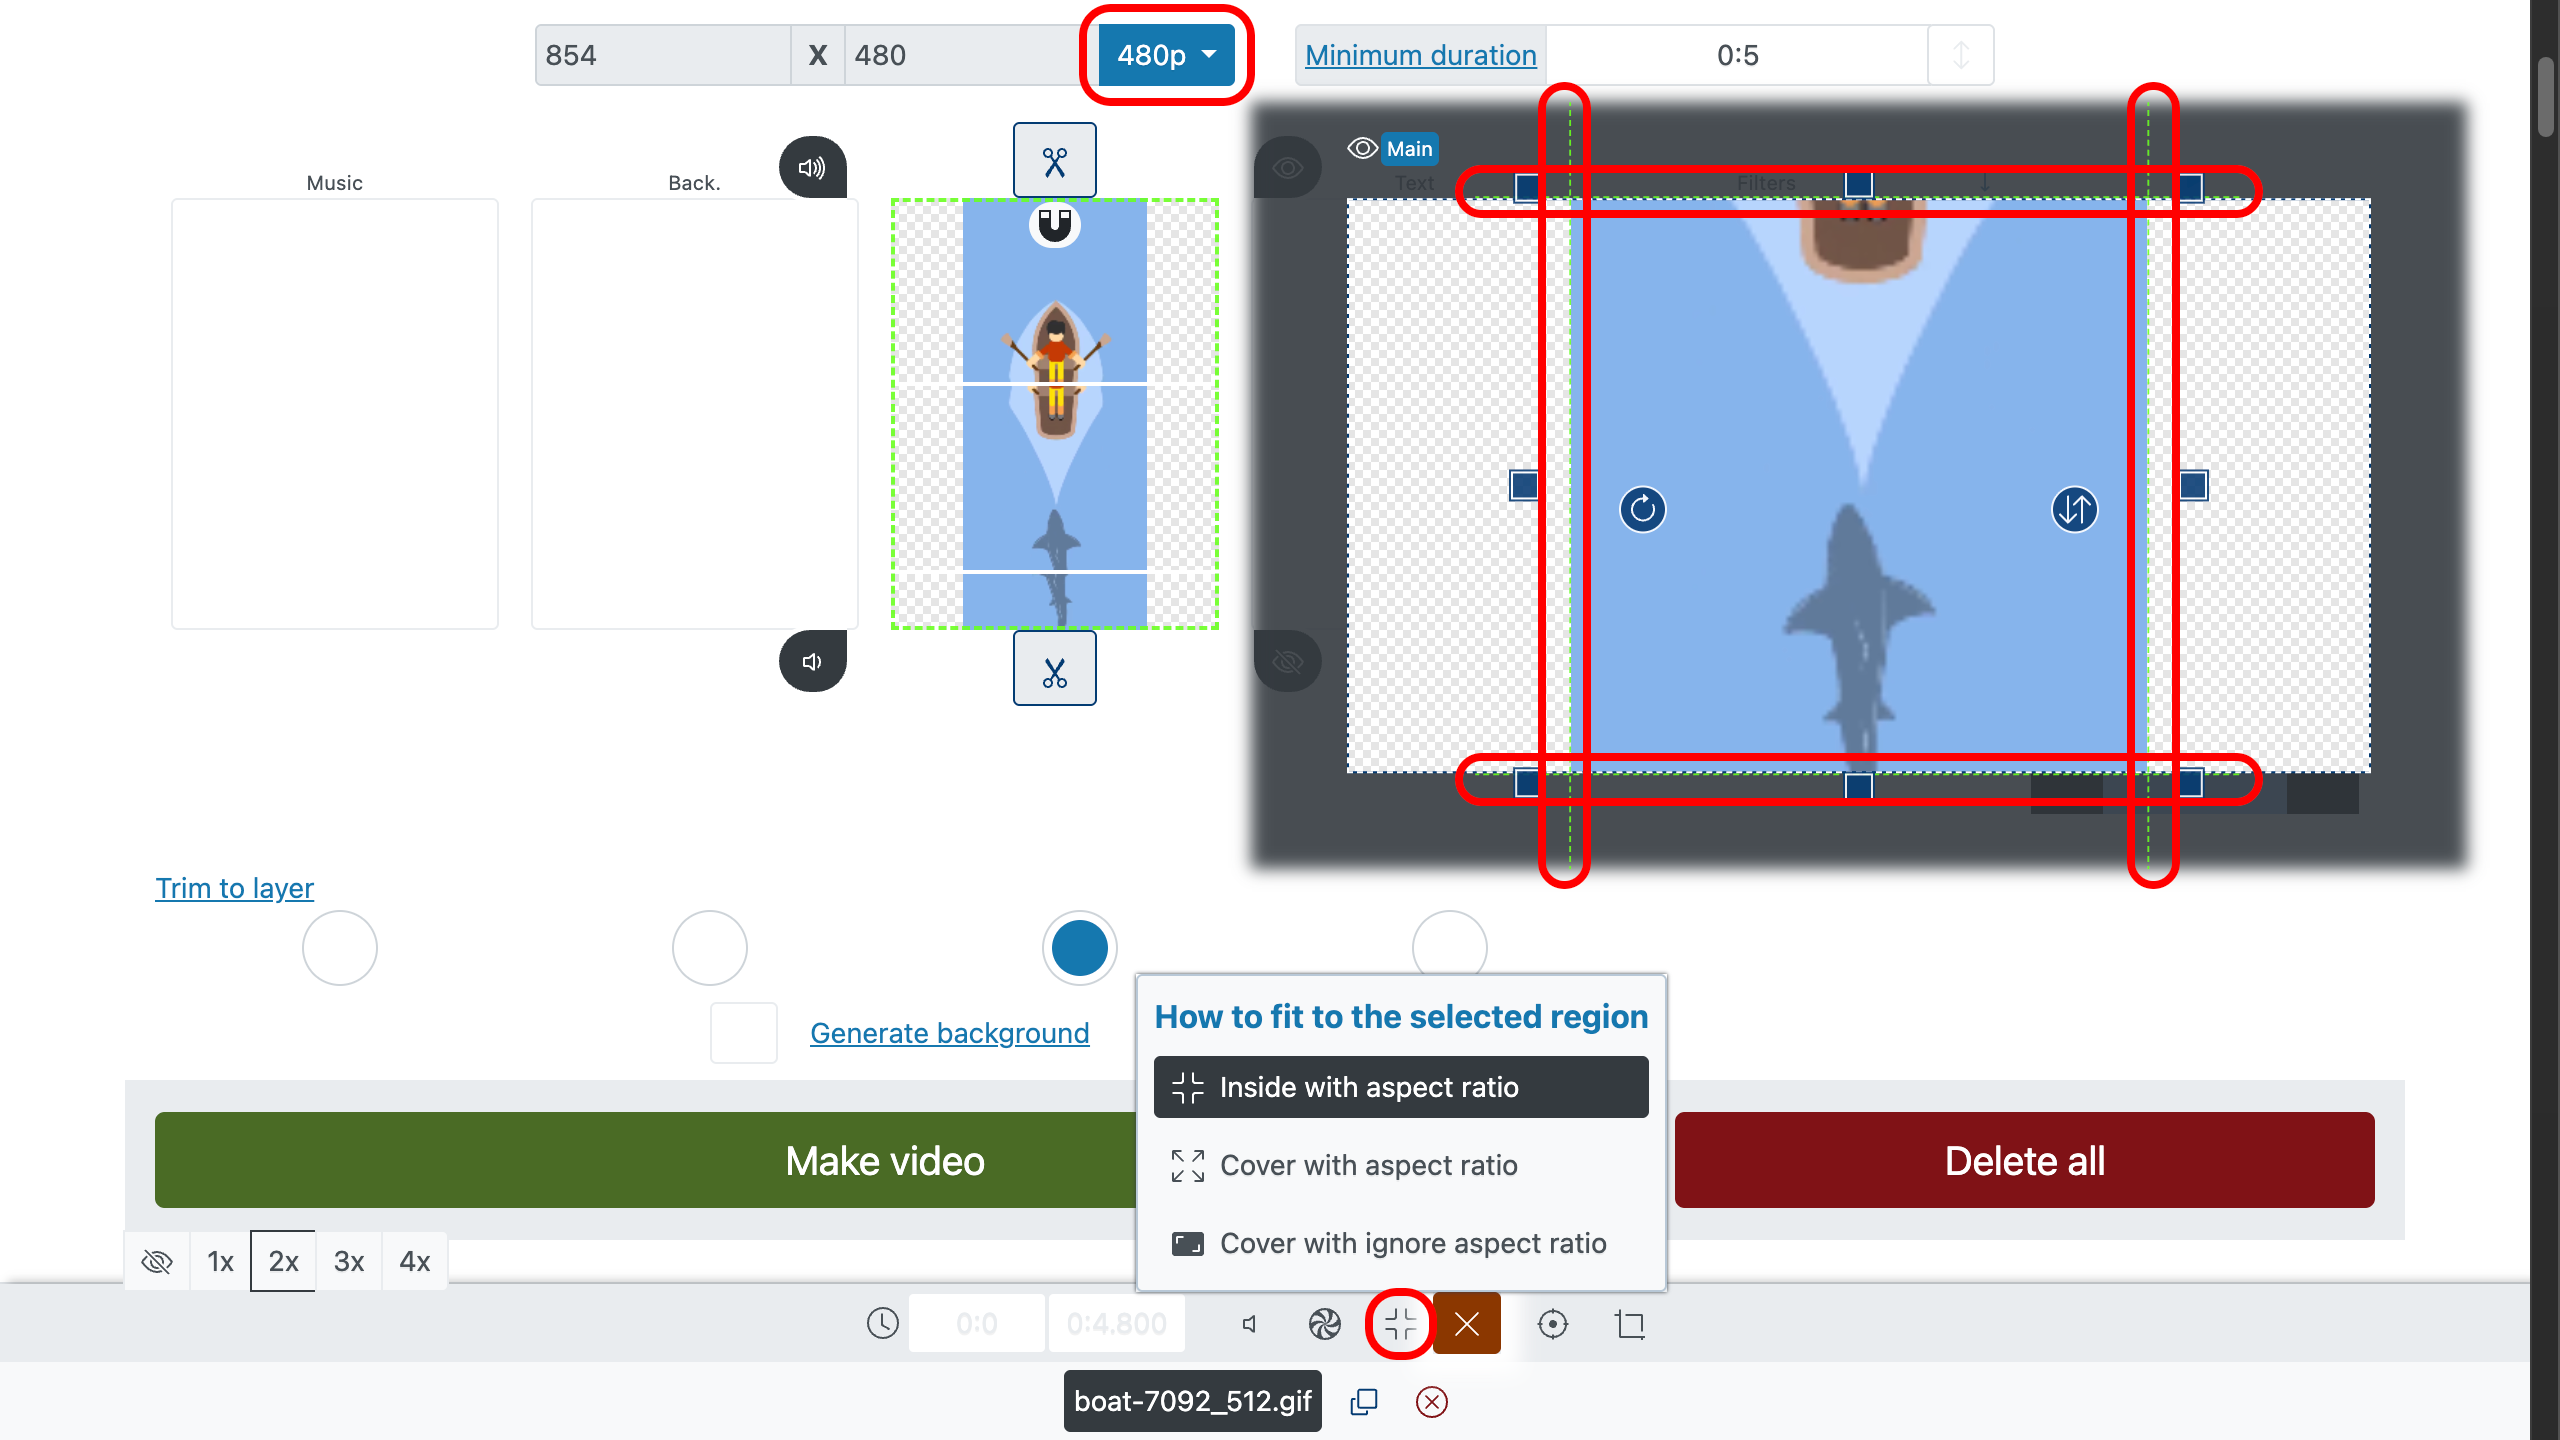
Step 2: Adjust Canvas and Orientation
By default, the new video will keep the same proportions as your source GIF. You can also choose 16:9 (YouTube), 9:16 (Stories/Reels), 1:1 (square), or 4:5 (feed).
If proportions don’t match, use Fit (letterbox with borders), Fill (cover frame, part cropped), or Stretch (ignore aspect ratio).
Cropping is also available: cut away unwanted edges and keep only what matters most.
How to crop photos and videos.
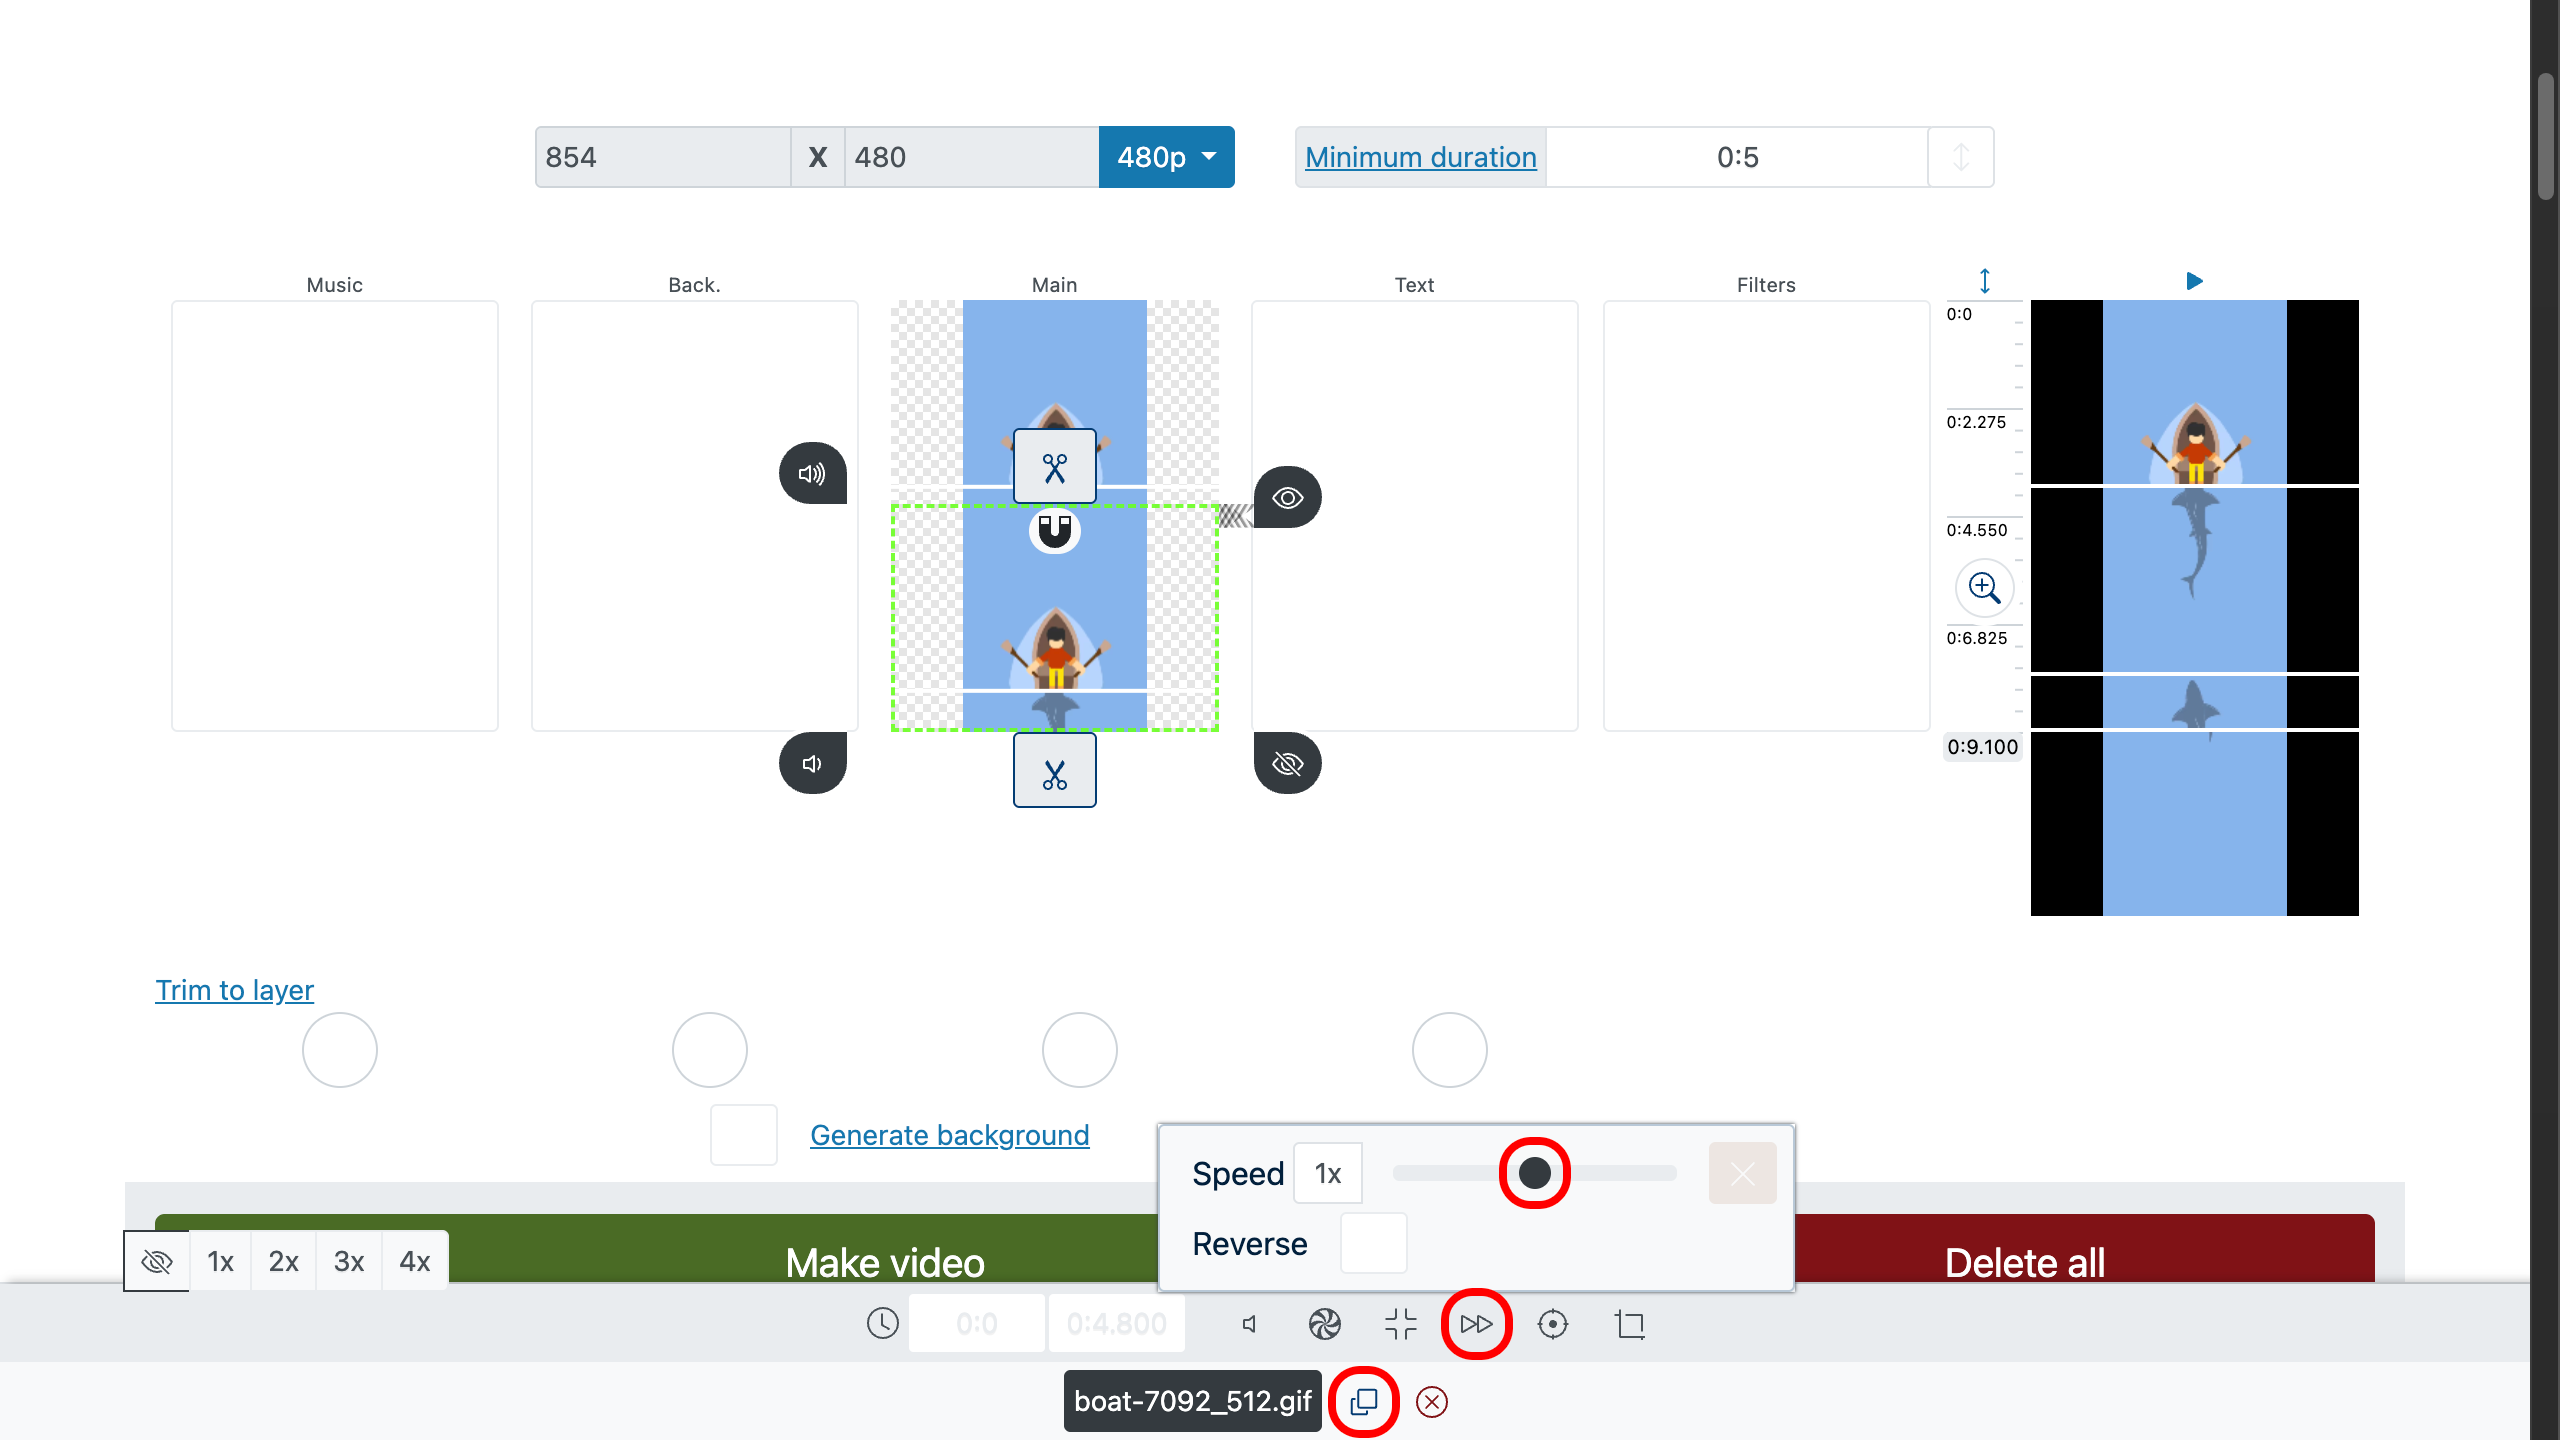
Step 3: Duration and Speed
By default, the GIF loops forever. To extend playback, simply copy the clip multiple times using the duplicate button on the bottom panel. You may also freeze the last frame for a smoother ending.
Change playback speed: speed up for dynamic action or slow down for emphasis. If the motion looks choppy, increase the frame rate to 24–30 fps.
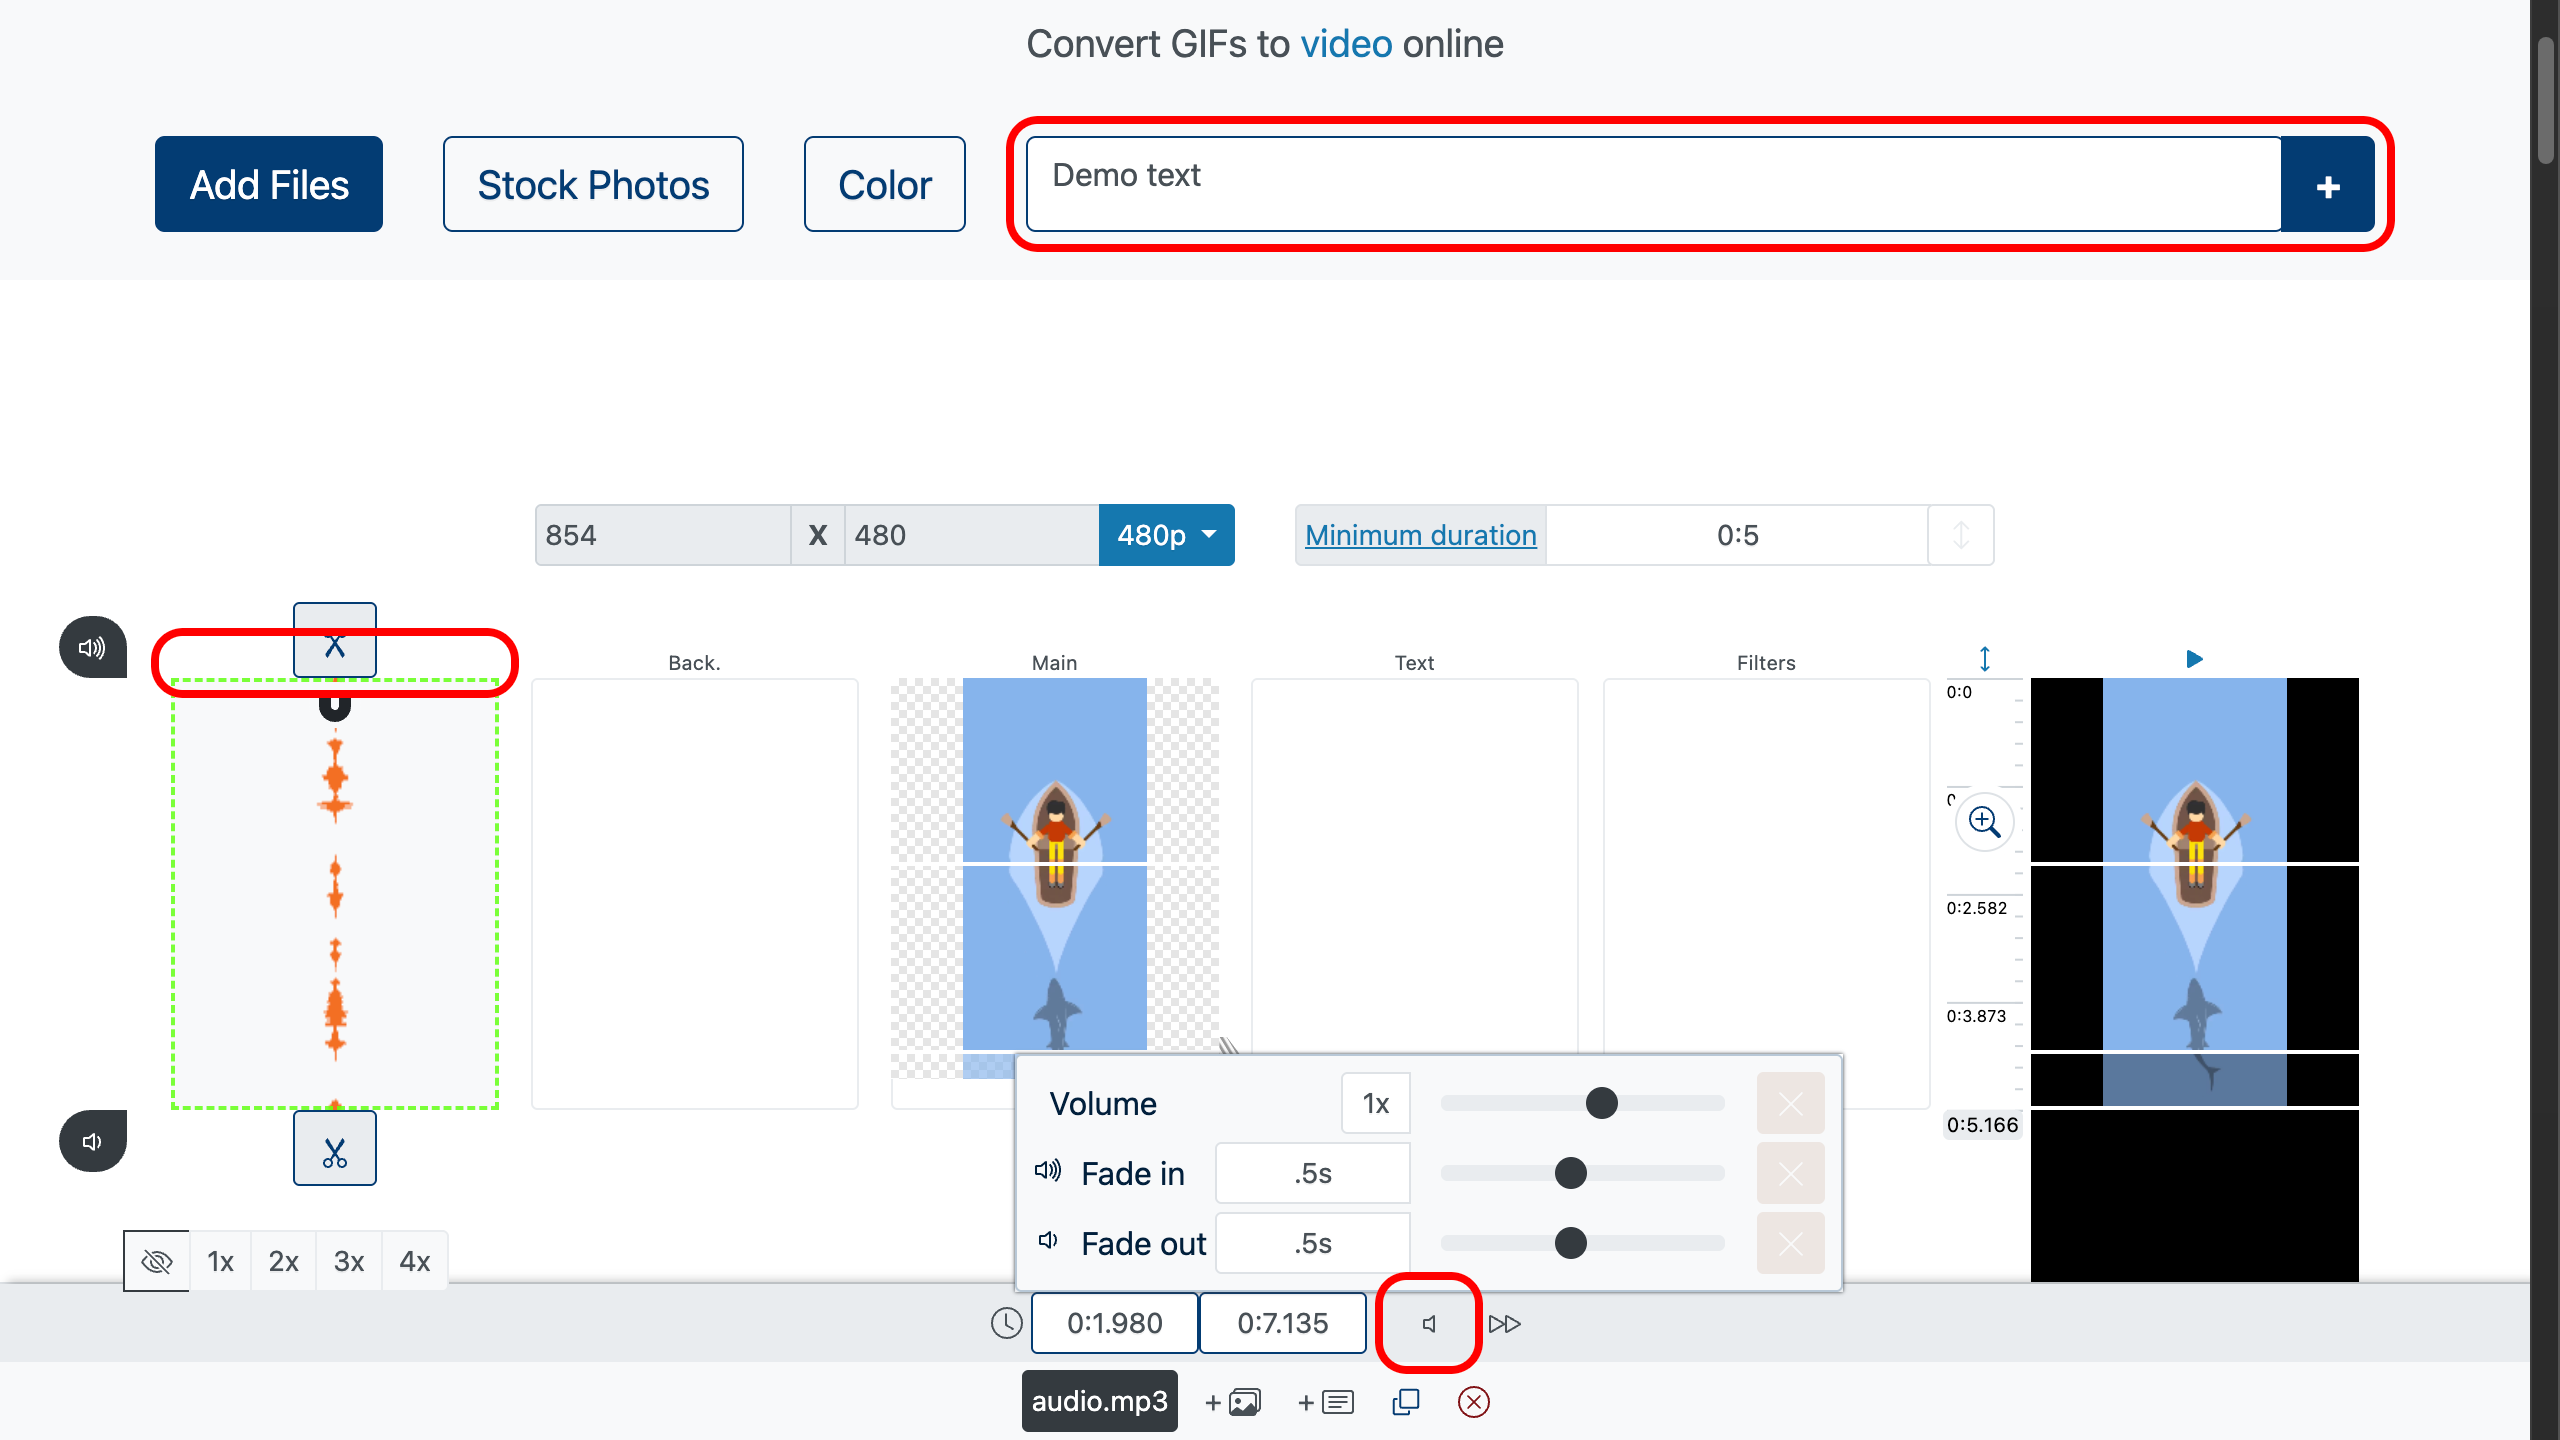
Step 4: Add Music and Text
Drag an audio file onto the sound track. Balance the volume, apply fade-in at the start and fade-out at the end. Align musical beats with GIF moments for dramatic effect.
Add titles, captions, or emojis. Choose font, color, and animation. For readability, apply a semi-transparent background or text outline.
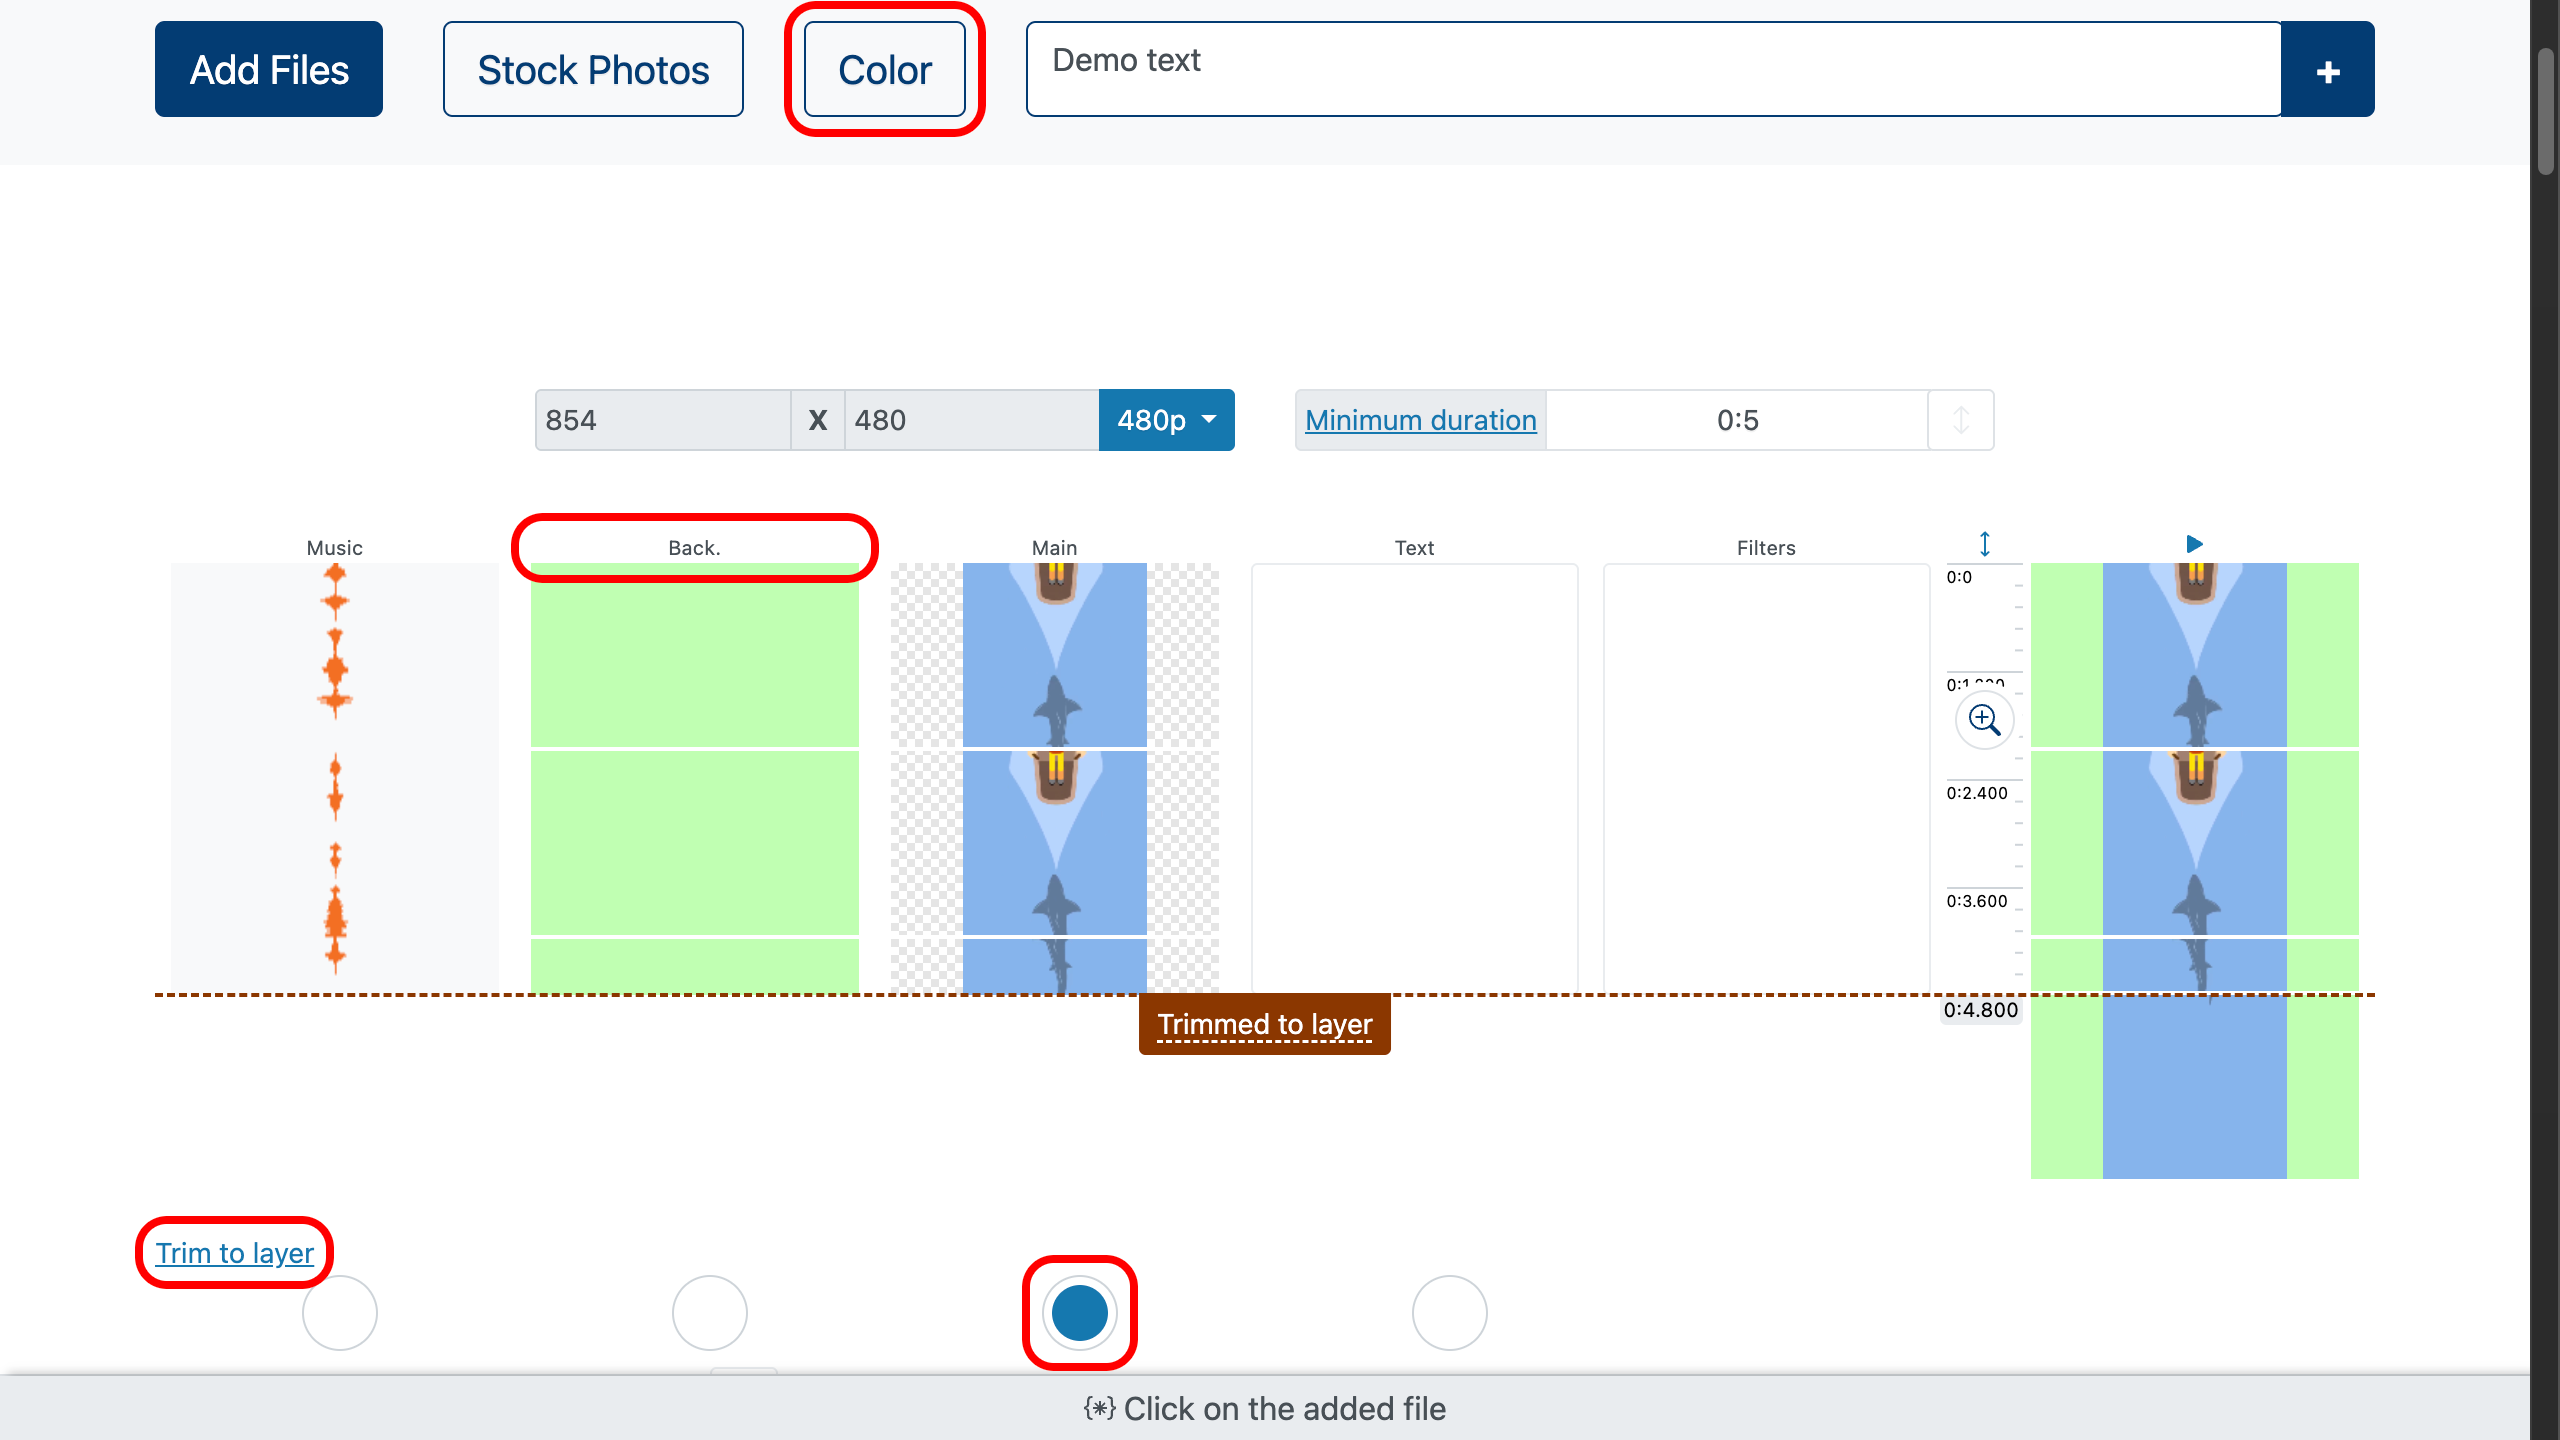
Step 5: Background and Borders
If you selected Fit and borders remain, fill them with a solid color, a blurred GIF copy, or another image. This keeps the composition neat.
To color the background, drag a color layer beneath the GIF. Then enable “crop to layer” on the GIF track — the video maker will align all layers to the GIF automatically.
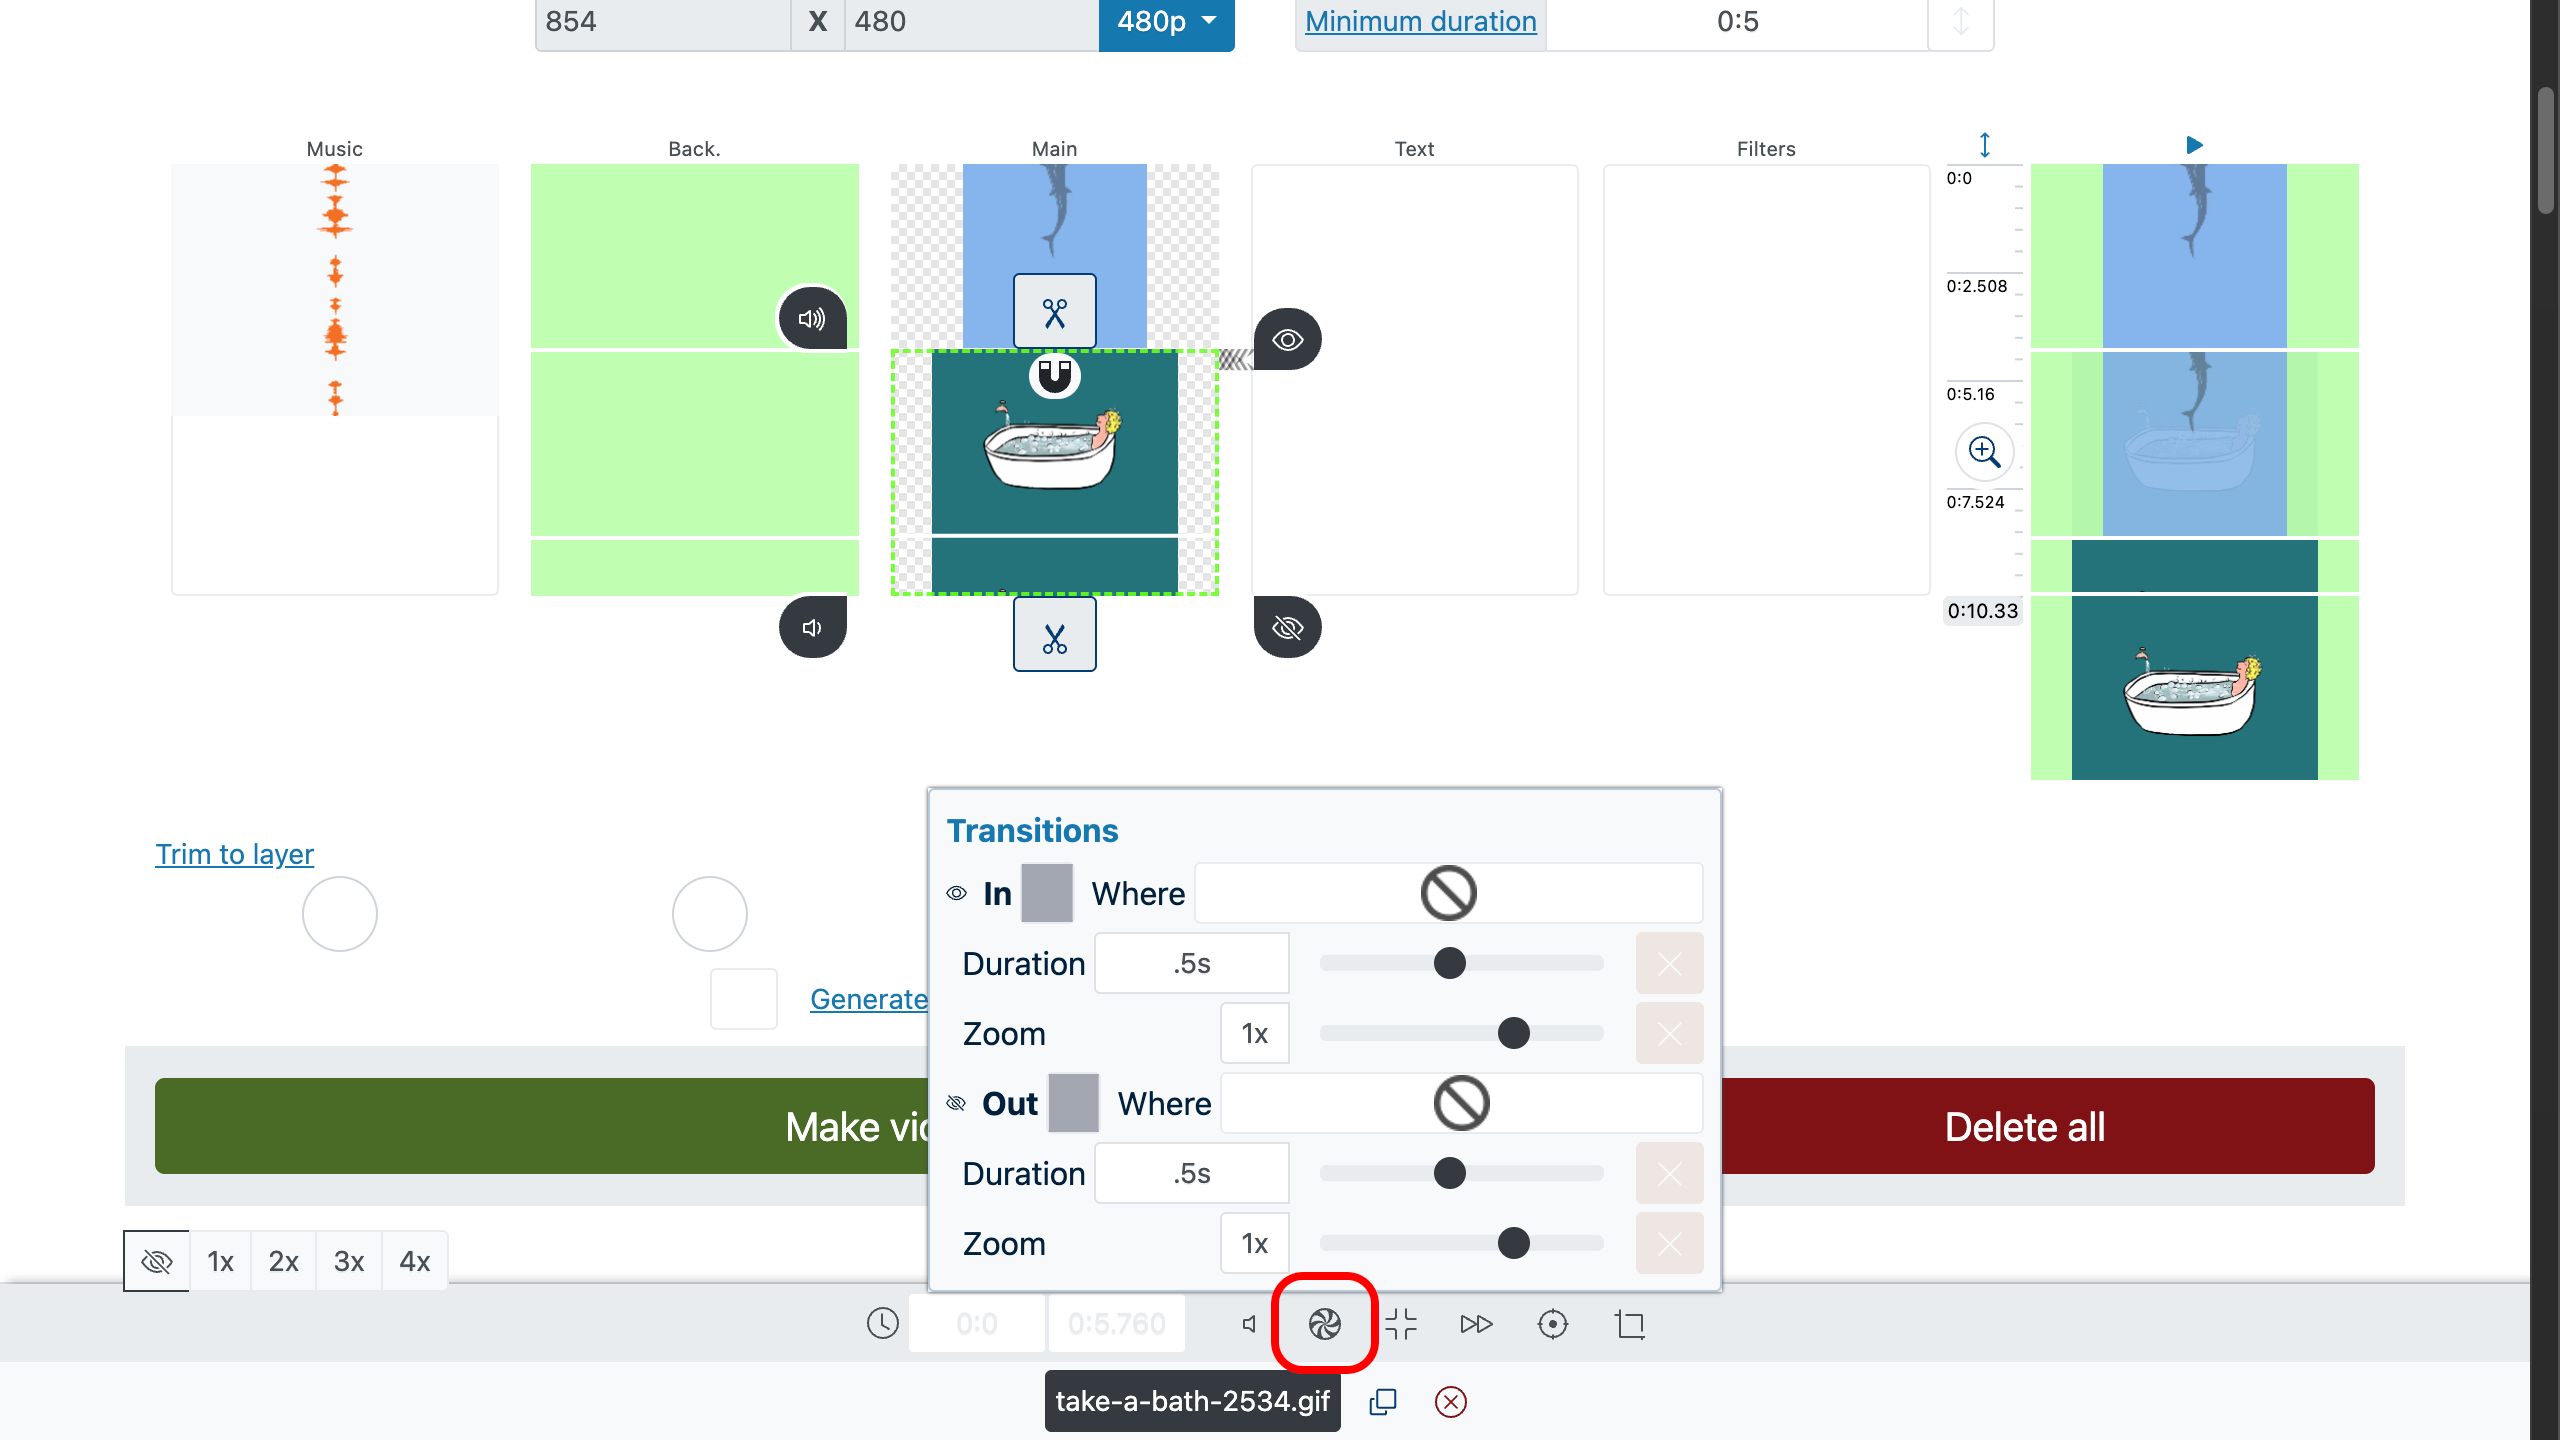
Step 6: Combine Multiple GIFs to Video
You can merge several animations into one timeline. Arrange them in sequence or side by side like a collage. Add smooth transitions or keep direct cuts depending on your project.
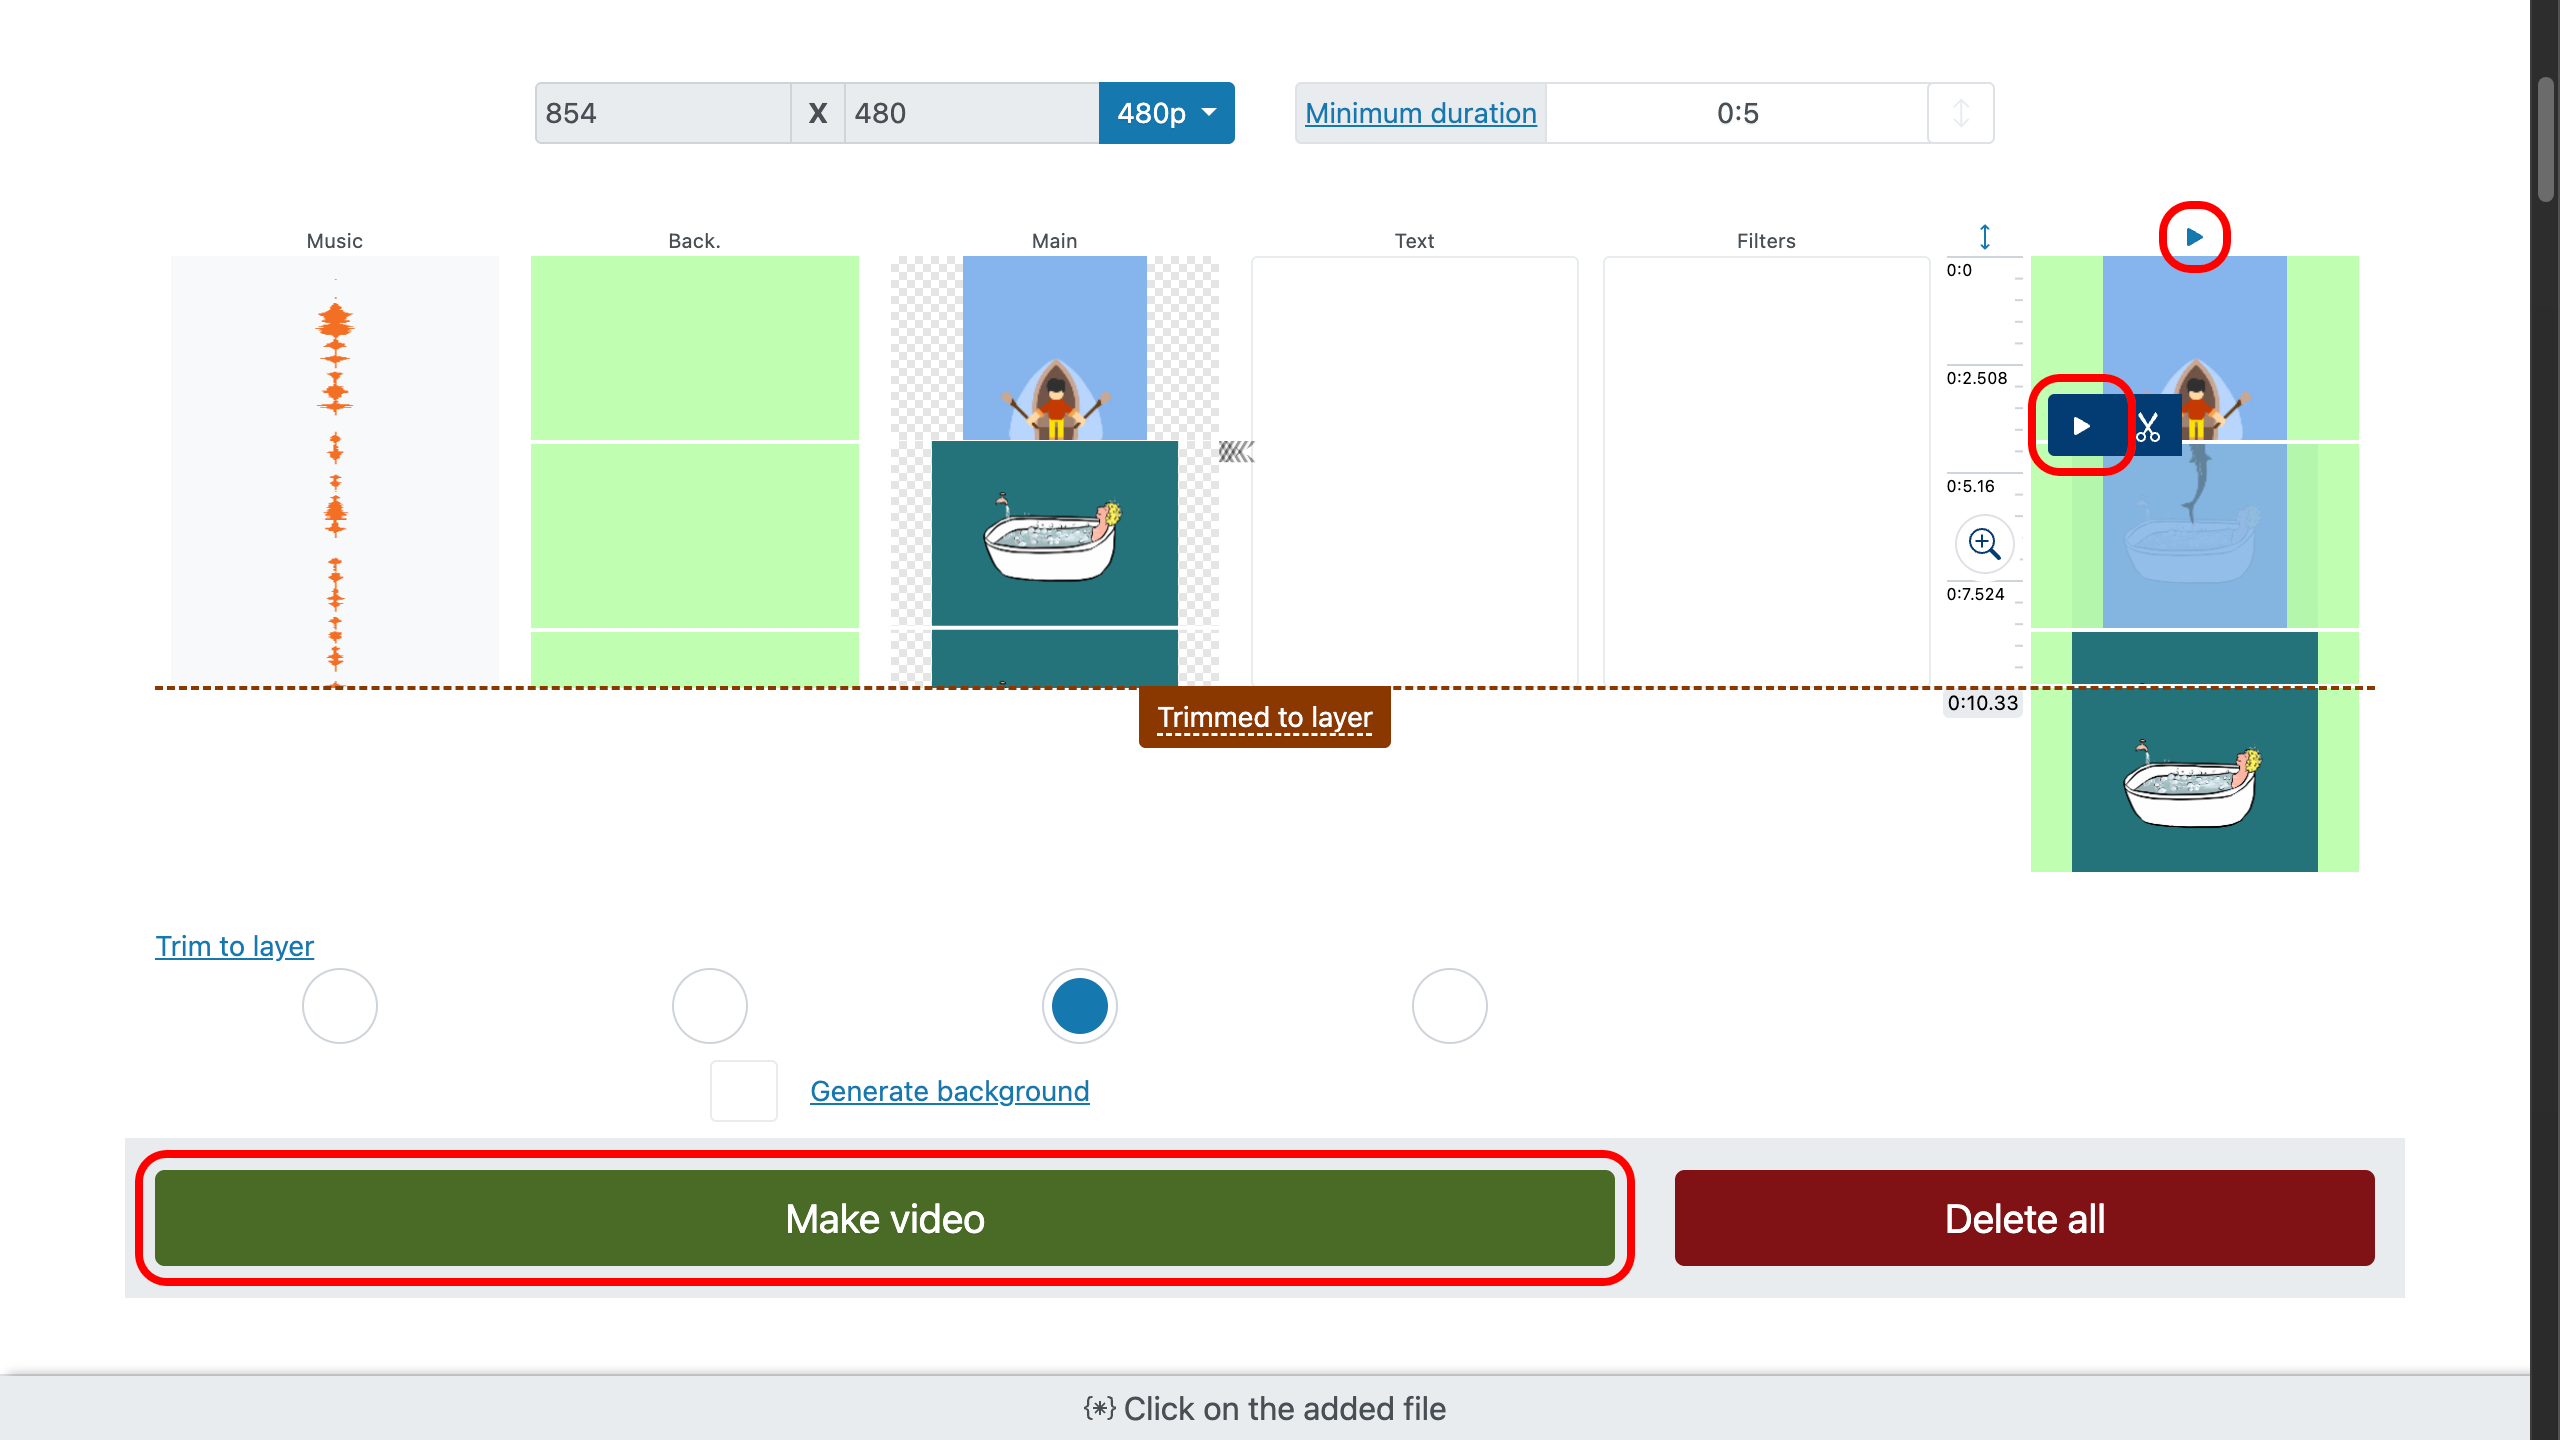
Step 7: Export to MP4
Before saving, use preview: double-click on a moment or the right preview window, then press play. Check that animation, text, and sound look correct.
In the export settings choose MP4 (H.264 + AAC). Recommended values:
- Resolution: source resolution or preset (1080p for YouTube, 720p for smaller files, 1440×2560/1080×1920 for vertical).
- FPS: 24–30 fps for smooth motion.
- Bitrate: VBR or auto; raise it if you notice artifacts.
- Audio: 128–192 kbps for music and speech.
Click “Make Video,” wait for rendering, and download the finished MP4. This process effectively lets you add GIF to MP4 and share it everywhere.
Extra Tips
- Avoid noise: very sharp or patterned GIFs compress poorly.
- Boost contrast: slightly increase clarity to keep details.
- Cropping: if the focus is near edges, prefer Fit mode.
- Duration: 5–15 seconds is ideal for social media clips.
FAQ
Can I add sound? Yes. Convert the file from GIF to video, then add audio in the online app and export.
Why is my MP4 bigger/smaller? Size depends on resolution, fps, and bitrate. Lower one setting for a smaller file.
My video looks jerky. Raise FPS in export or slow down slightly for smoother playback.
Can I merge several animations? Yes, place multiple gifs to video on the timeline and export as one movie.