How to Add Music to a Photo: Step-by-Step Guide
Creating a memorable video means preserving emotions. It could be a warm clip for family and friends, a birthday slideshow, or a stylish reel for a marketplace to attract attention to a product. Adding music to a photo is one of the simplest yet most impactful ways to create mood and make your content truly unforgettable.
Below is a step-by-step guide on how to quickly and easily combine music and photos directly in your browser, on any device: iPhone, Android, Mac, or PC.
It takes less than
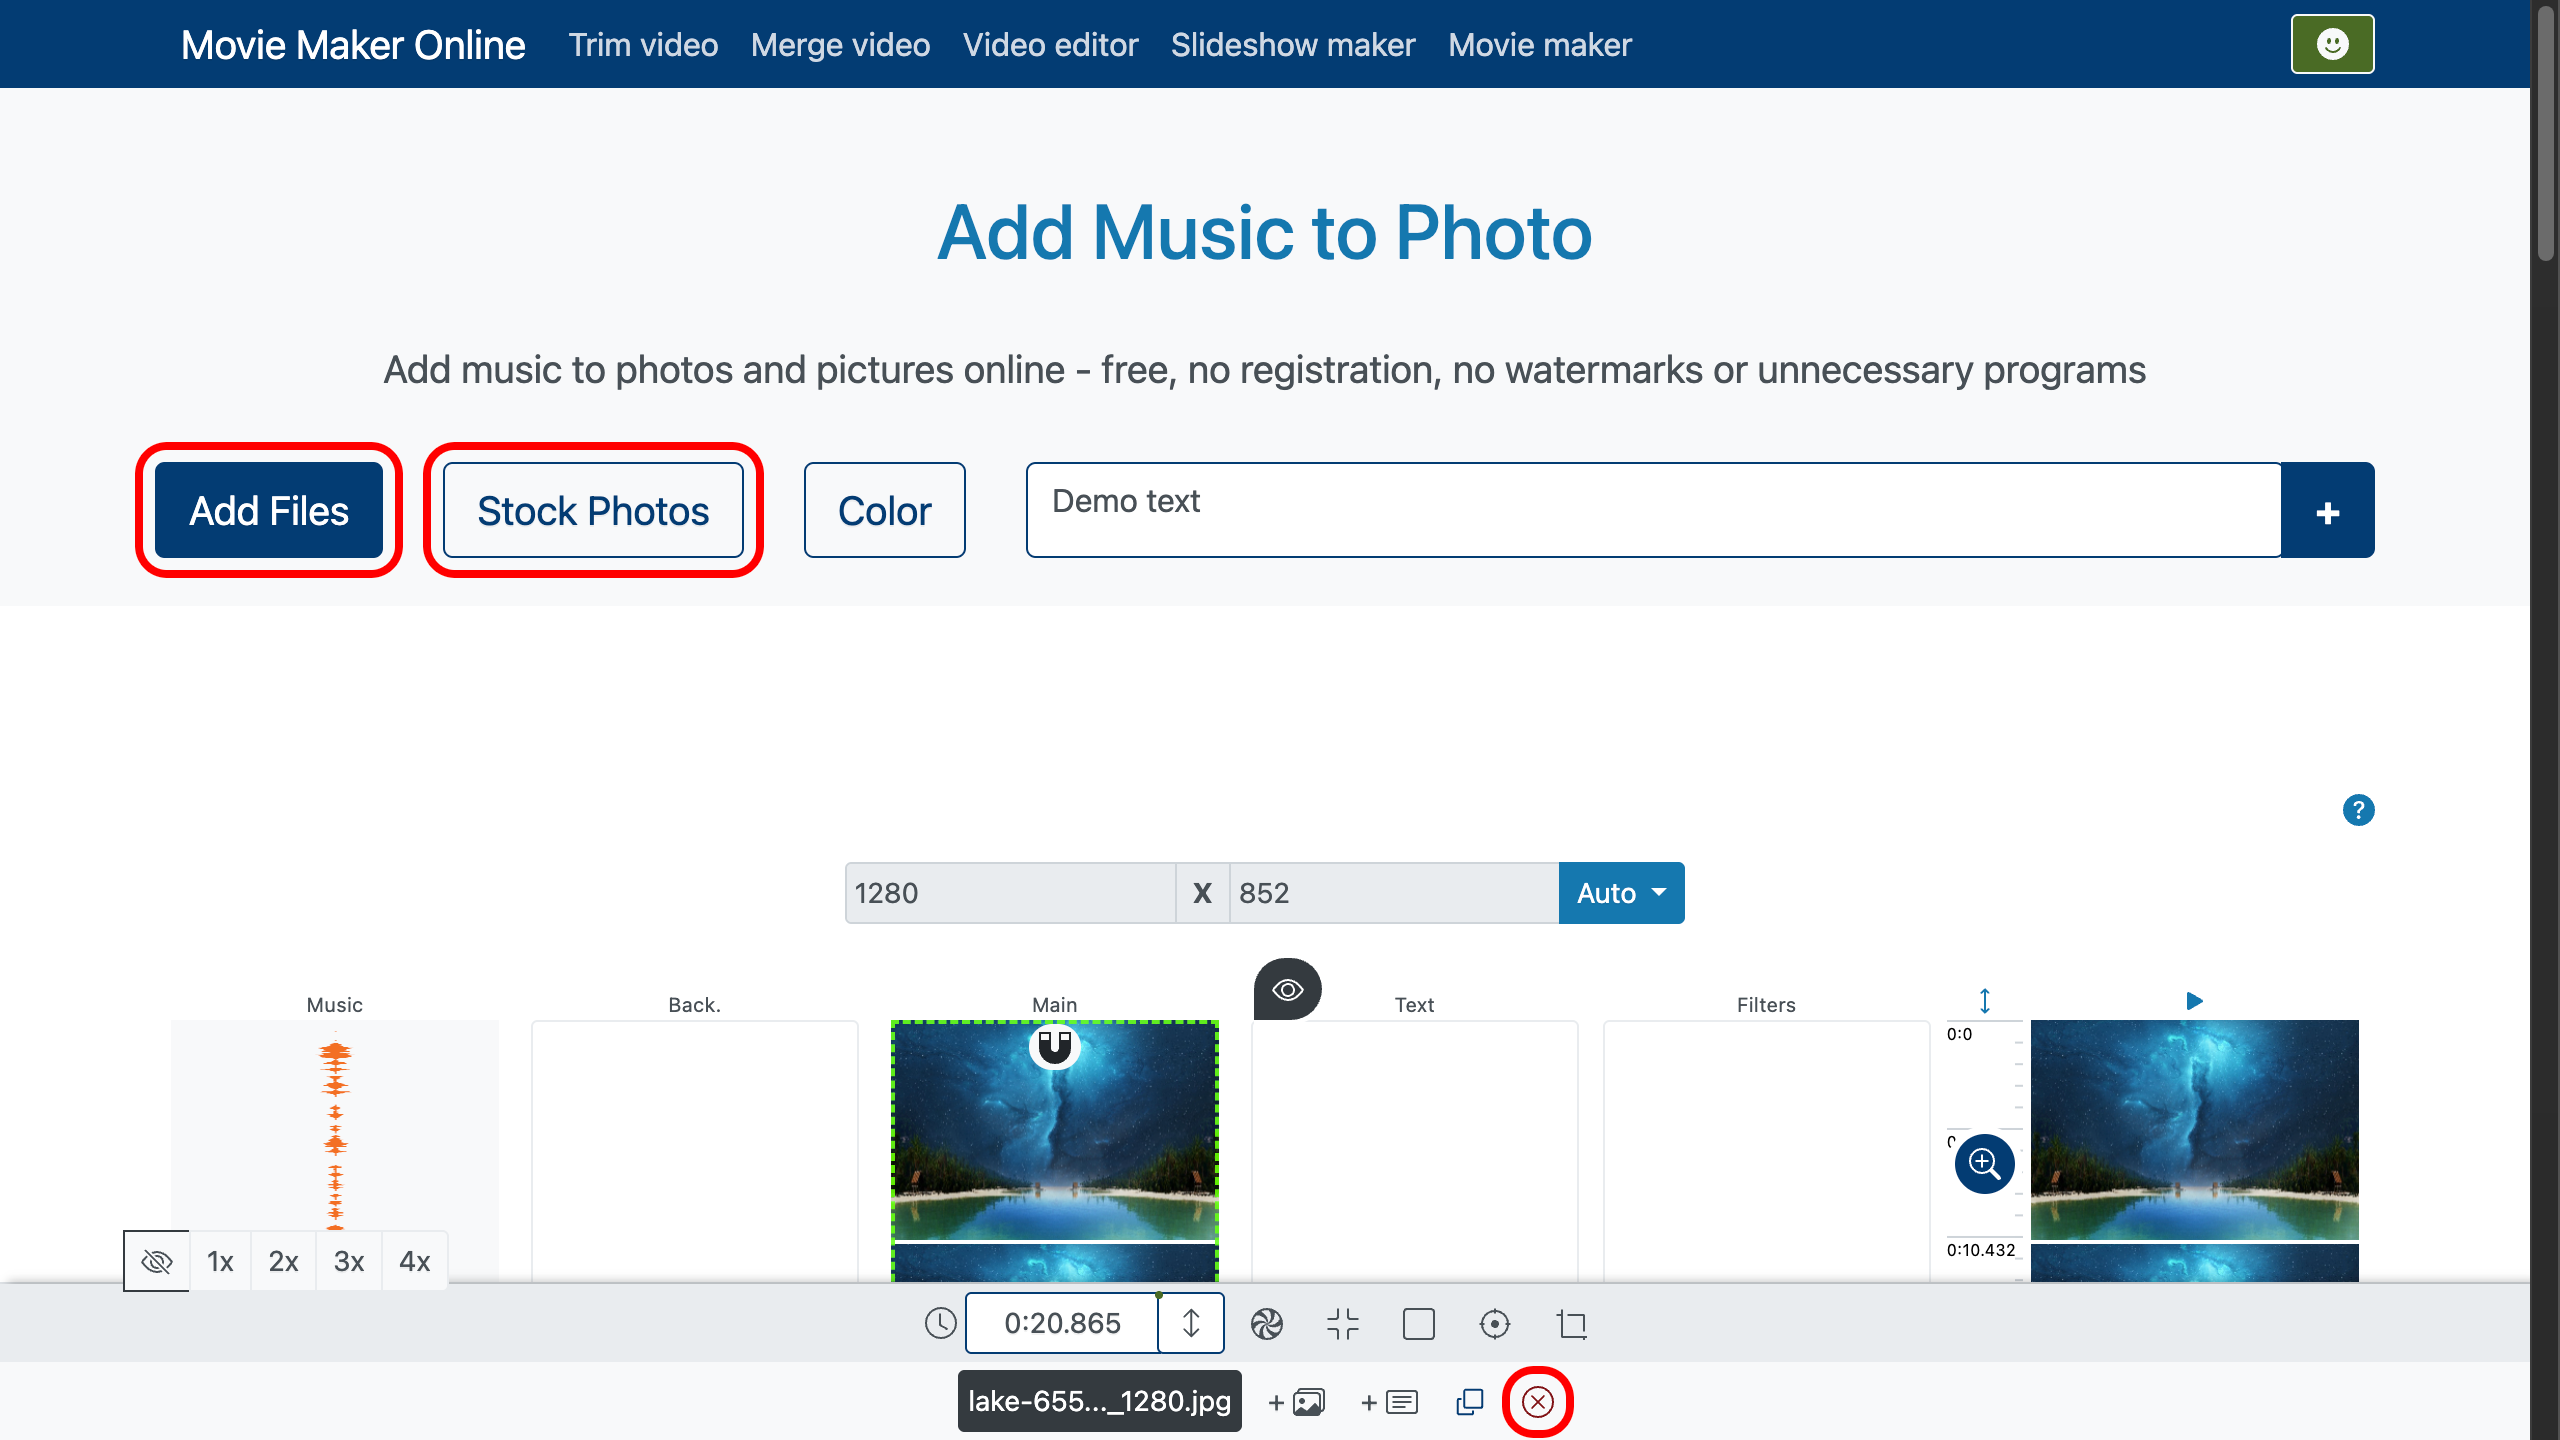
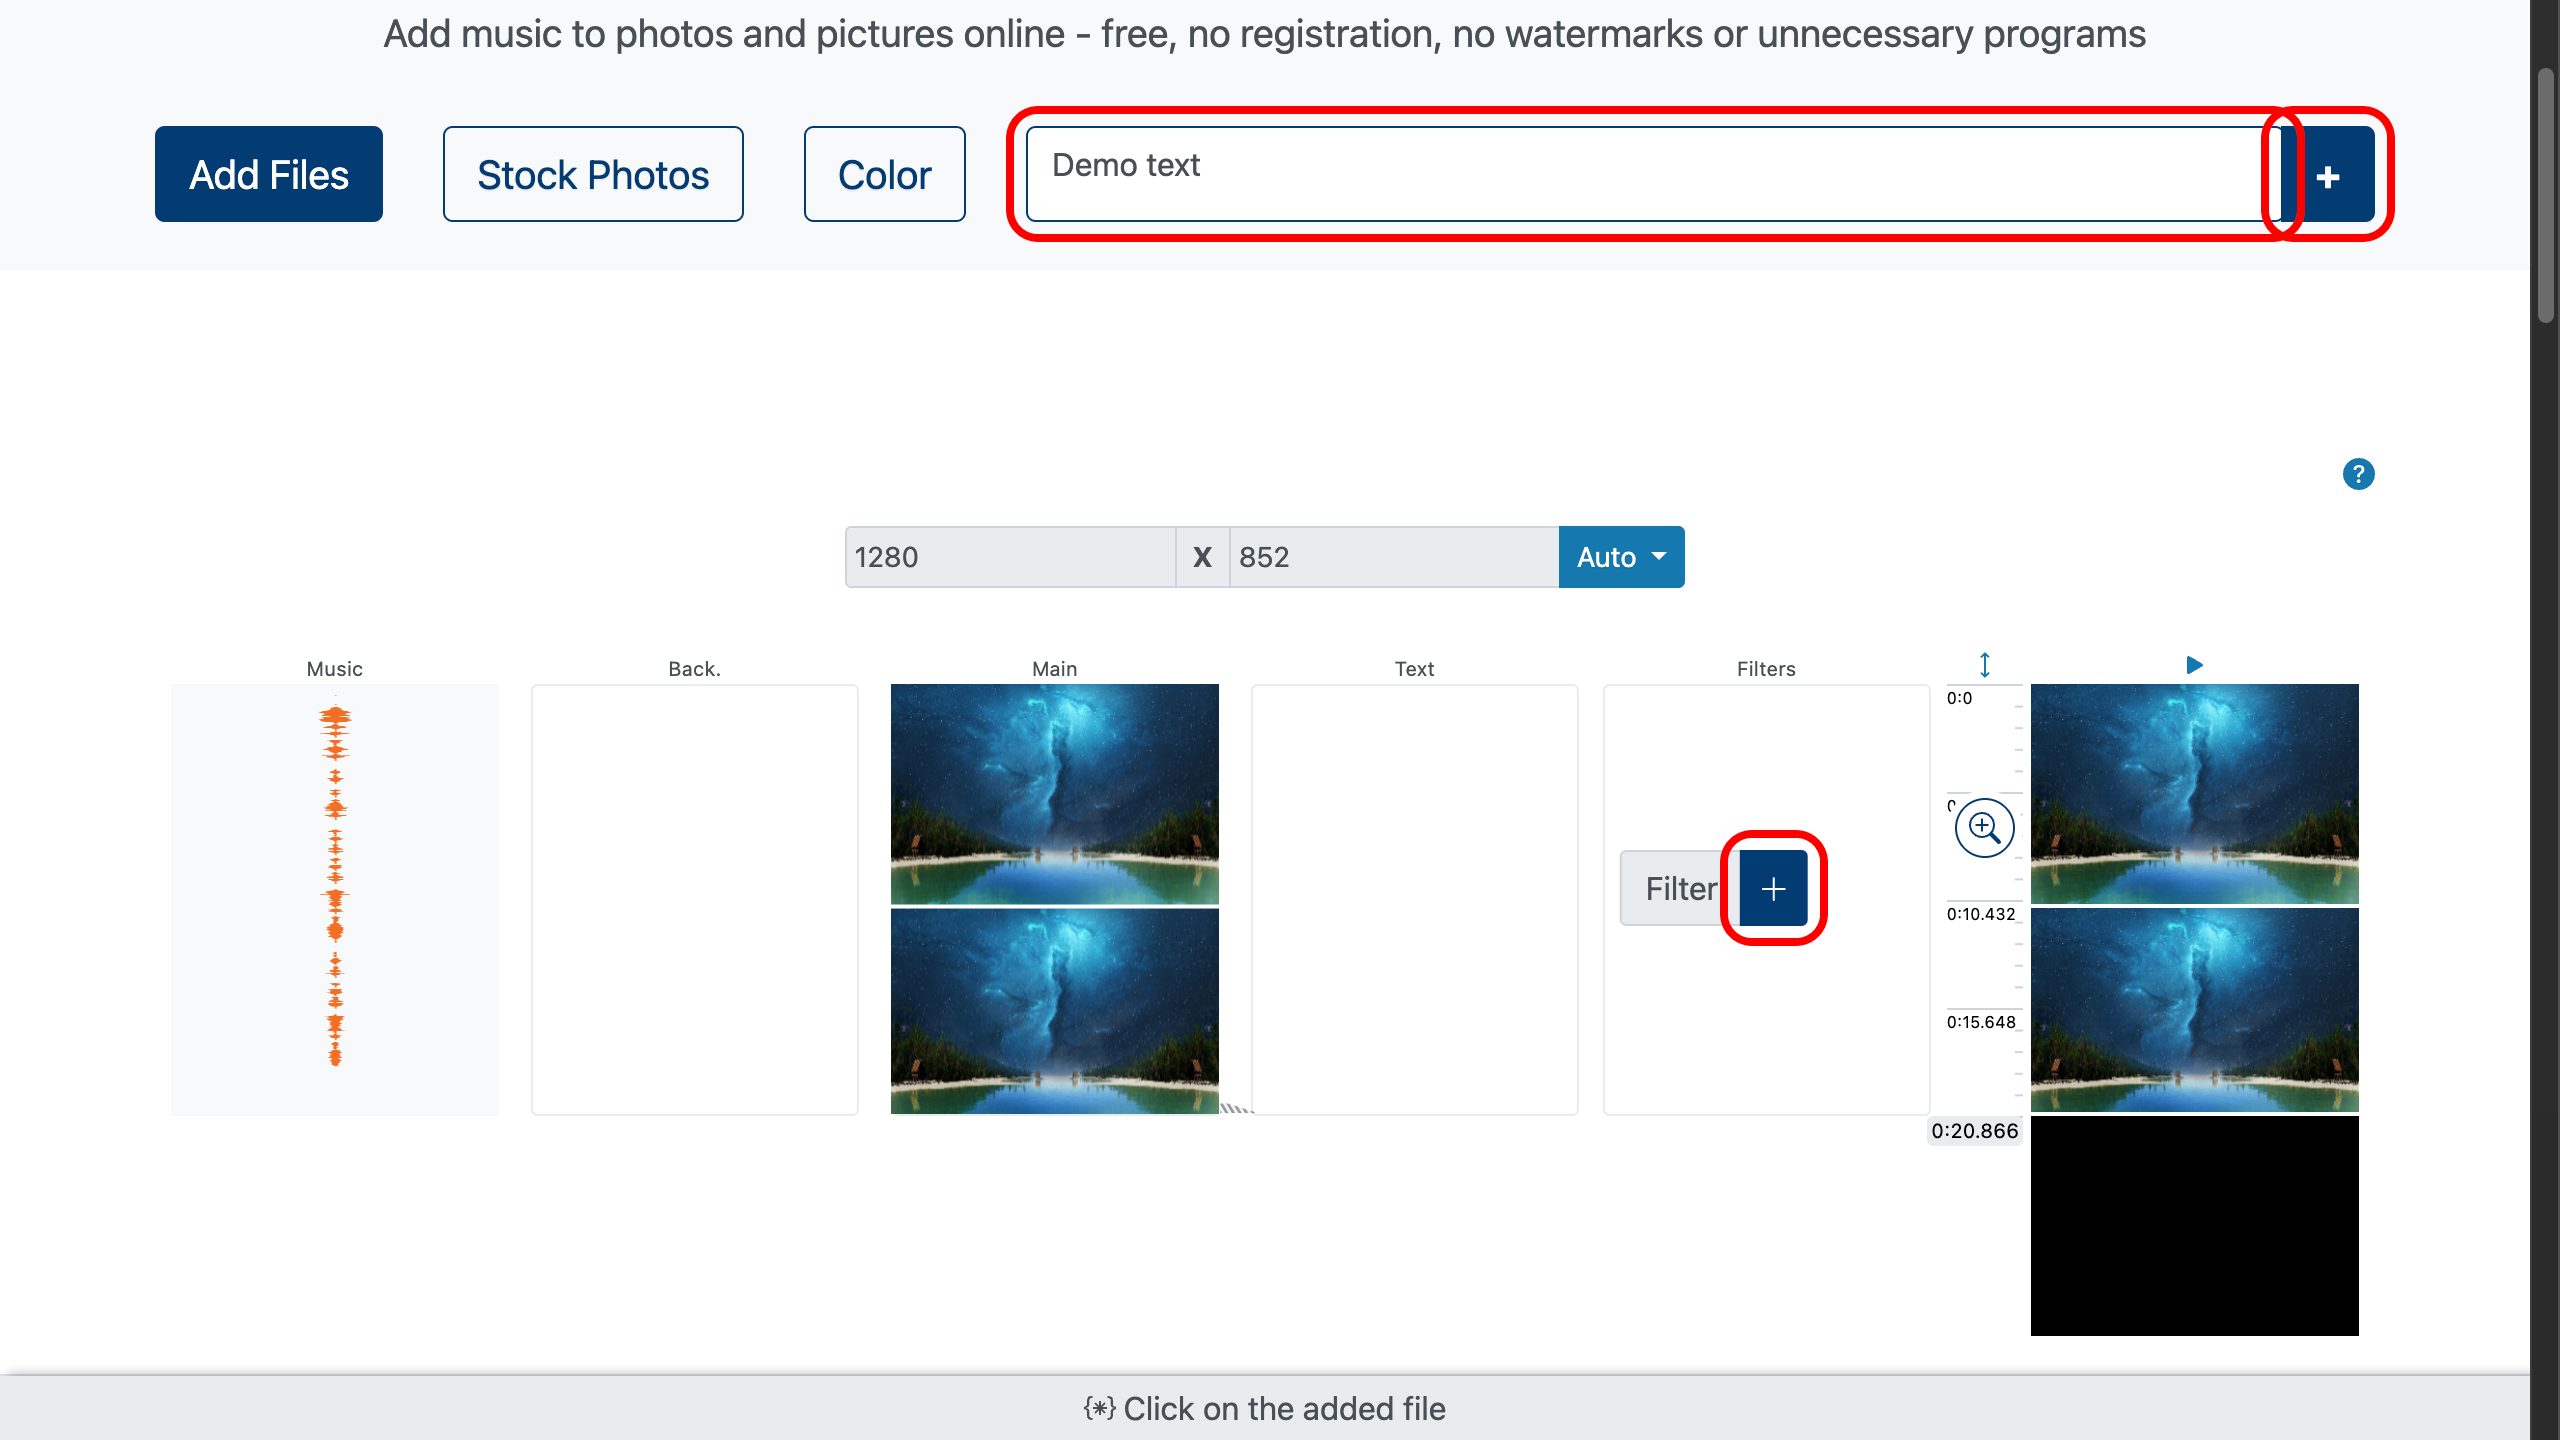
Step 1: Upload Photos and Music
Start by uploading images — one or multiple. You can use any format: JPG, PNG, HEIC, and others. You can also upload music in any format — MP3, WAV, M4A, AAC, etc. All photos will appear on the main layer, and the music on the audio track.
You can also choose photos and images from the built-in free photo stock directly in the editor — convenient, fast, and without copyright restrictions.
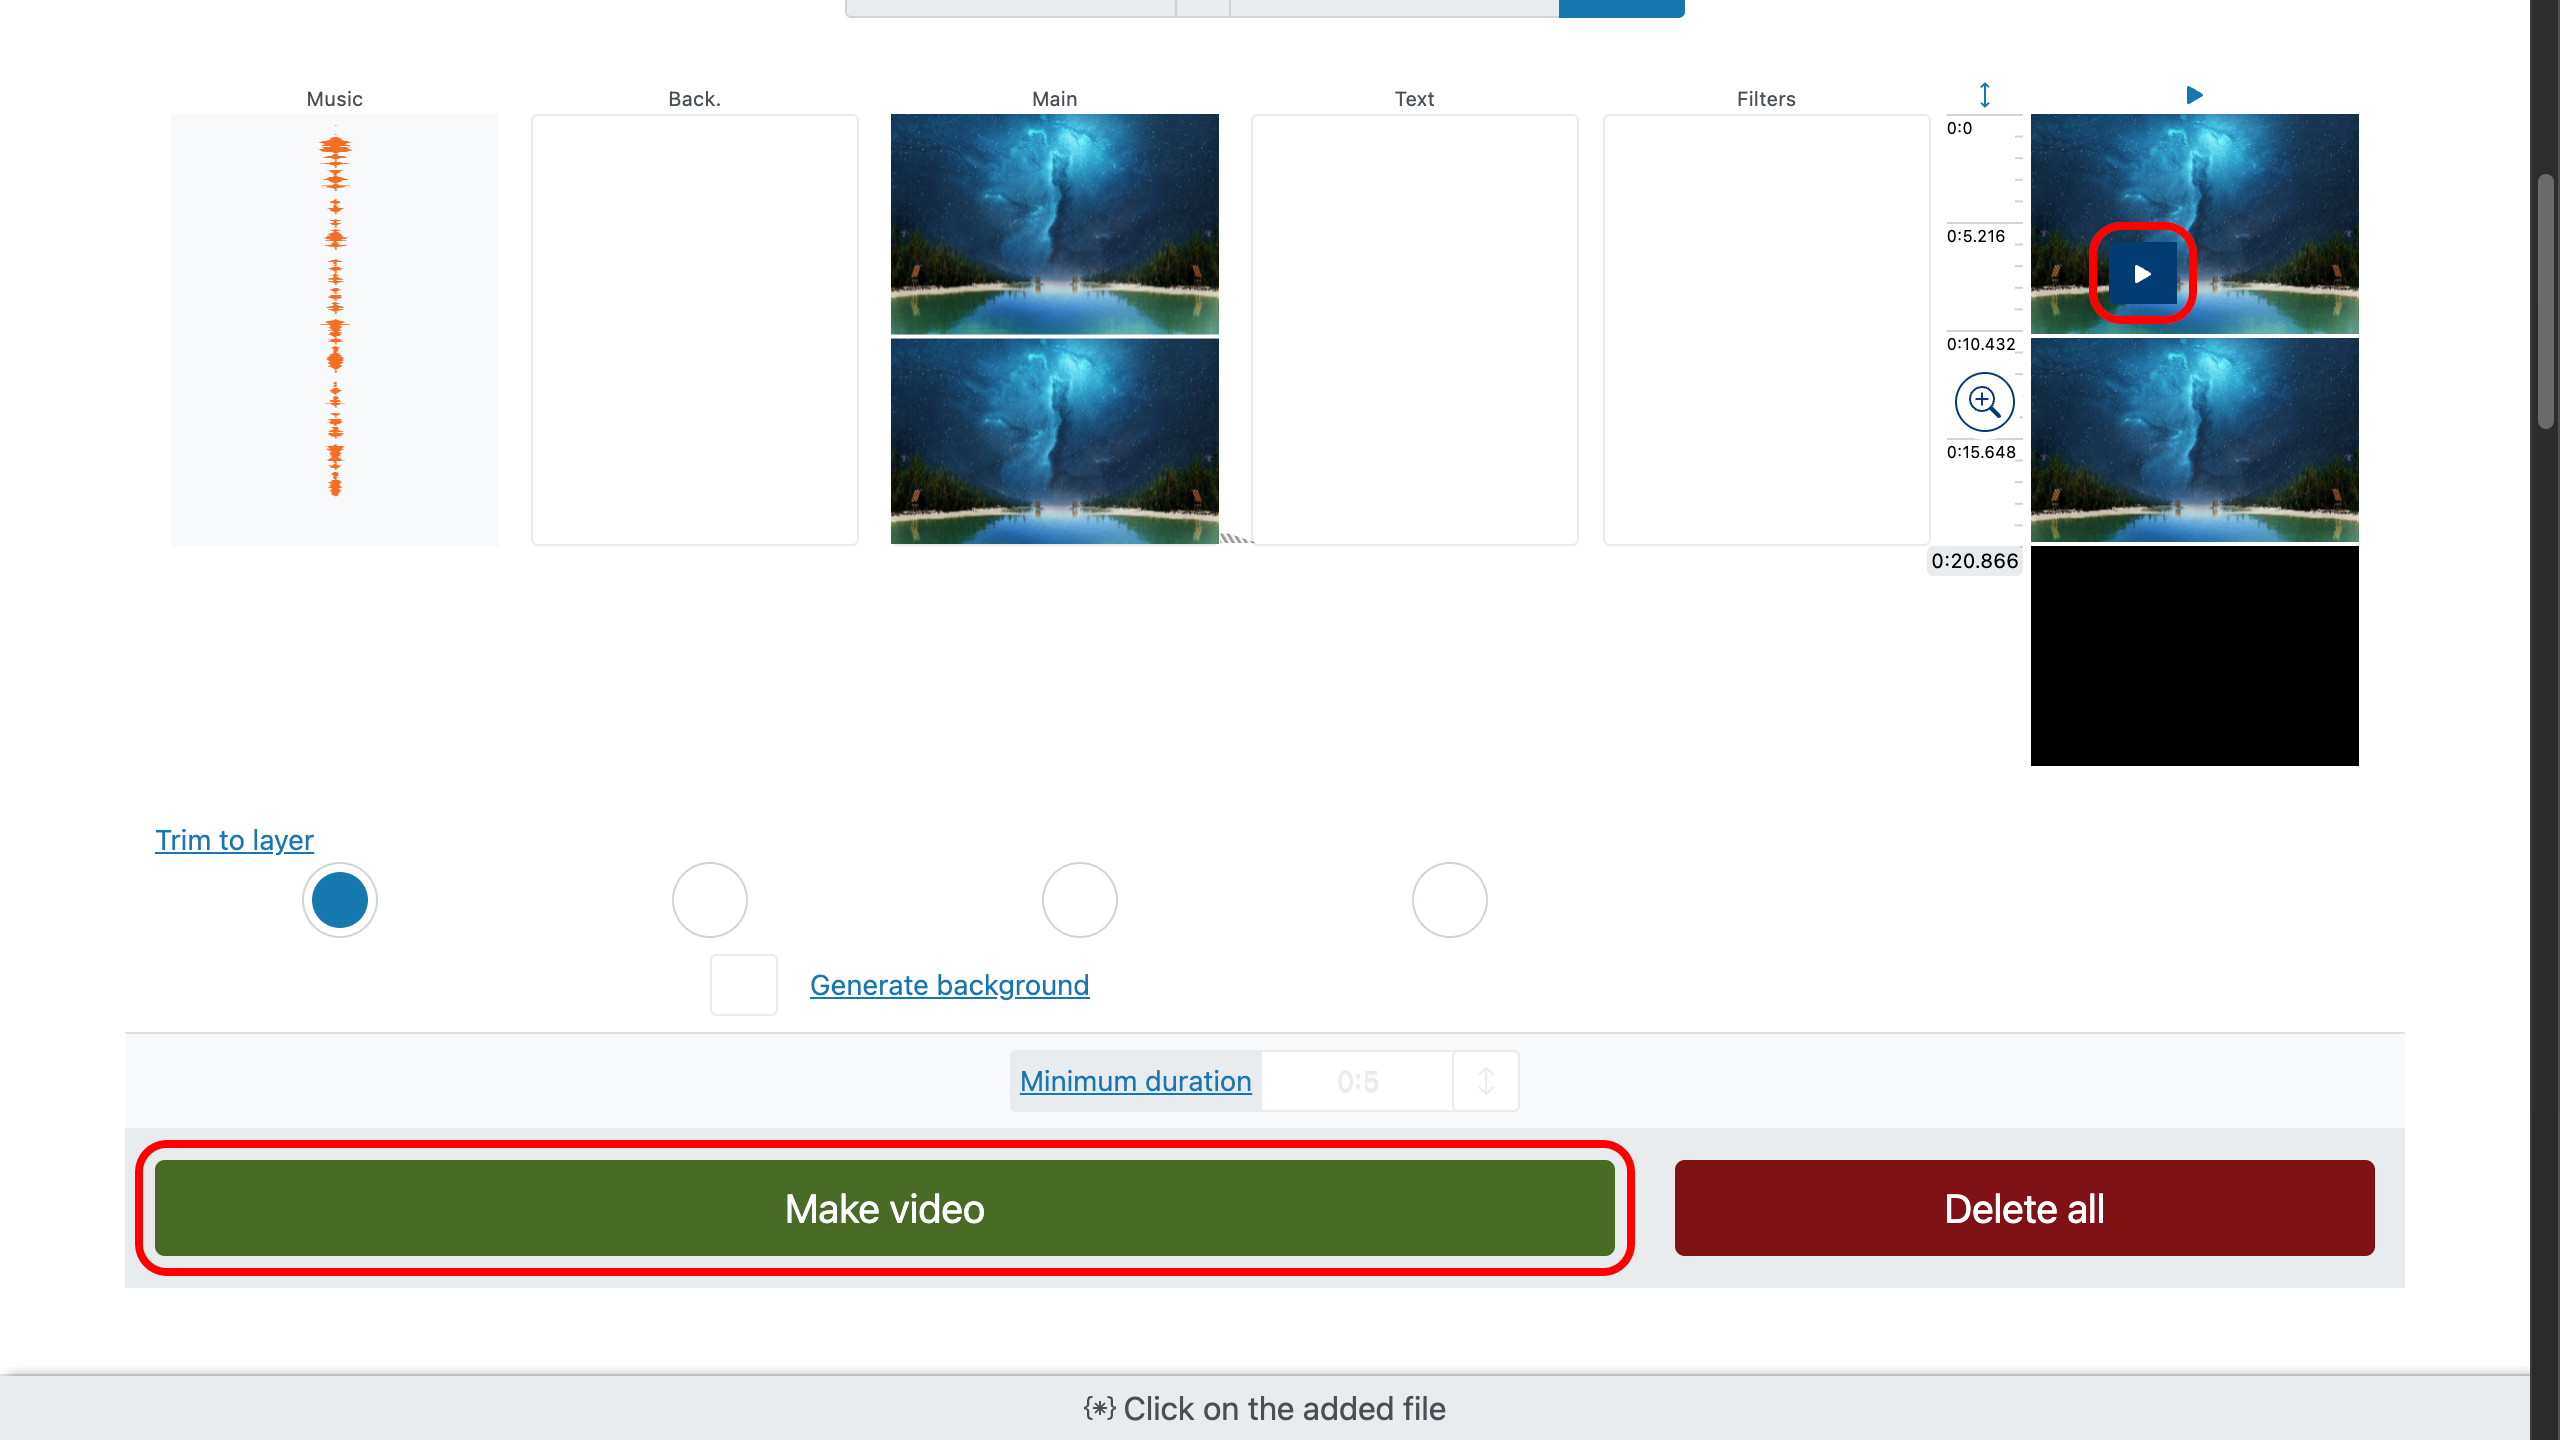
To delete an uploaded file, click the trash icon in the property panel of the corresponding element.
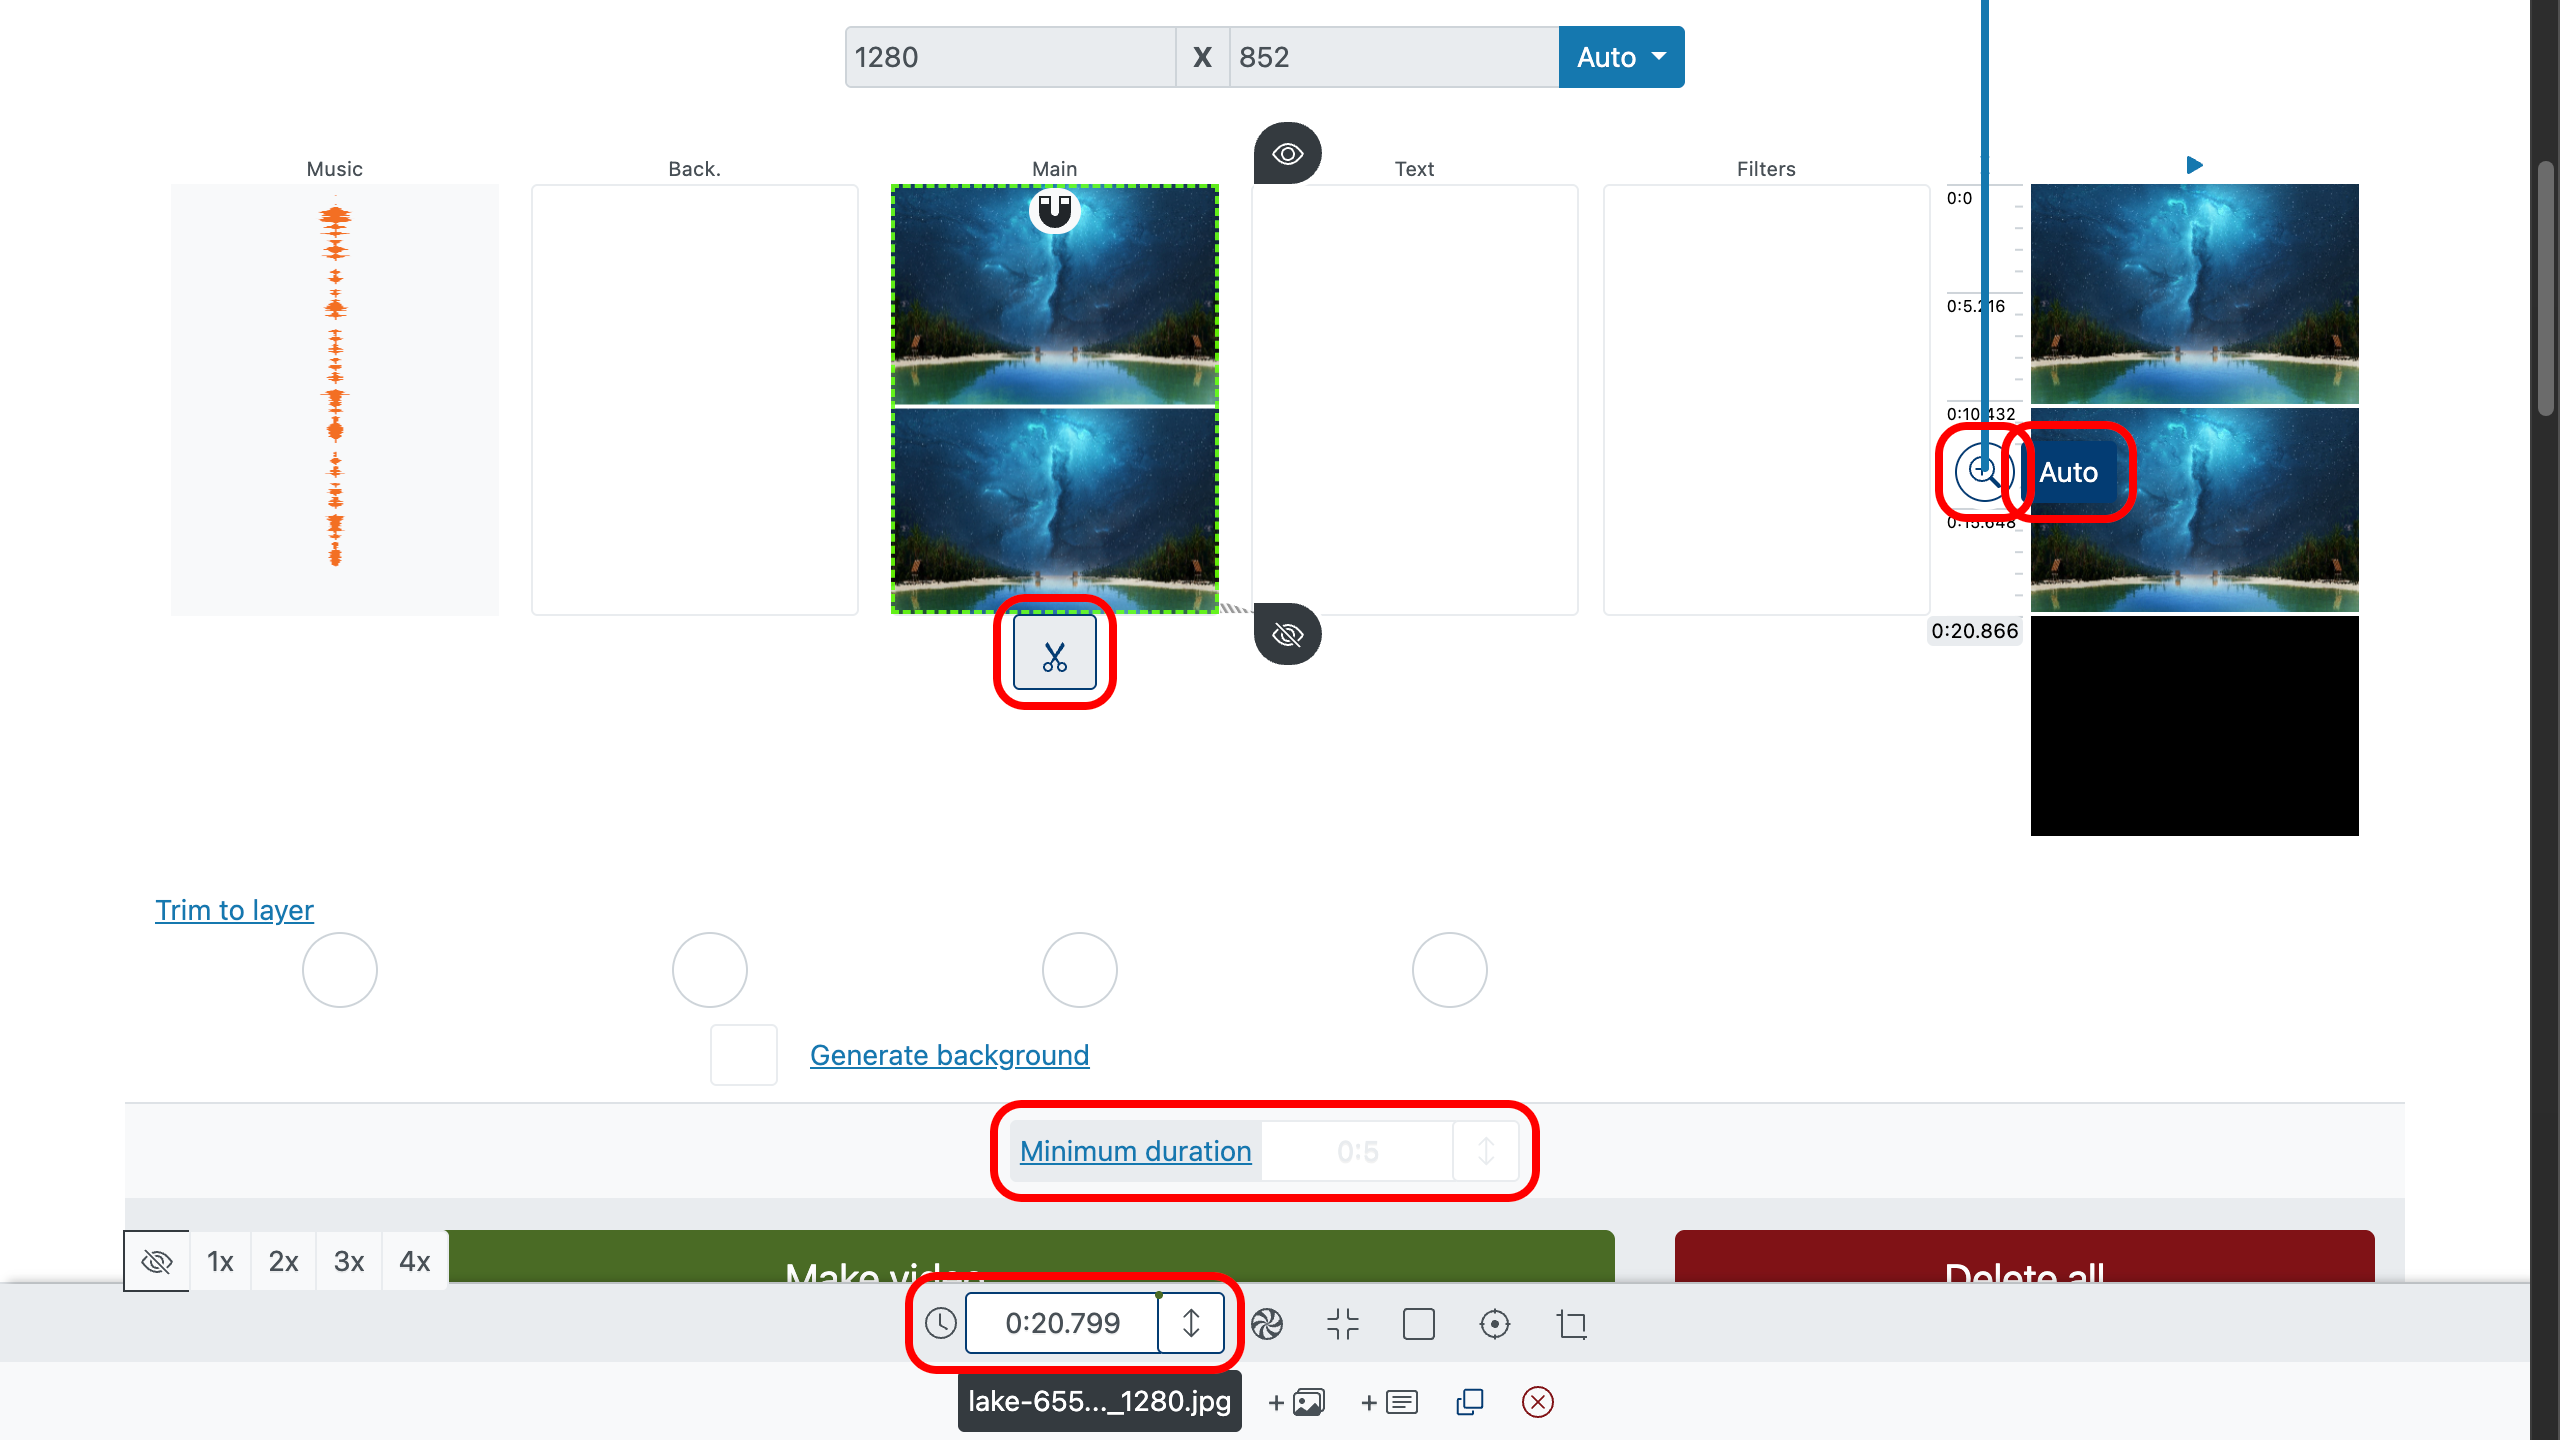
Step 2: Set Photo Order and Duration
The video editor uses a vertical timeline — especially handy on smartphones. Photos placed lower will appear later. Photos to the right will overlap those on the left in the frame.
To change the duration of each image, use the slider at the bottom edge or enter a precise value manually. The minimum duration is limited by the system and cannot be lower than the set value.
For easier editing, you can zoom the timeline: just drag the zoom button. This allows you to precisely control element durations and positions. To return to automatic zoom — click the "Auto" button.
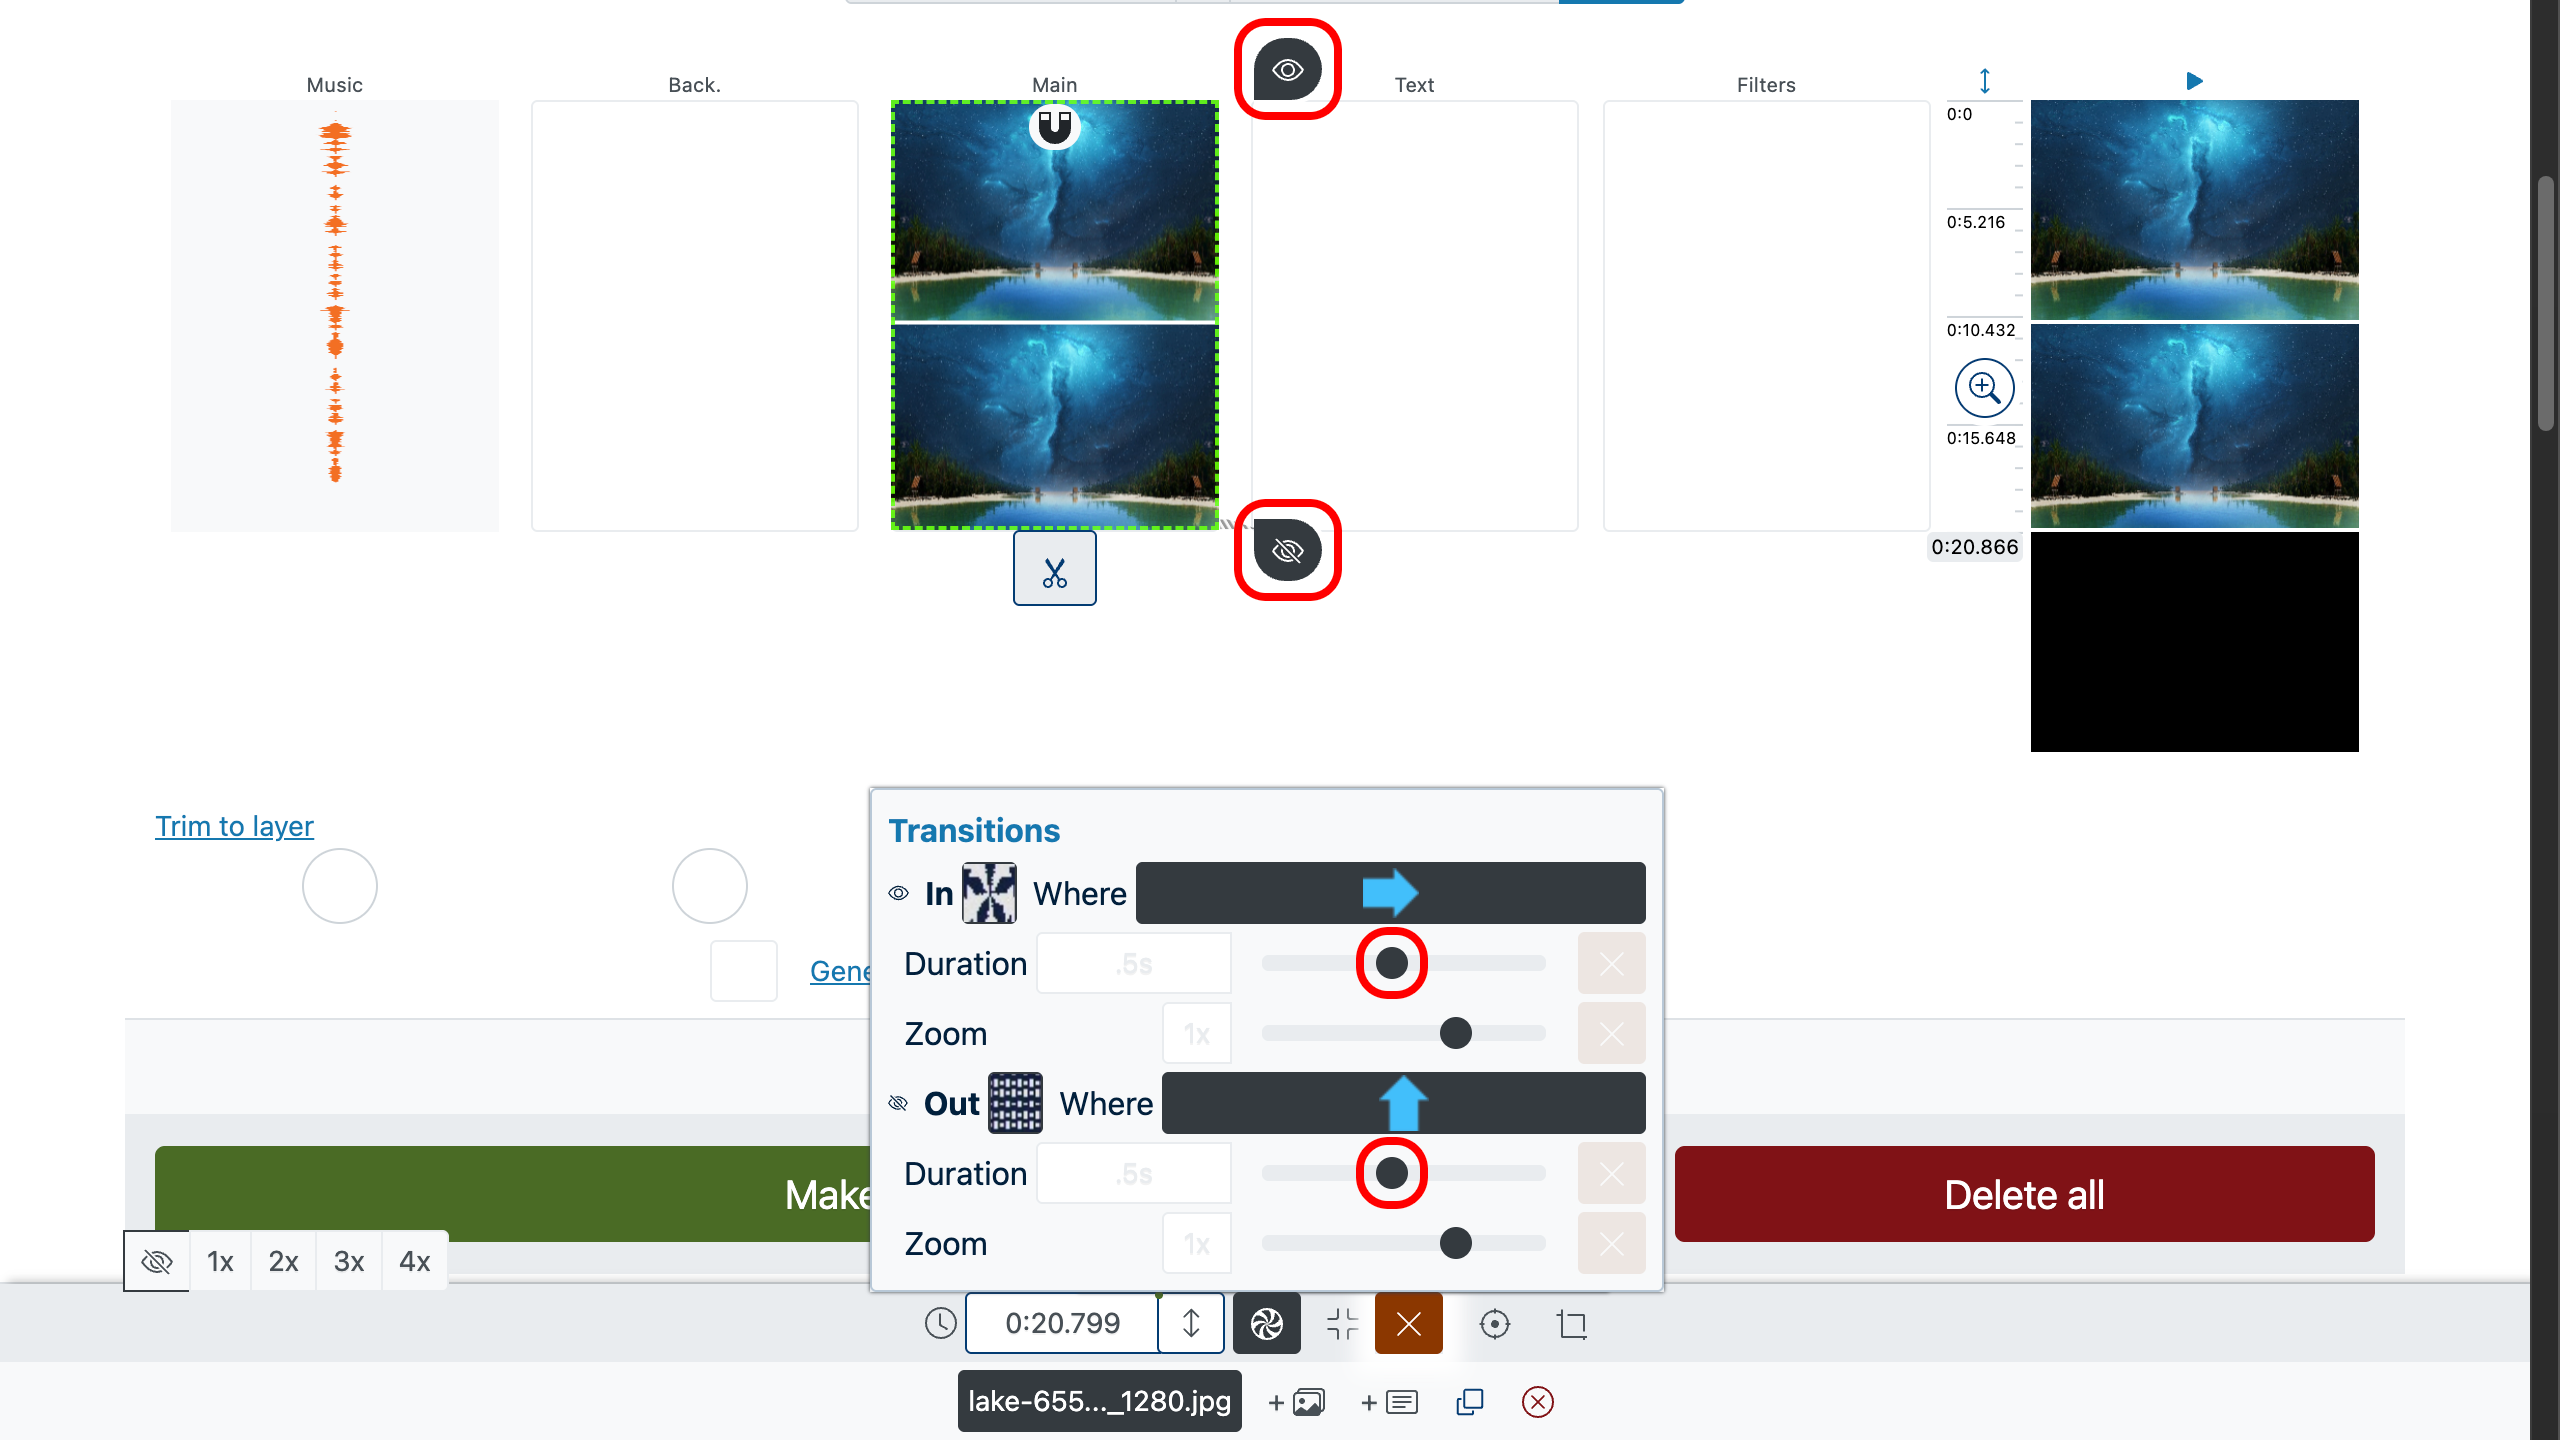
Step 3: Add Smooth Transitions
To blend music and photos as effectively as possible, use transitions between frames. This gives the video a finished look and makes viewing pleasant. You can set transition duration using the sliders on the right or enter a precise value in the properties panel.
Additionally, for each element, you can set start and end scale, and direction of appearance and disappearance — for example, to make the image "fly in" from the left and "fade out" upward.
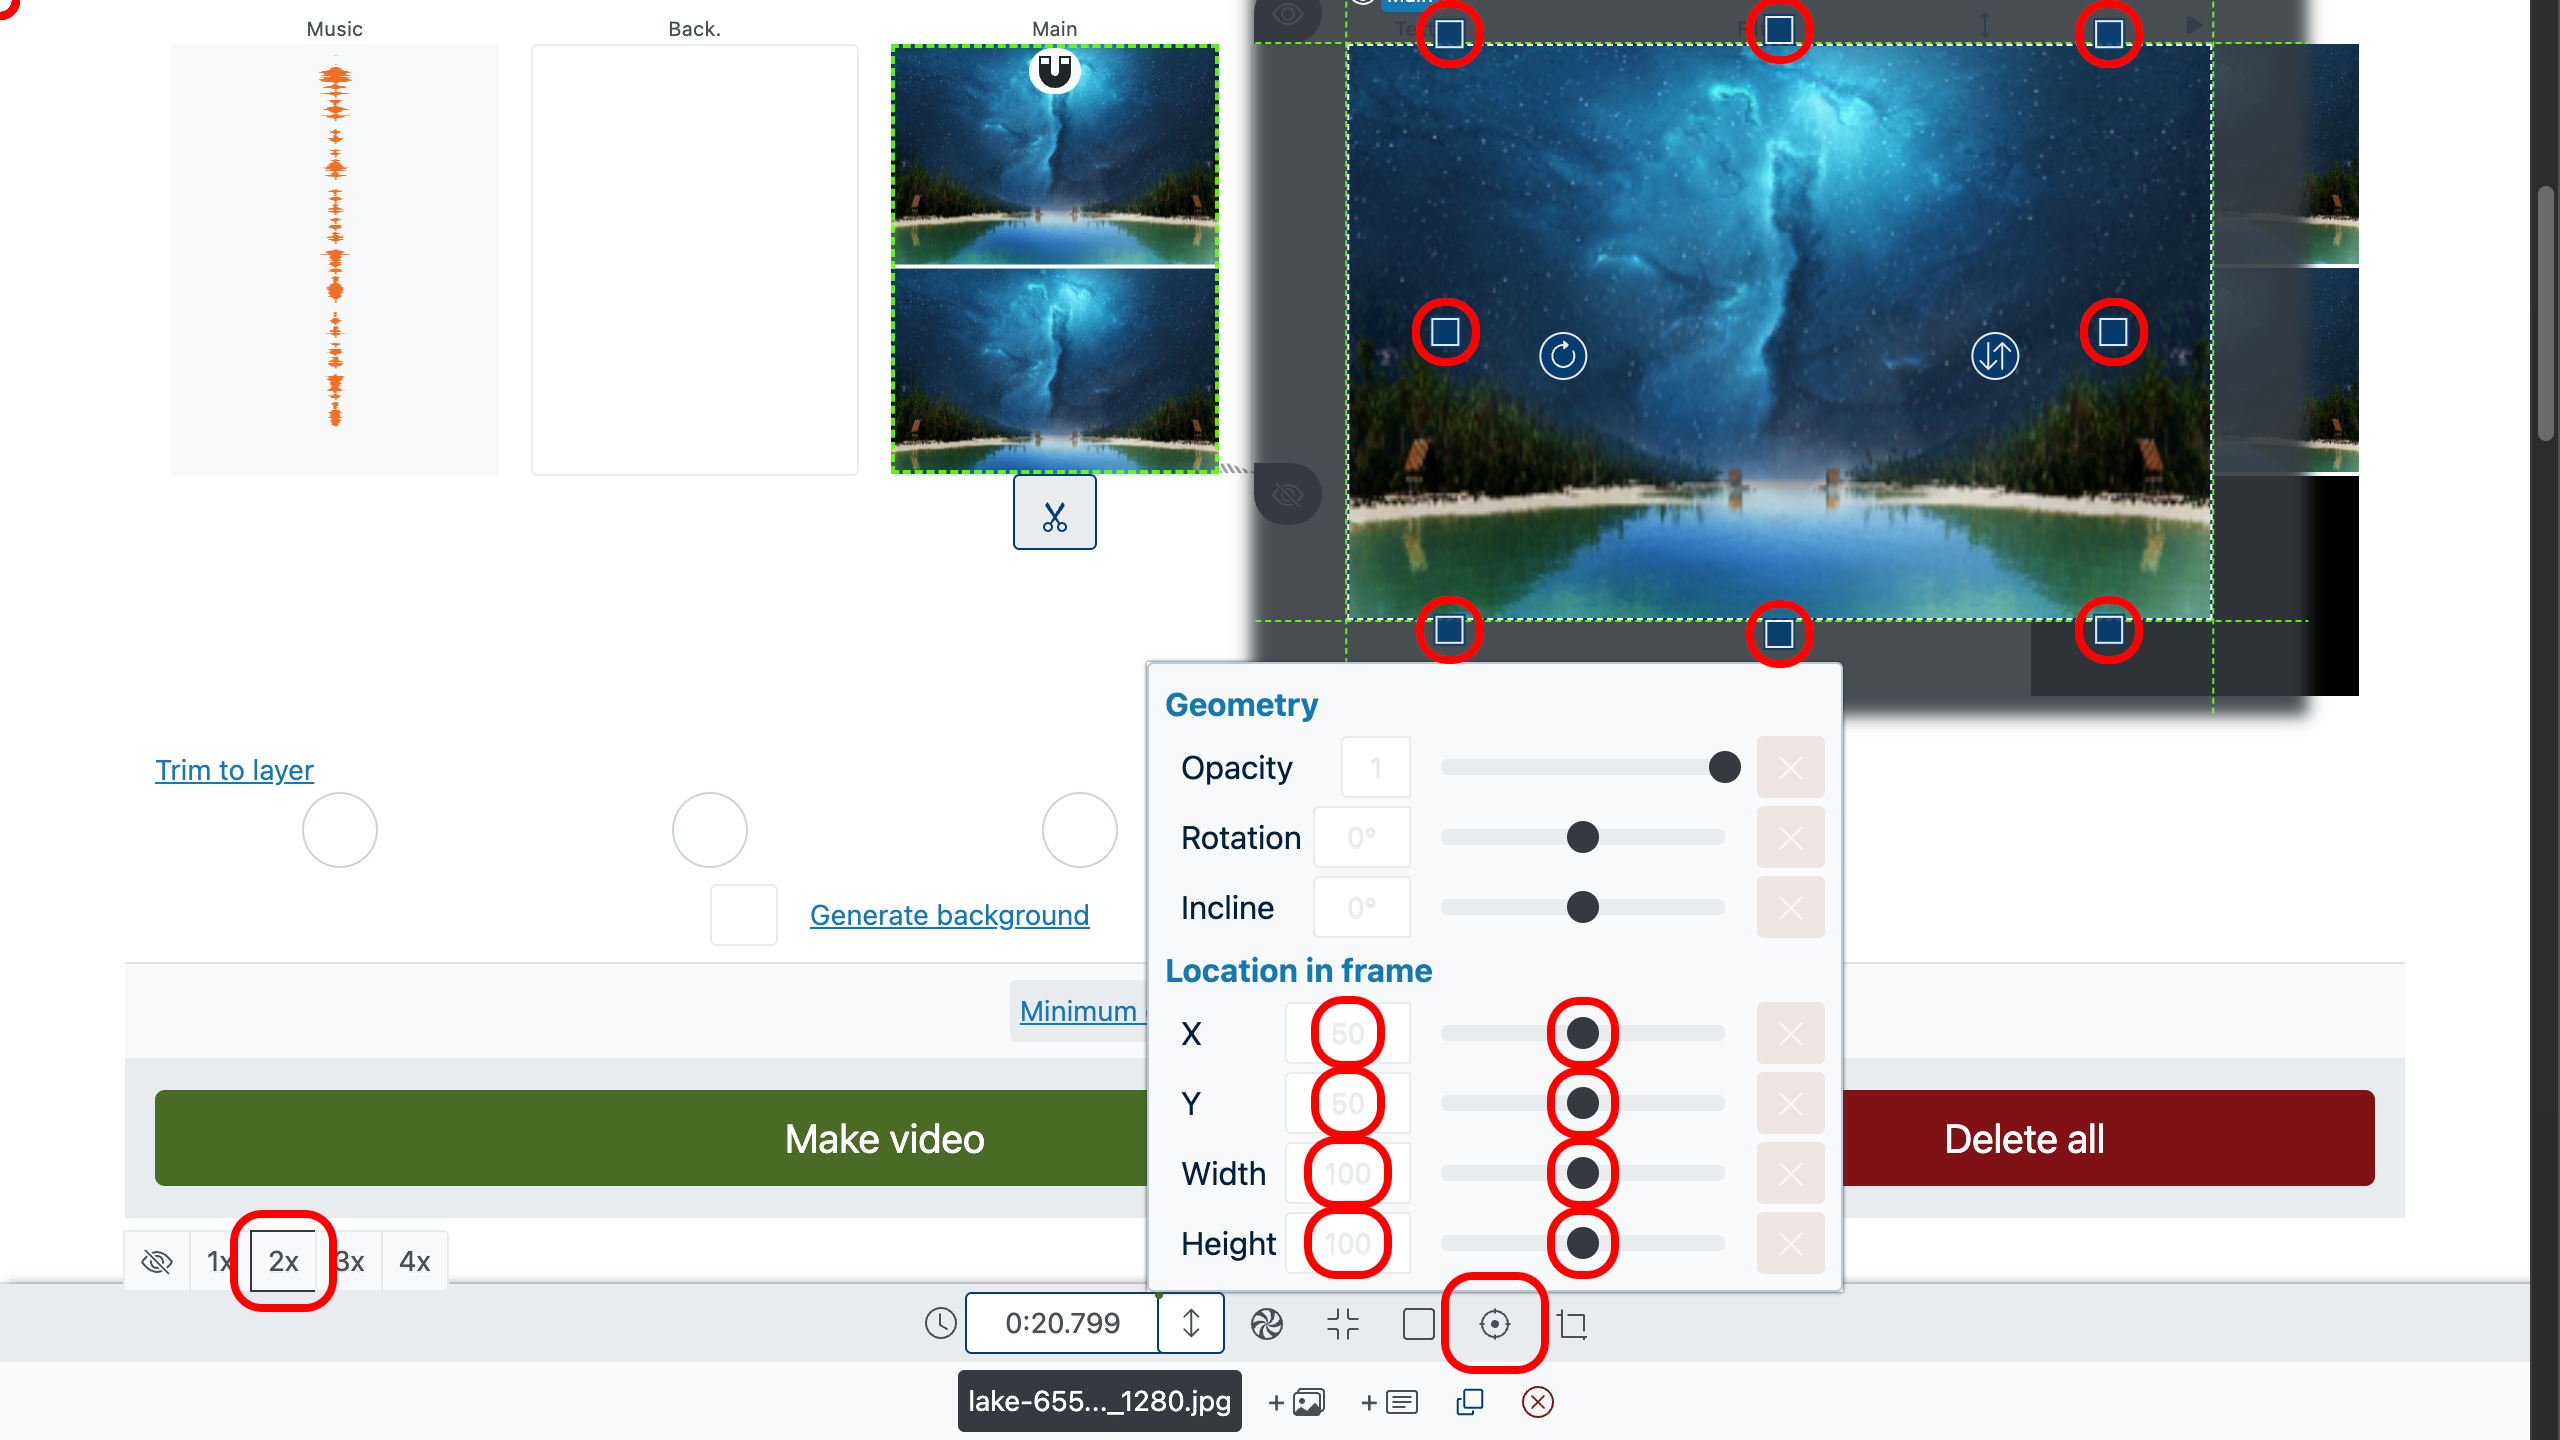
Step 4: Crop Photo and Video Edges
In the editor, you can crop the image edges if it exceeds the frame or needs to focus on an important detail. To do this, drag the sliders on the sides of the photo directly in the editing area.
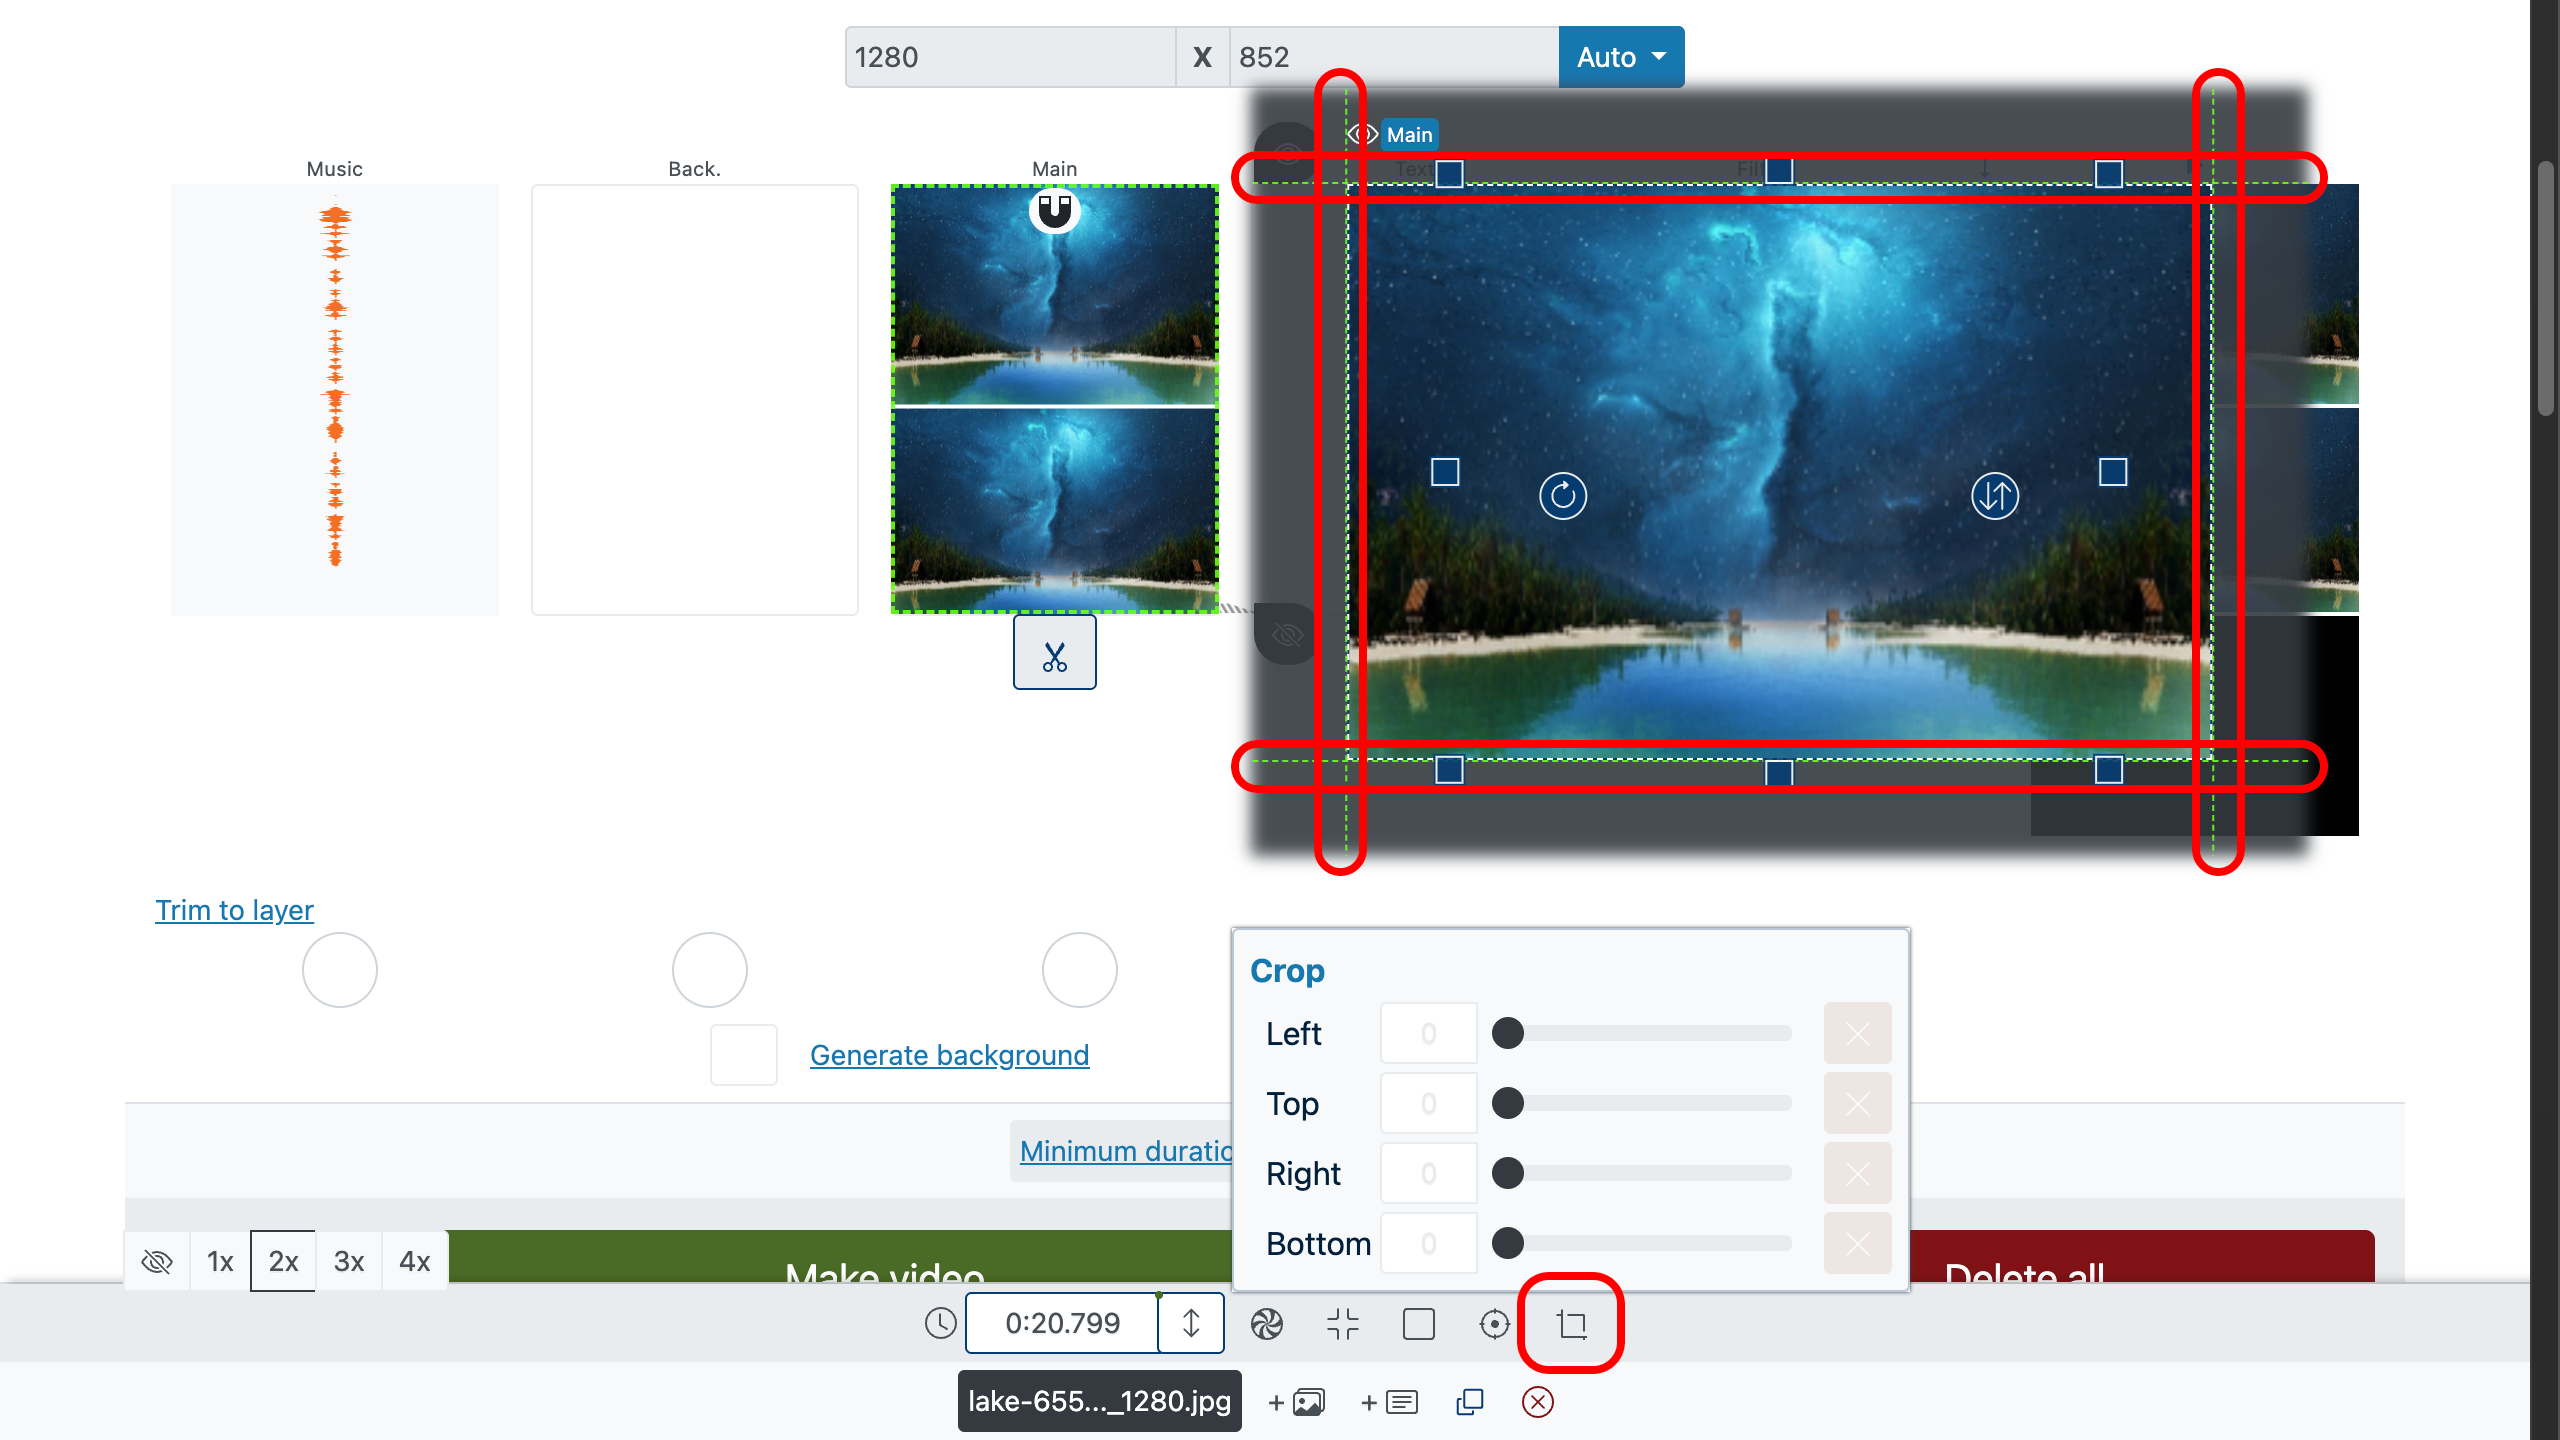
In the same editor, you can set the position and scale of the image in the frame to precisely adjust placement and composition.
You can enable or disable the editing mode using the corresponding button in the property panel of the selected image.
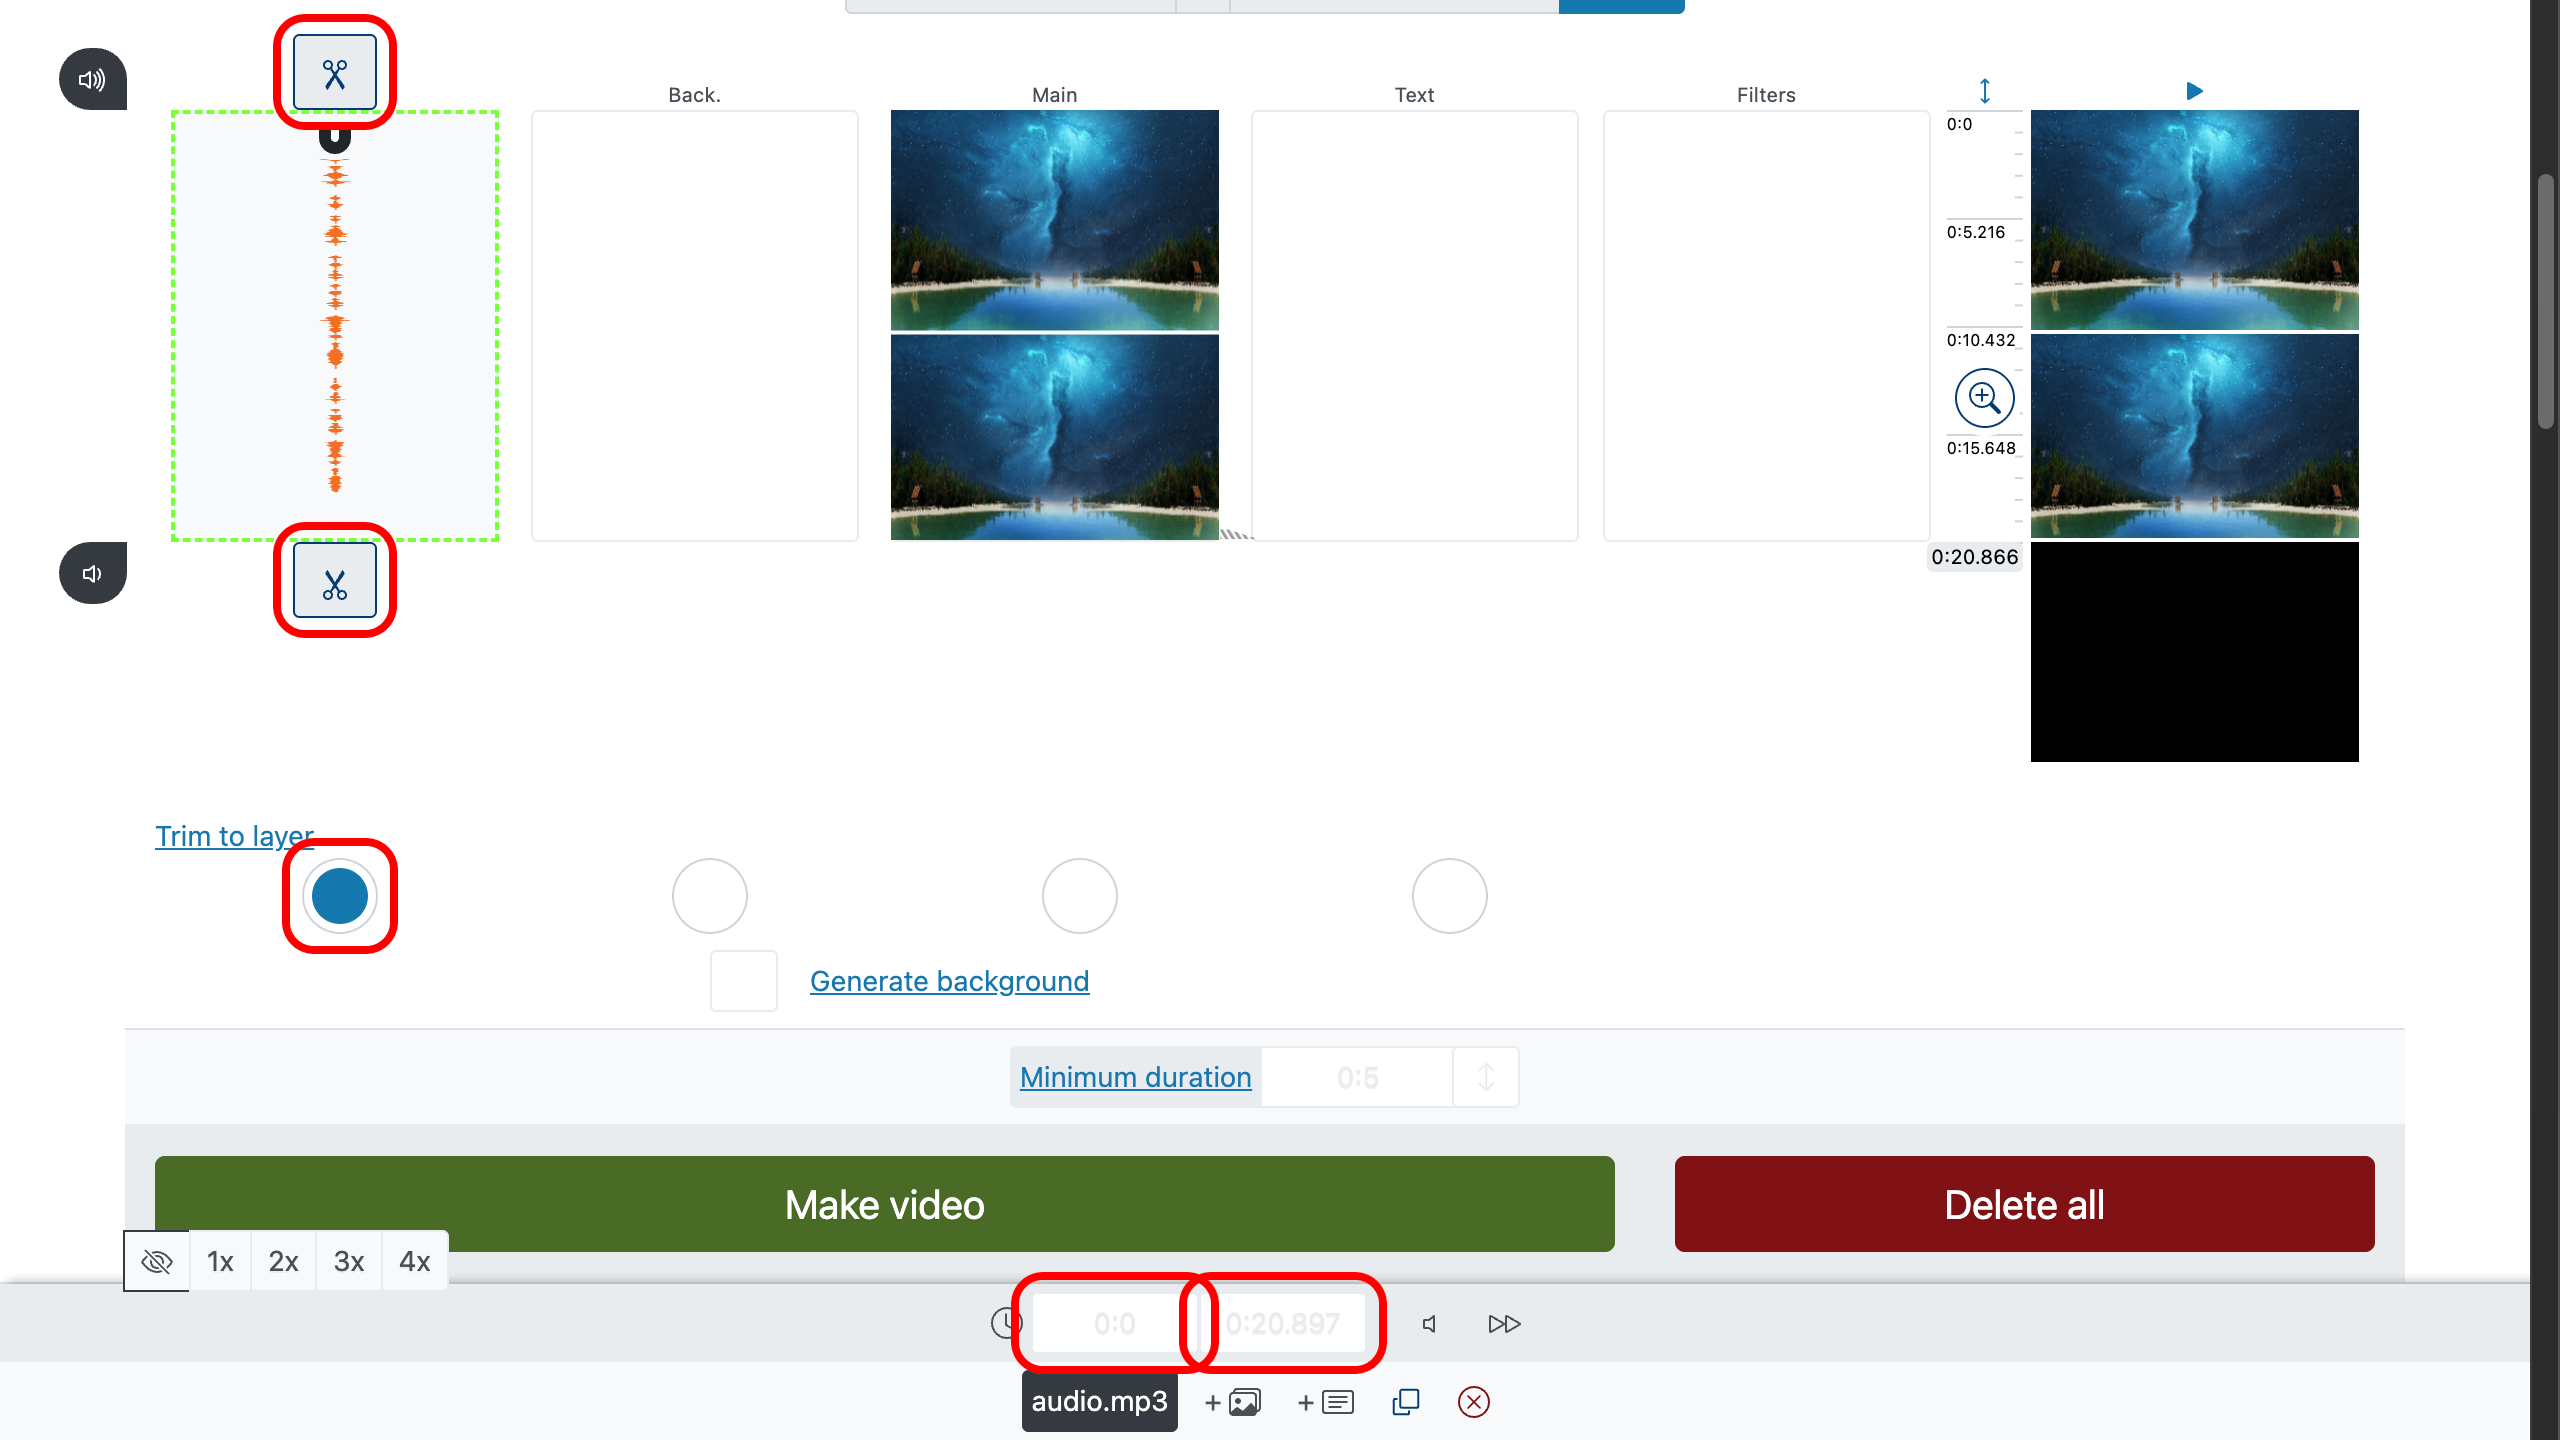
Step 5: Trim or Stretch Music to Match Photos
You can flexibly adjust the music: shorten the track by dragging the start and end sliders, or enter exact timing manually.
Want the music to match the exact duration of the photos? Enable "Trim to layer" under the photo layer. Want the opposite — for the photos to match the length of the track? Stretch the images to the full length of the music or enable "Trim to layer" under the audio track.
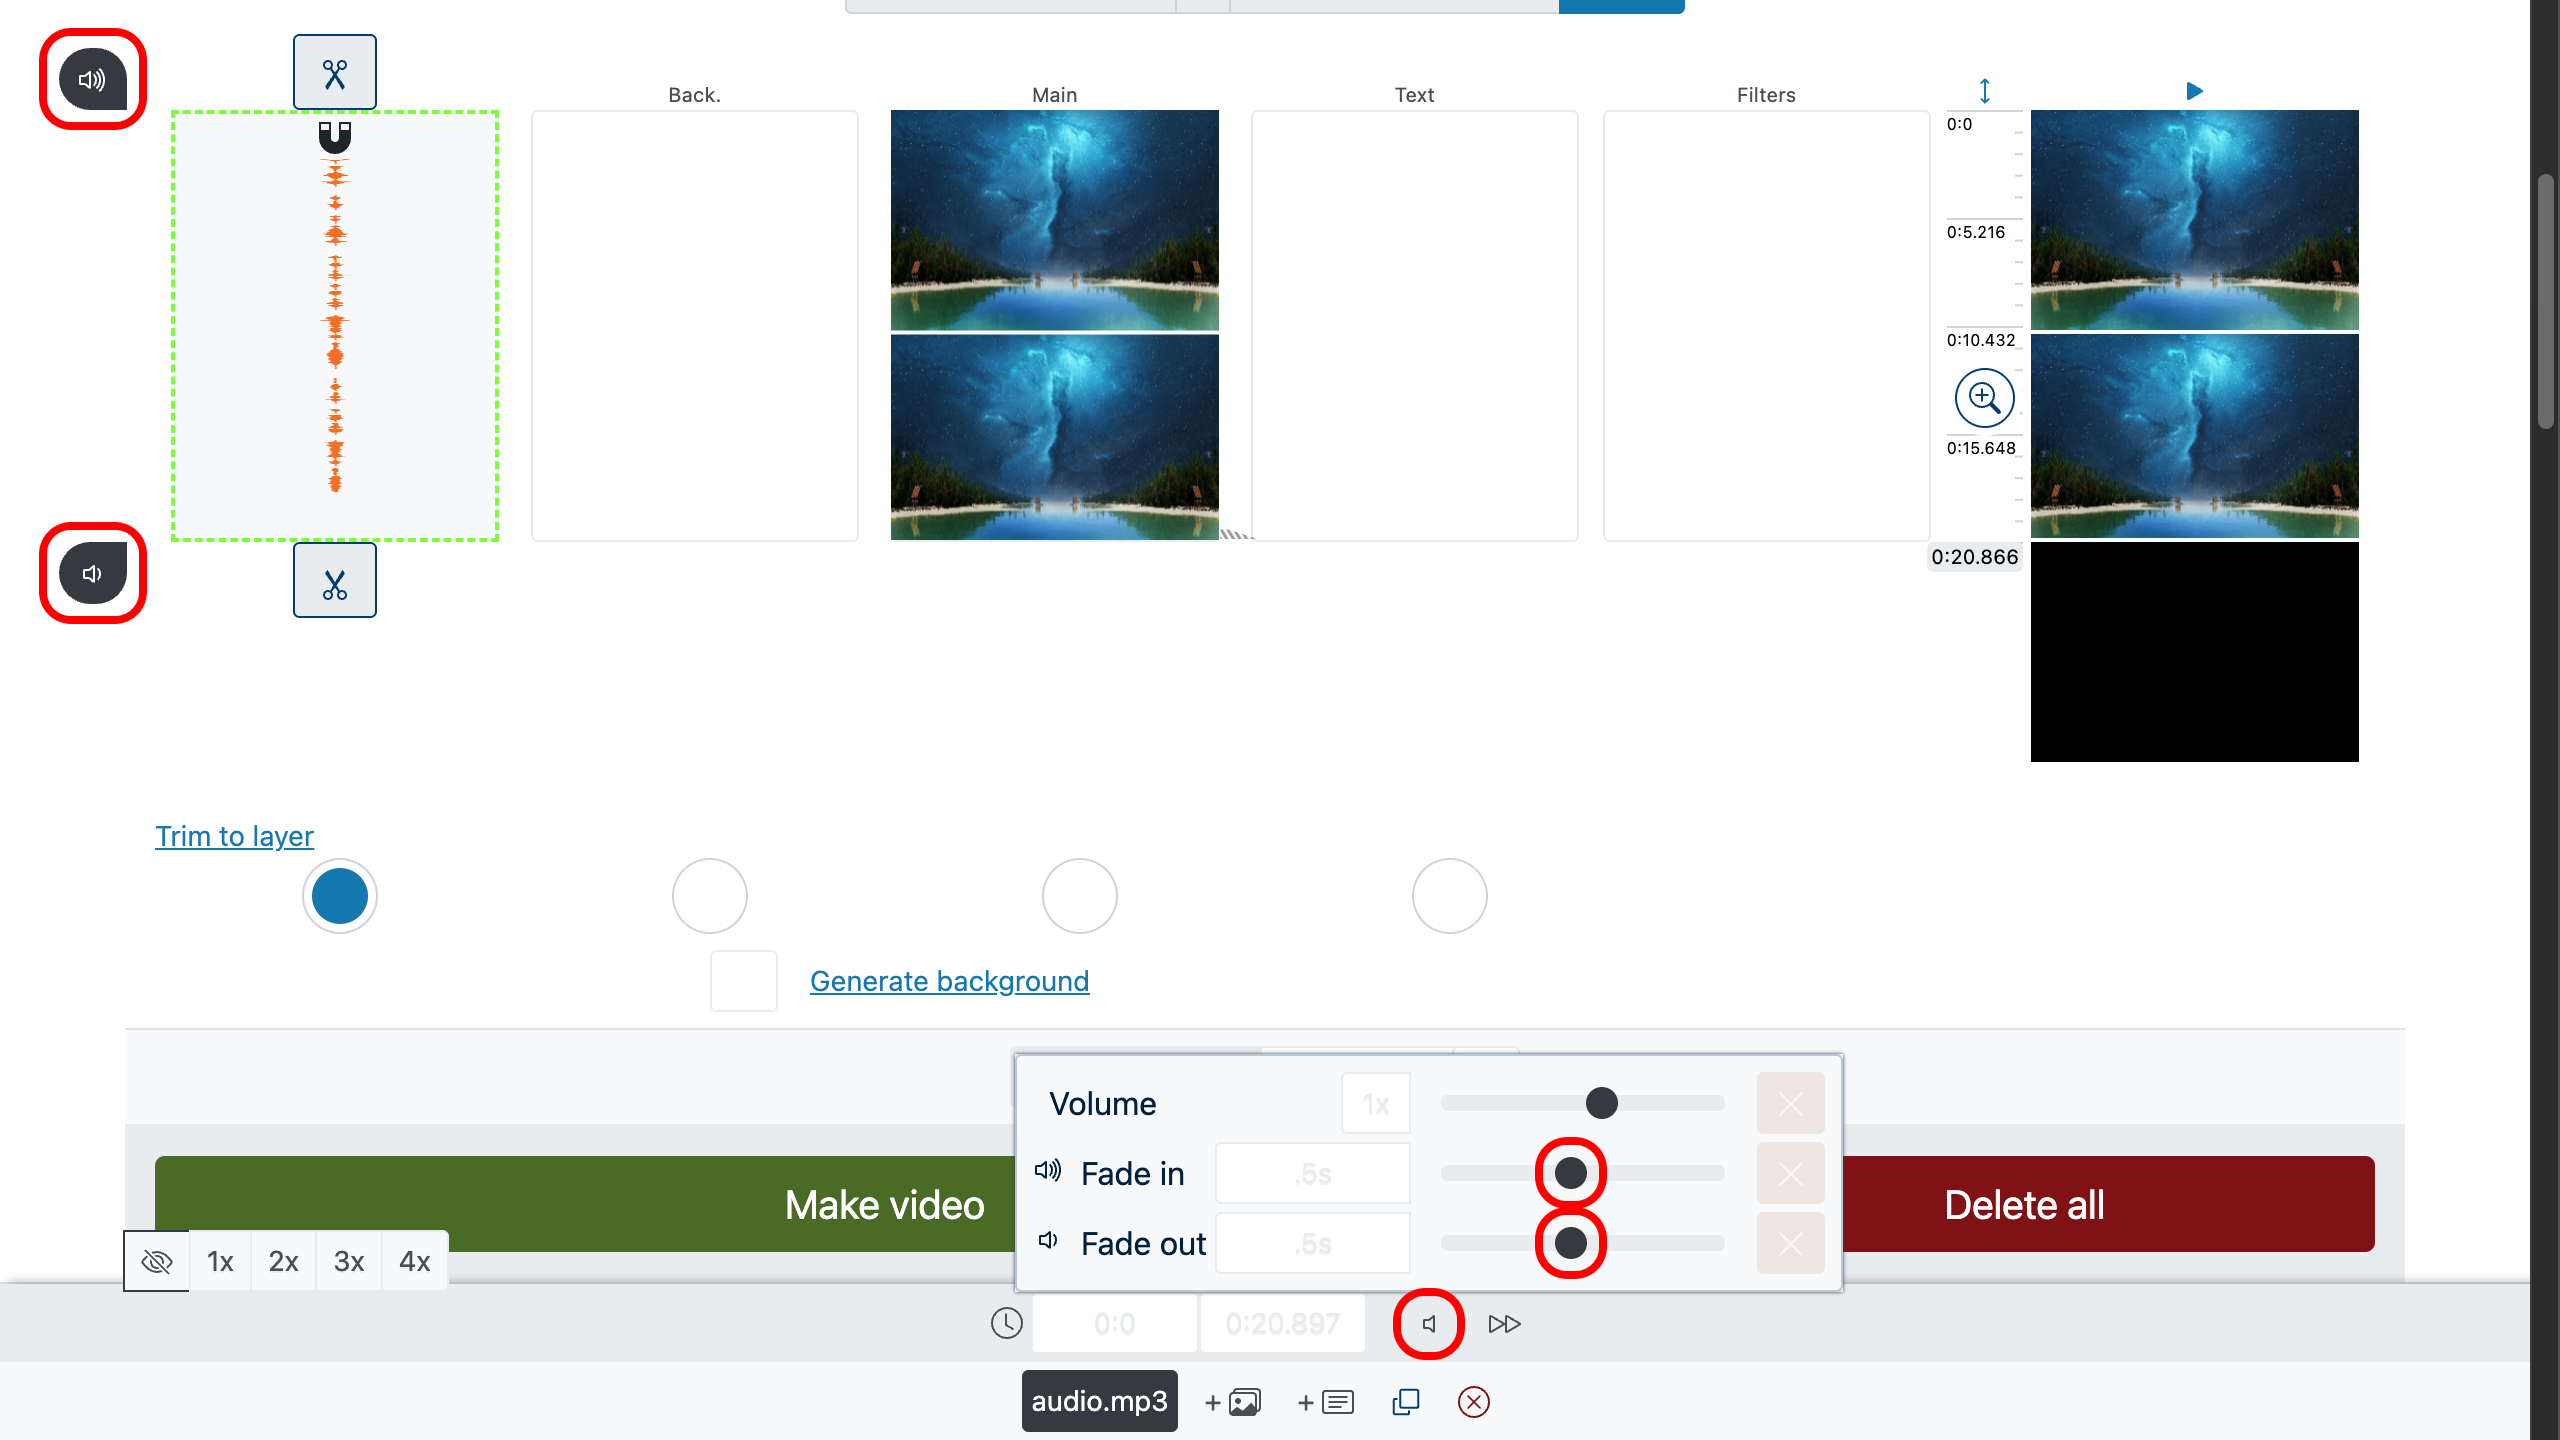
Step 6: Adjust Audio Fade In and Out
Add smooth fade-in and fade-out for the music — this makes the video sound more professional and pleasant to the ear. Adjustment takes seconds using handy sliders.
Step 7: Add Text and Effects
Add captions, titles, and visual effects to highlight key moments, set the mood, and enhance atmosphere. This helps make the video not only beautiful but also more expressive.
Effects can be applied to a single file or the entire video at once — using a special effects track, via double-click. Convenient if you want a consistent style or filter across the whole clip.
Step 8: Preview and Save the Video
You can also select the desired format — vertical for TikTok and Instagram or horizontal for YouTube, so the video looks perfect on the intended platform.
Before final save, use the preview function (double-click on the desired moment in the video timeline on the right) — this helps ensure everything is in place, music sounds right, and transitions and effects work as intended.
Once you’ve checked, click "Create Video" — and your video will soon be ready to use and publish.
Tips to Make Your Video Better
- Choose music that matches the mood — it enhances the effect.
- Use short captions or quotes on photos to make the video more expressive.
- Stick to a consistent visual style: colors, filters, fonts.
- Don’t overload the video — simplicity looks more appealing.
Adding music to a photo means bringing the image to life. Tell stories that speak louder than a thousand words.