How to Add Music — Why It Turns Clips Into Stories
A birthday that flickers. A clumsy toast that lands just right. A product in evening light, ready for the marketplace. Without music, it’s footage. With music, it’s a memory—something your family replays, something customers watch to the end.
With our online video maker, you’ll do all of this in a browser on iPhone, Mac, PC, or Android. No downloads. No apps. No registration required. Just a clean export without watermark. Let’s combine video and music the fast way.
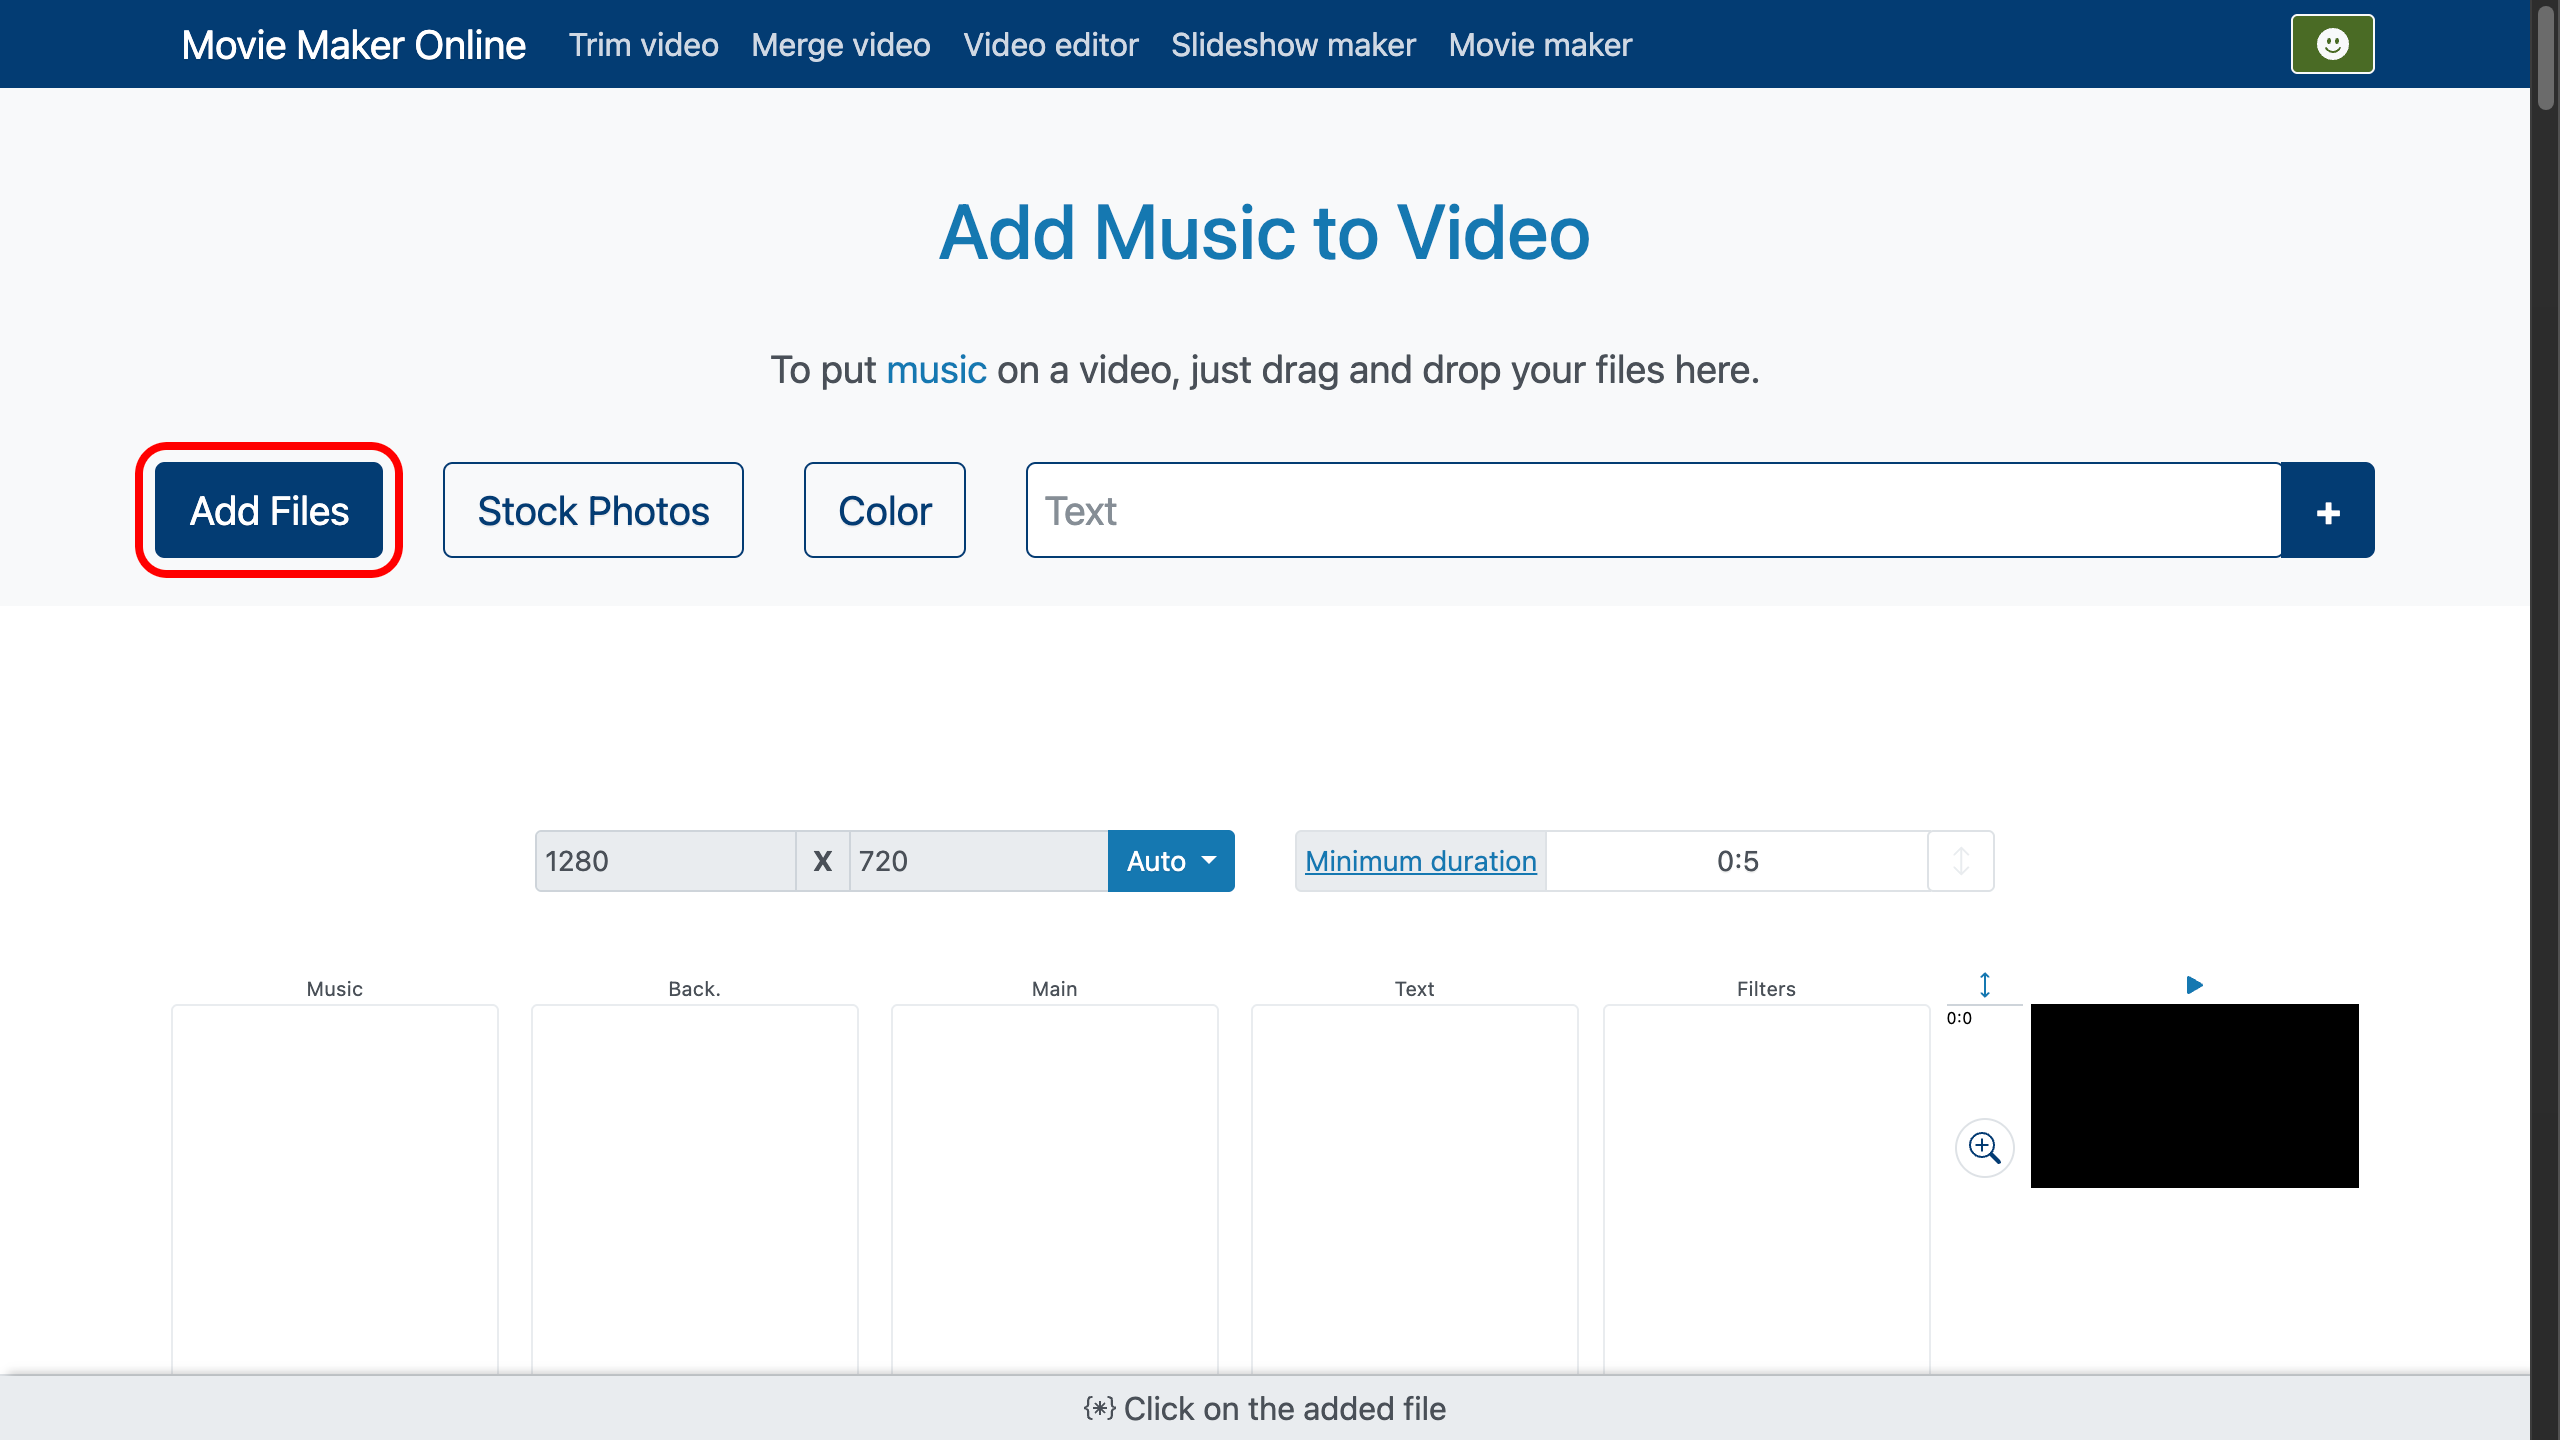
Step 1: How to Add Files & Choose the Track
Upload any format you have: video (MP4, MOV, AVI, MKV), audio (MP3, WAV, M4A), images (JPG, PNG, GIF). Building a slideshow? The song will be the thread that keeps every frame on the same line.
Picking music: match tempo to motion. Slow pans love long notes; jump-cuts like percussion. Want texture? Add sound effects—footsteps, fabric rustle, city hush—to make scenes feel true.
Looking for legal tracks and BBC-grade SFX? Start here: free music & SFX guide.
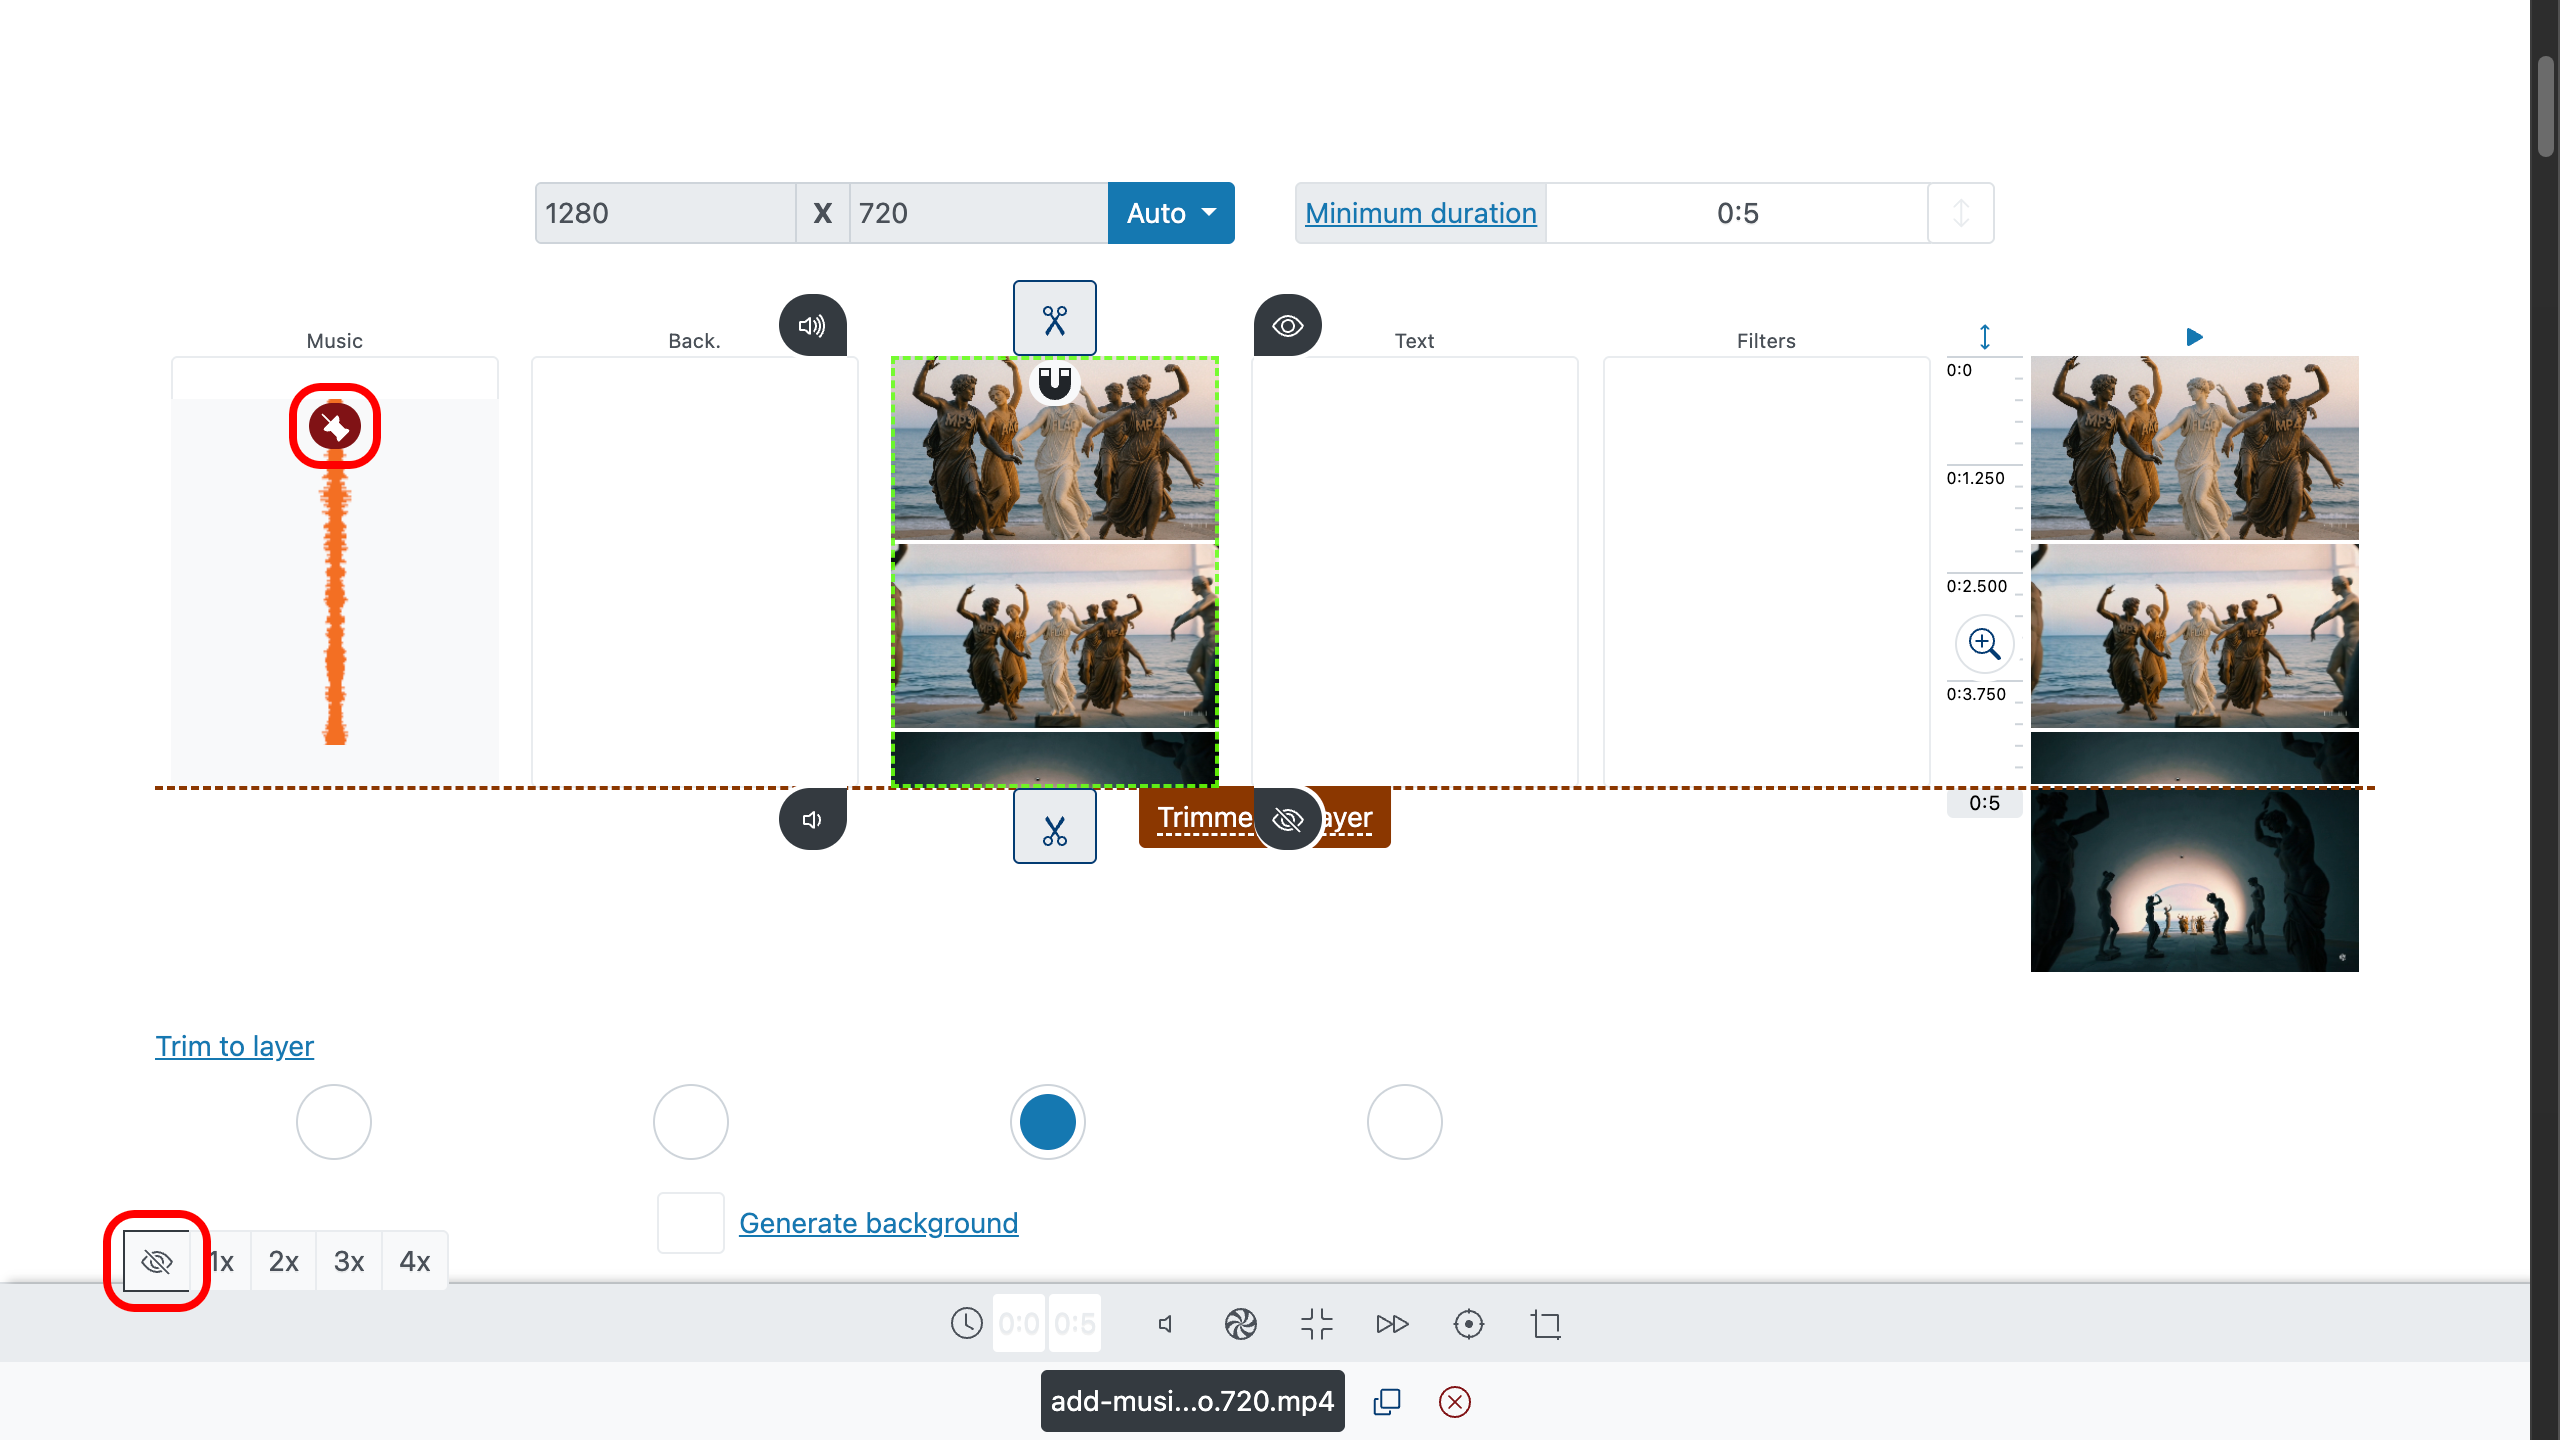
Step 2: How to Place Music on the Vertical Timeline
Your video lands on the video track. Your song lands on the music track—automatically. Our video editor uses a vertical timeline: the lower a file sits, the later it begins in the final video.
Drag the song upward to start earlier. Drag downward to start later. Position lock is controlled by. When you drag a file, lock turns on automatically. To return to automatic line-up “one after another,” click again to disable it.
That’s how you quickly put music over video without fighting the clock.
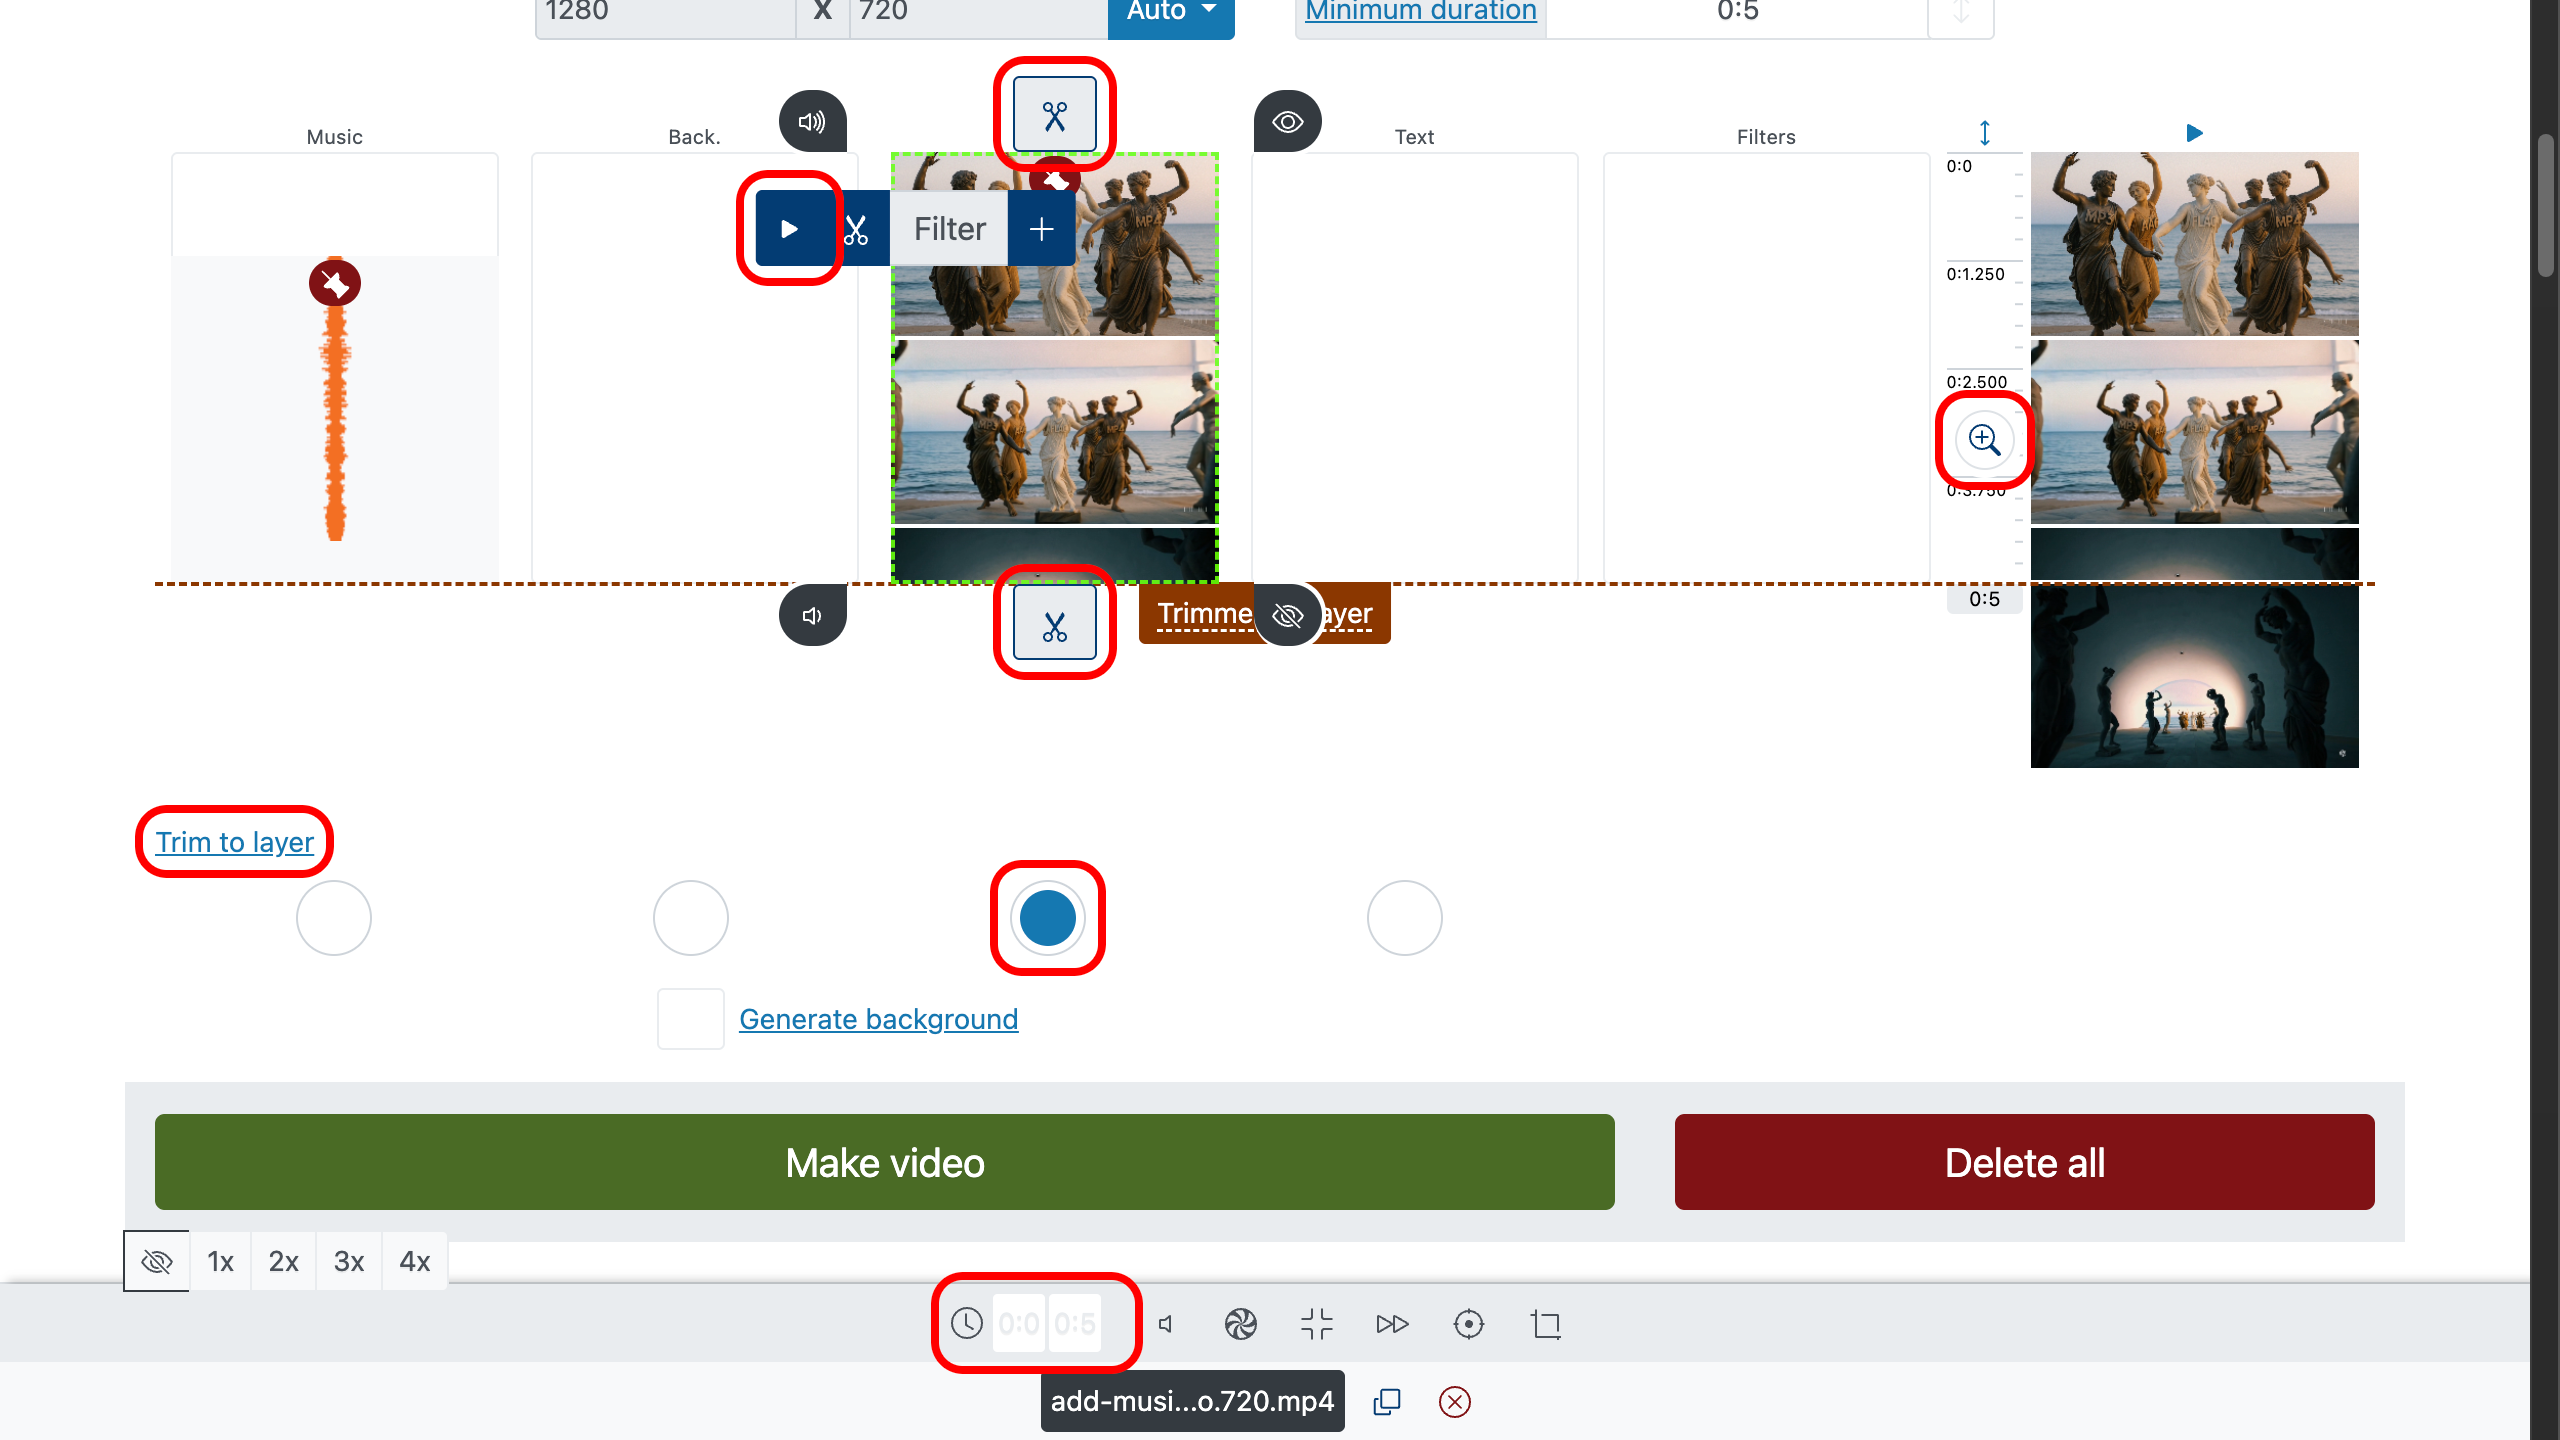
Step 3: How to Trim with Surgical Precision
Use handles to shave the head and tail. Prefer exact numbers? Type precise in/out times in clip properties. For pinpoint control, use the timeline zoom on the right: .
To find perfect cut points, double-click the timeline or the preview to set the playhead, then press on the control bar. Don’t want to chase the song’s ending? Choose a primary layer (usually your main video) and under the video editing area enable “trim to layer”. Every other file—including music—will conform to it.
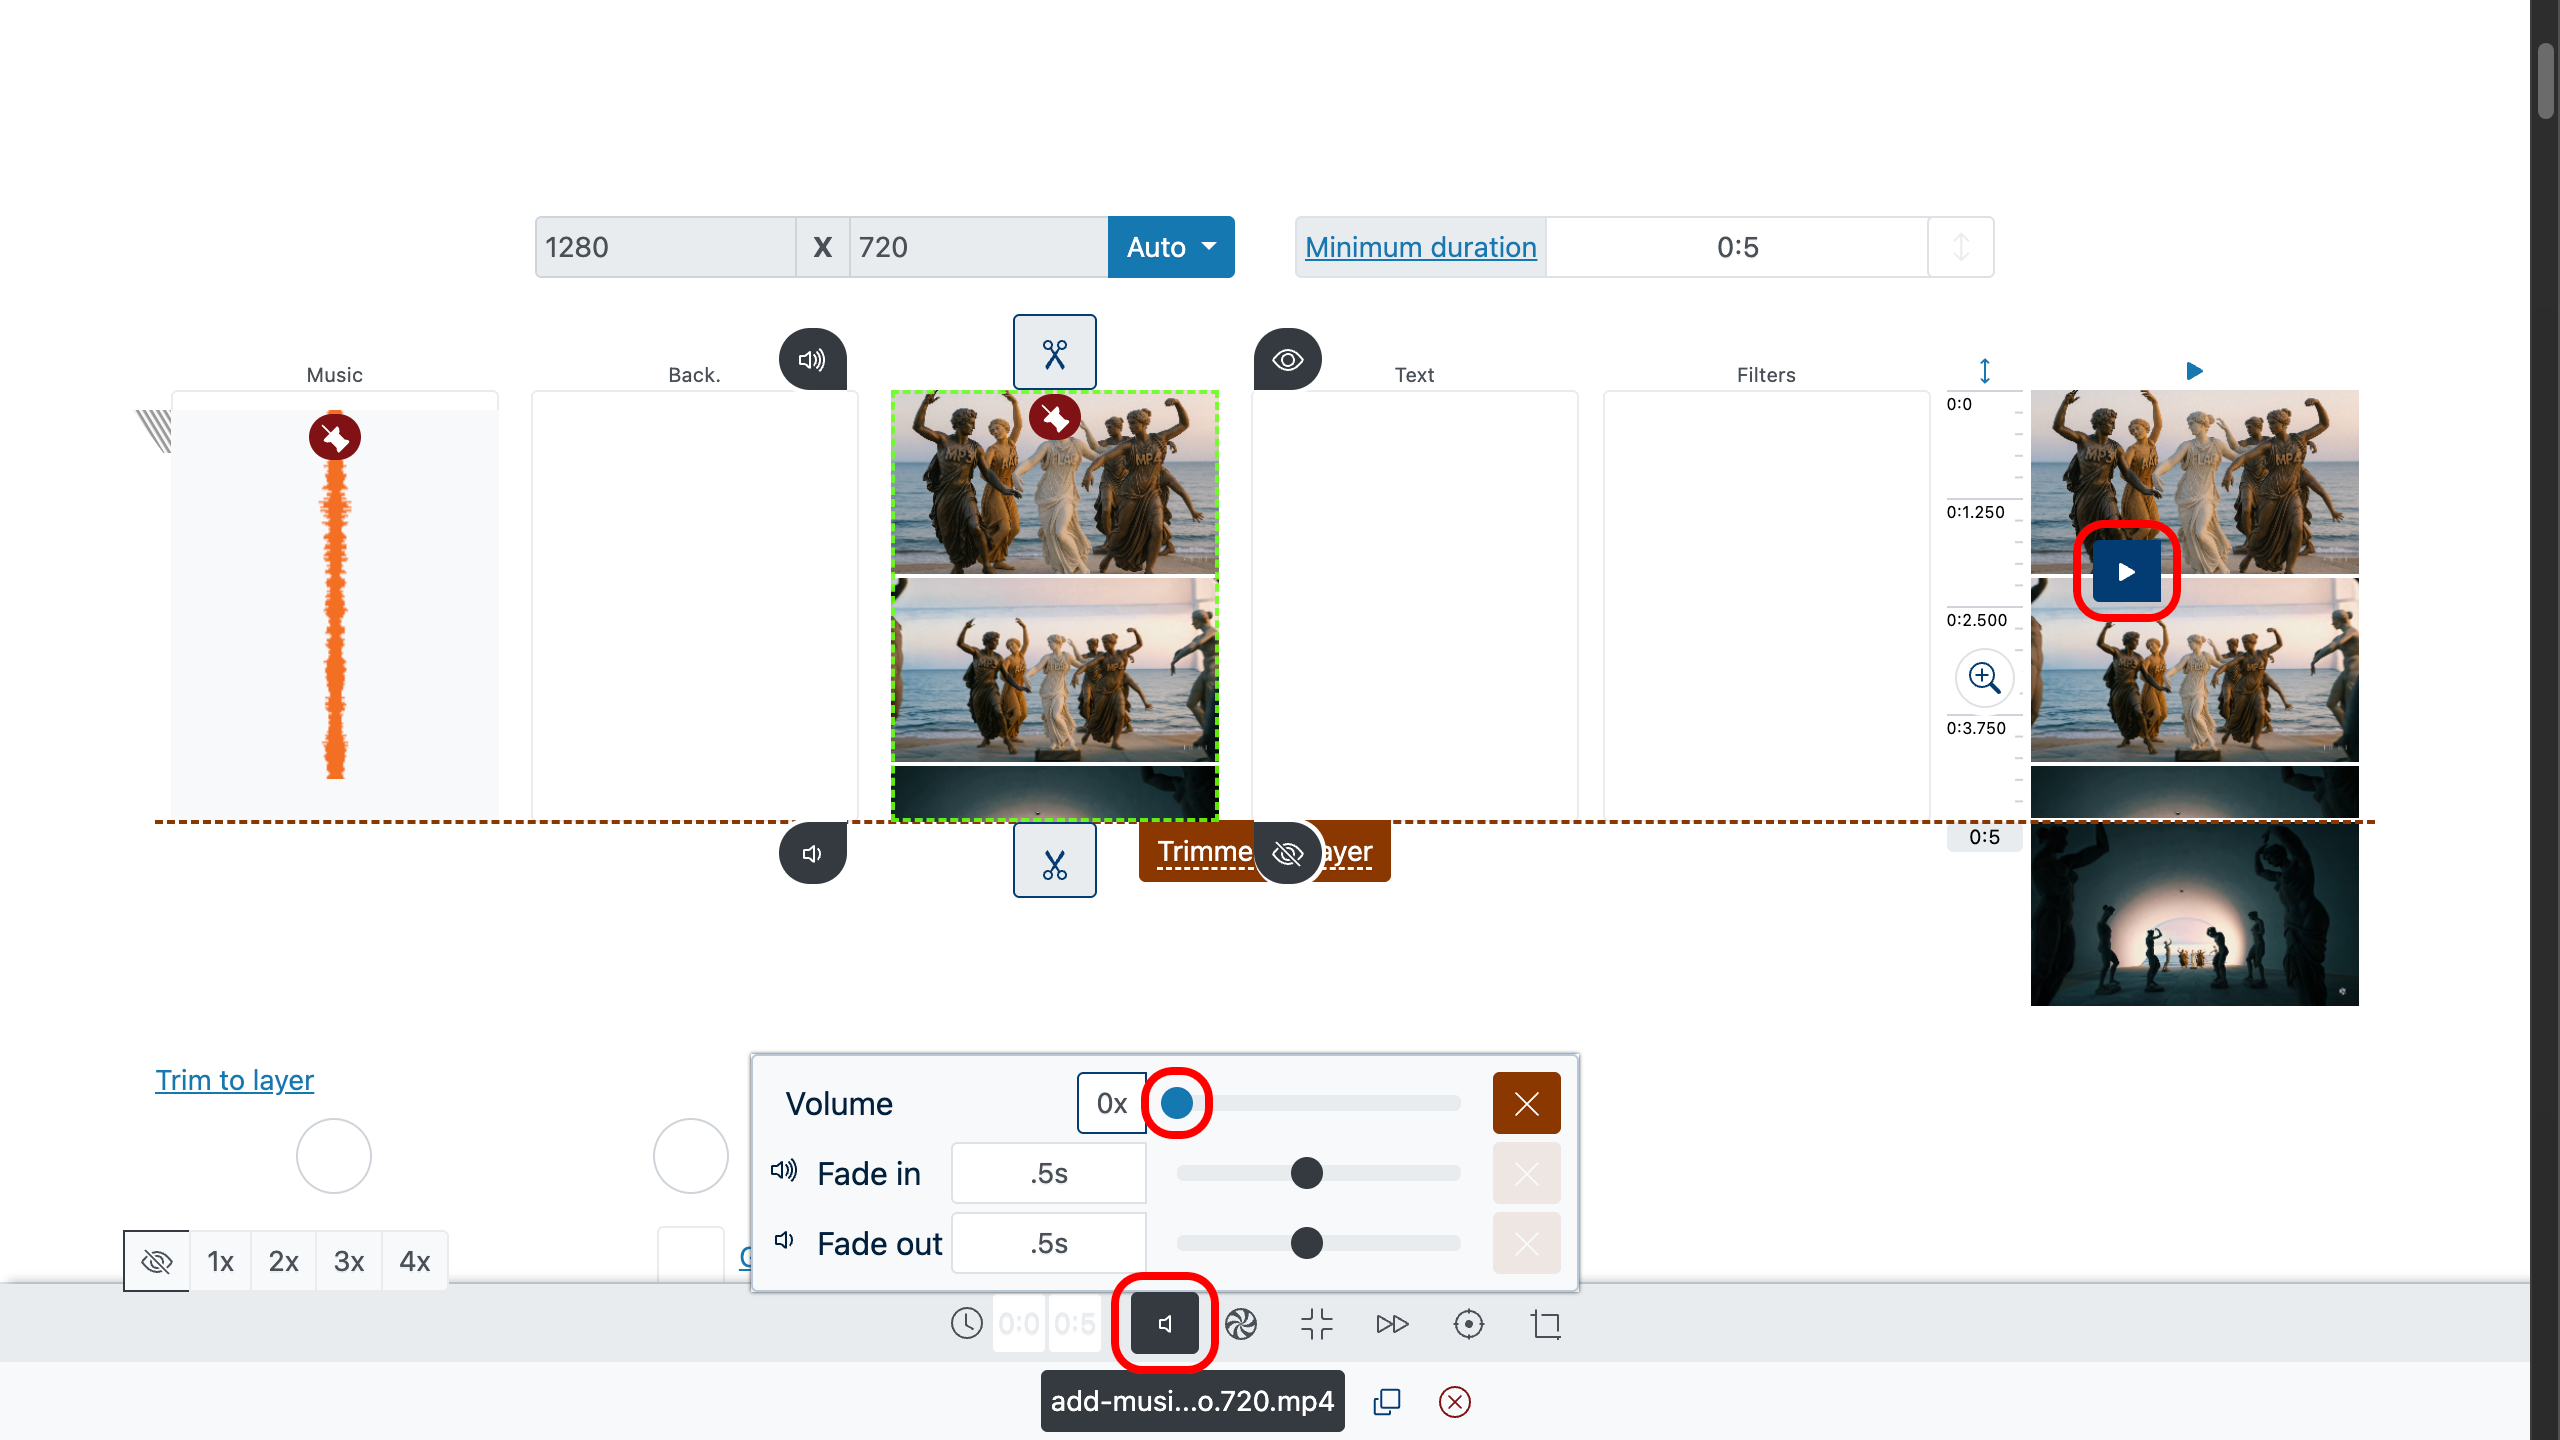
Step 4: How to Add Fade-Ins and Fade-Outs
Hard starts feel cheap; hard stops feel unfinished. Use to ease in at the beginning and set a soft fade-out at the end in the audio parameters. Now the soundtrack breathes with the cut instead of arguing with it.
Working with multiple clips and songs? See how to join videos—transitions stitch scenes so your merge of video with music feels seamless.
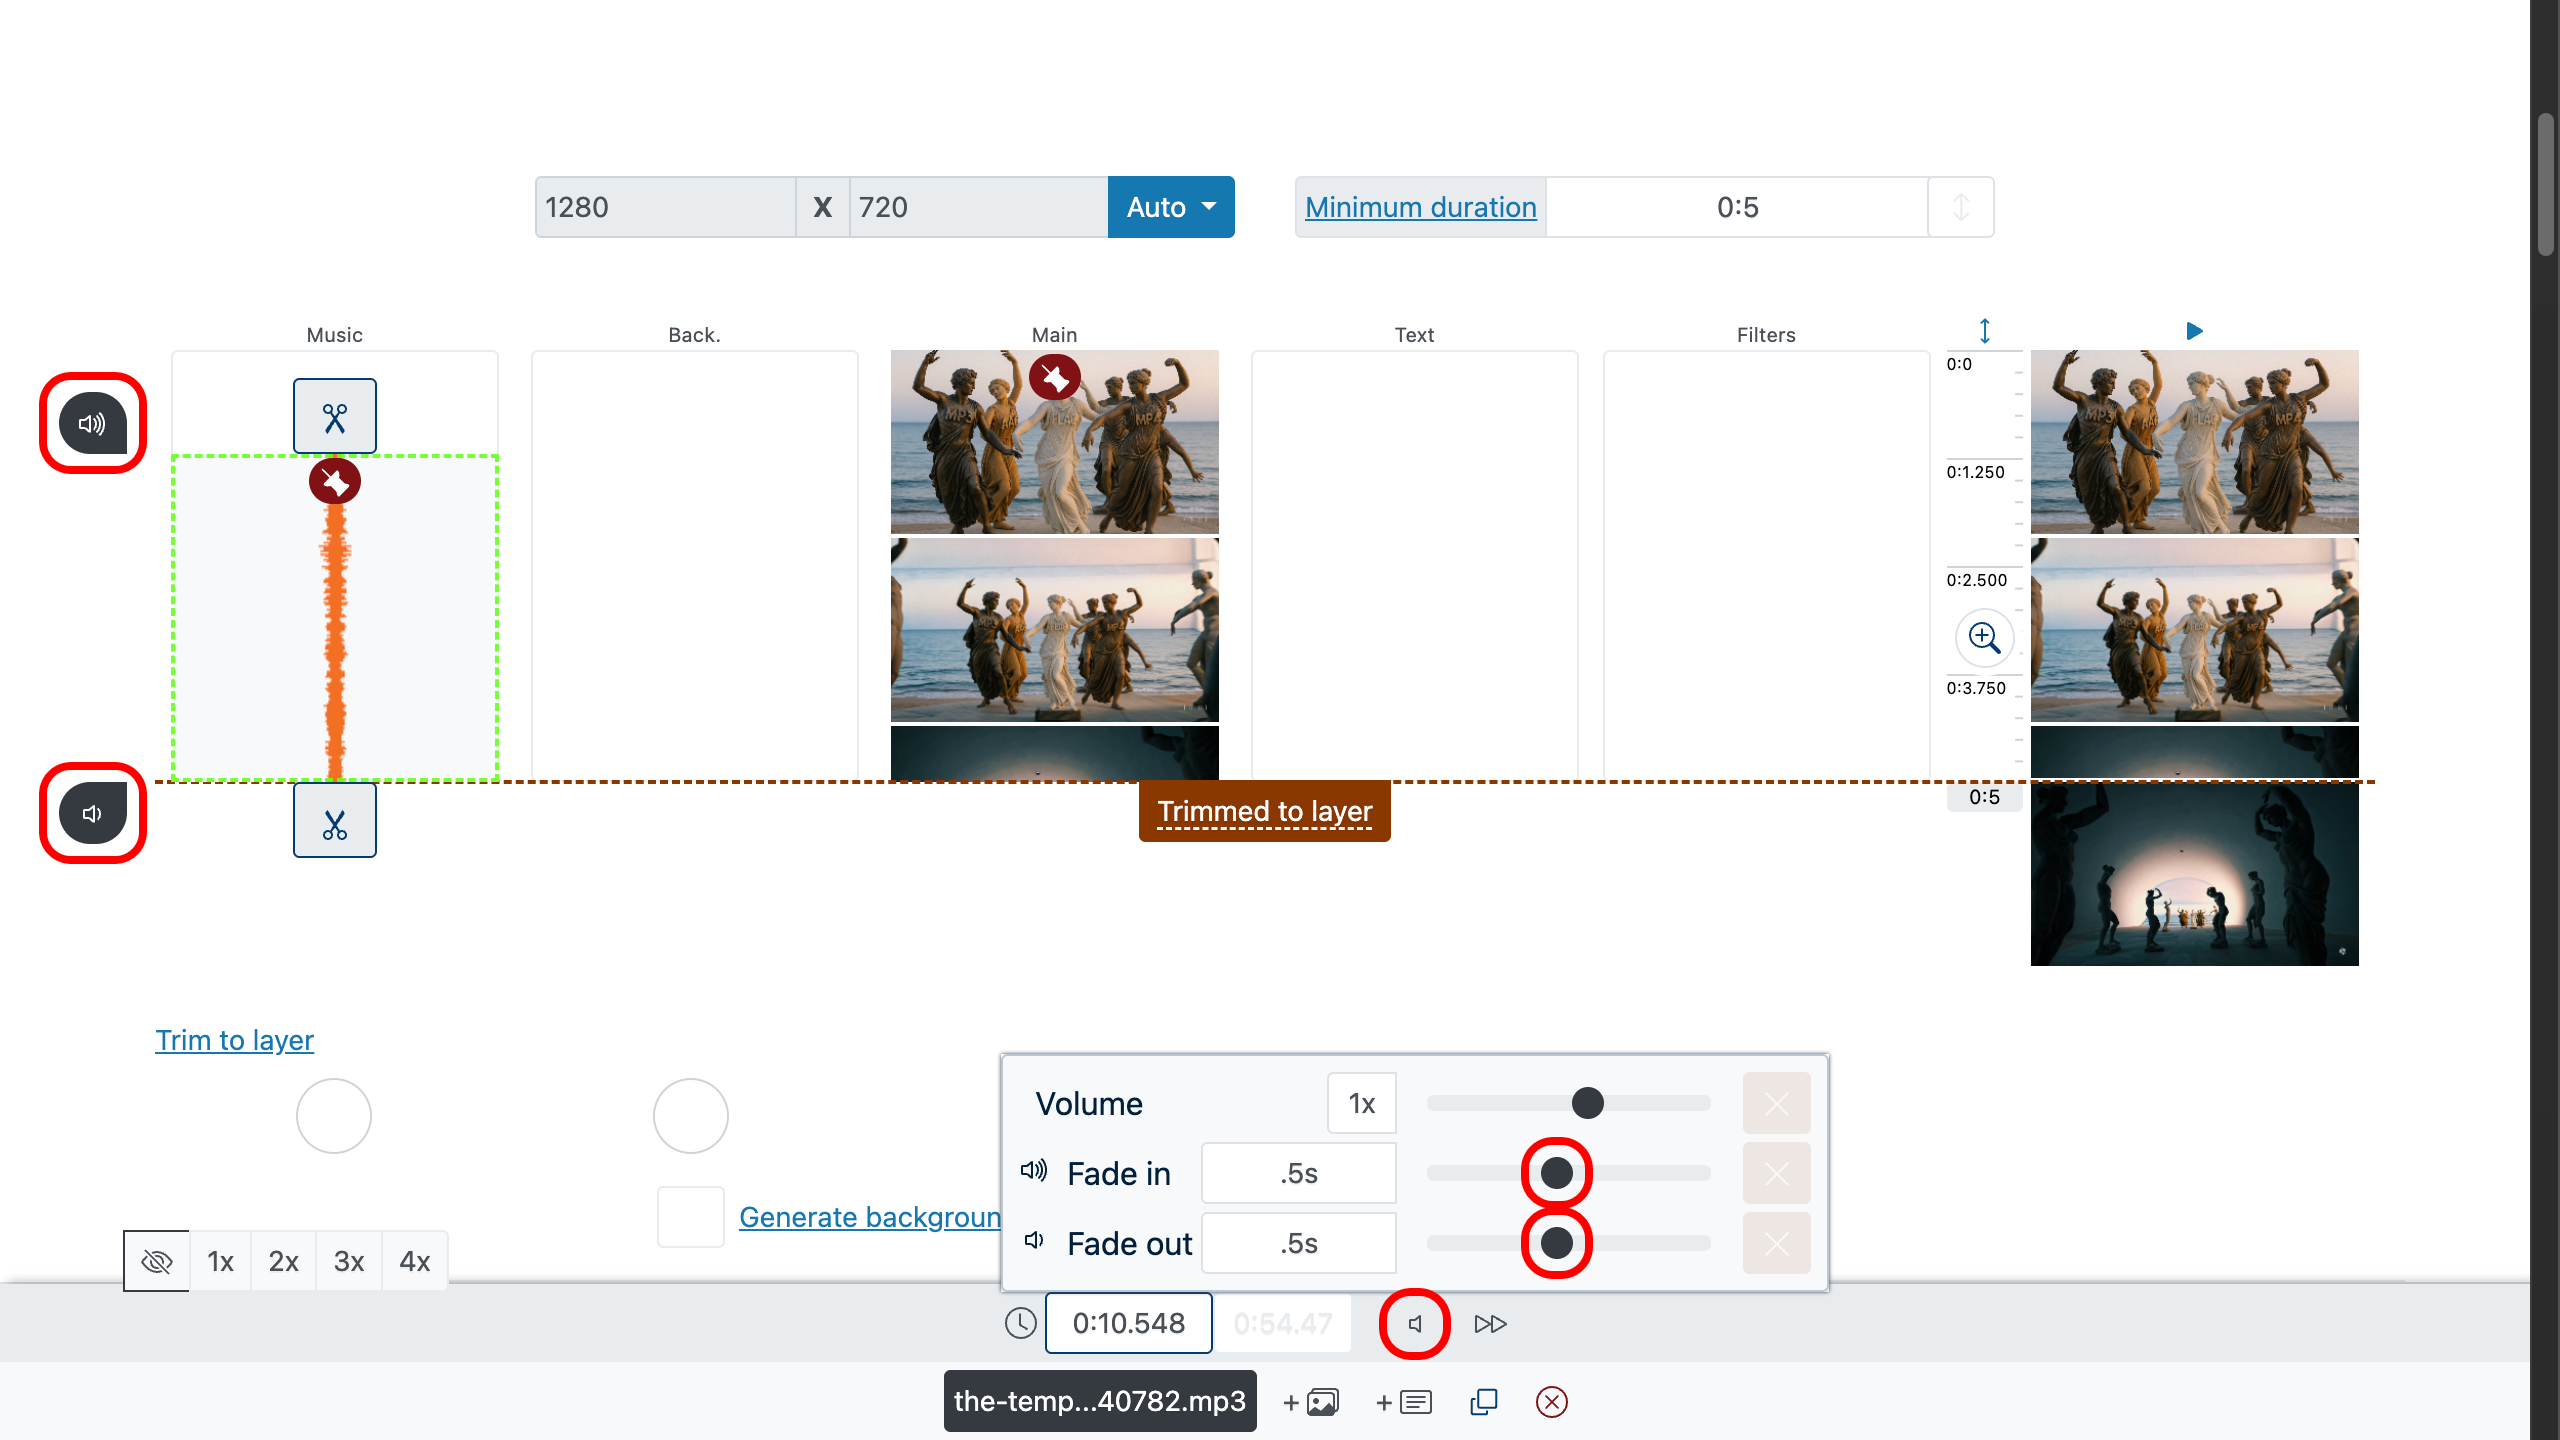
Step 5: How to Add Background Music
Use the volume parameter to make the background music quieter and highlight the primary audio (dialogue, key on-scene sounds). Lower the music so it supports the scene without competing with it.
- Music as background: reduce the music track’s volume on the lower settings panel.
- Main audio first: in the same way, you can increase the volume of the video’s primary audio track.
- Balance: give speech more space and keep the music a step below.
- Smoothness: if needed, add fade-in/fade-out so the music doesn’t start or end abruptly.
Tip: aim for clear speech—if words become hard to understand, lower the music a bit more, then press and judge the result by ear.
How to find free comedy background music for videos.
Step 6: How to Preview, Create, Download
Double-click anywhere on the preview layer to jump the playhead there, then press to check sync, trims, fades, and levels. When it feels right, create your file and download a clean export—free, no watermark.
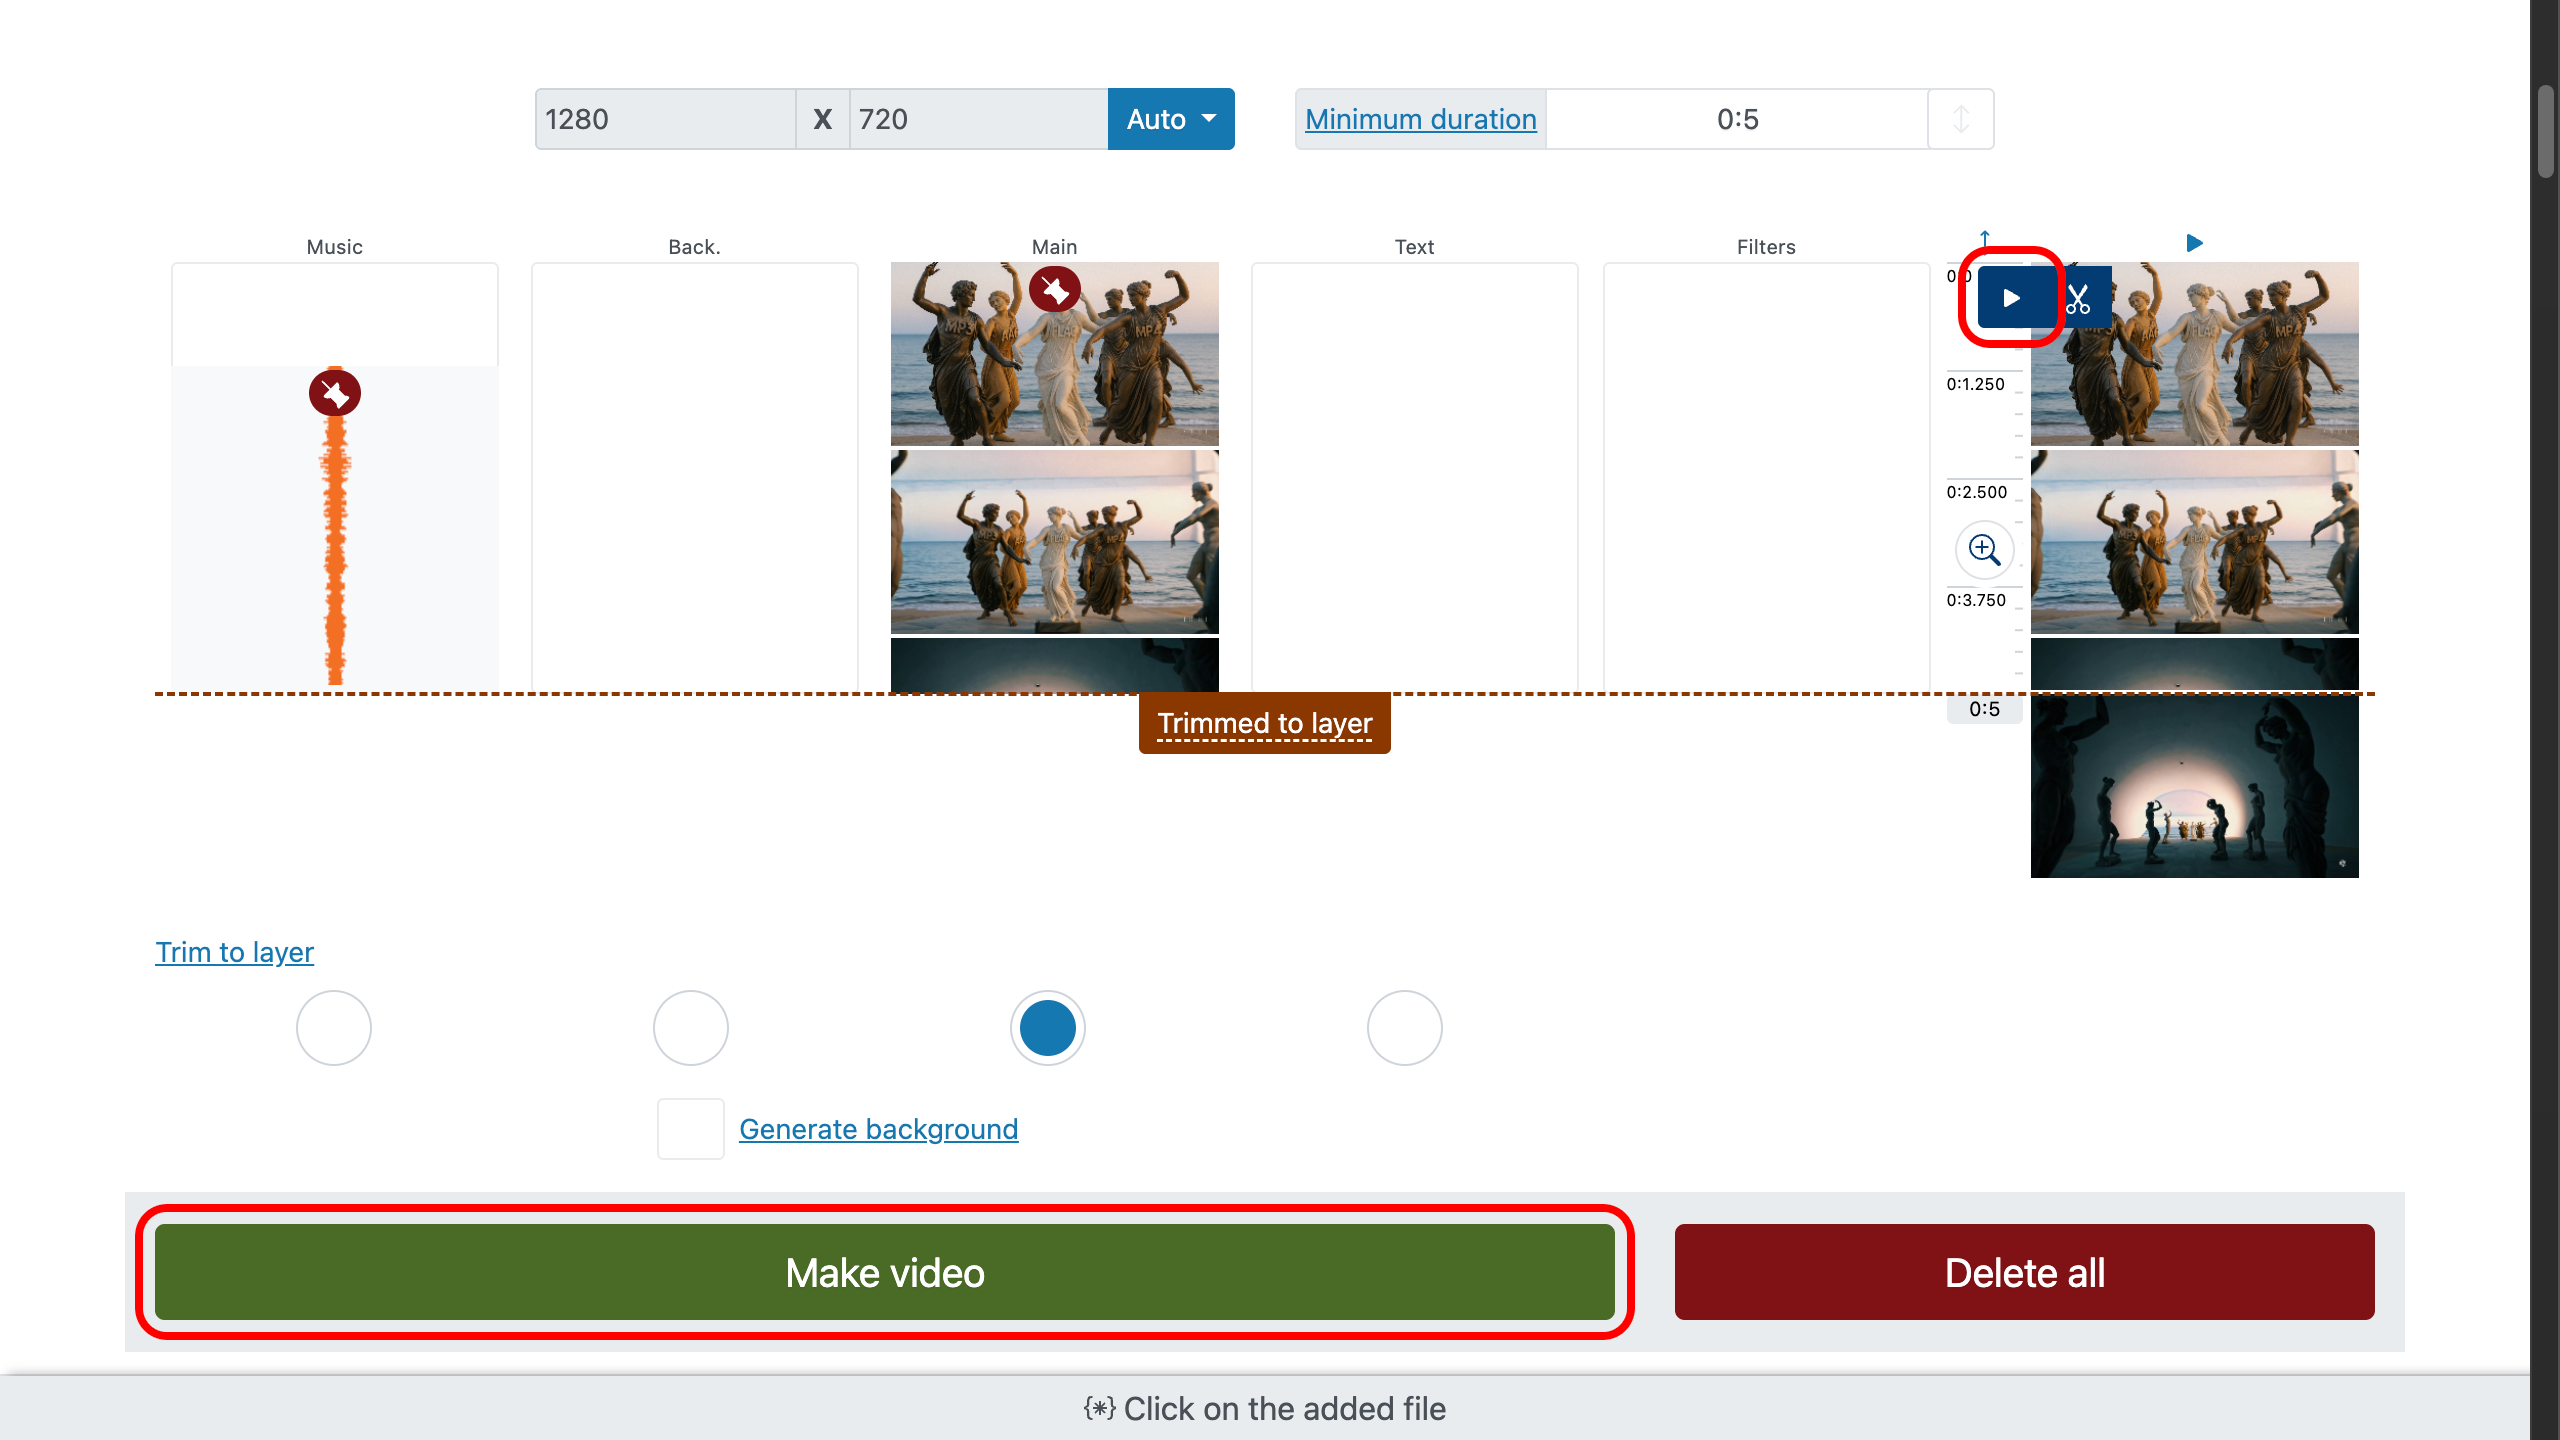
Step 7: Combined Video with Music (No Watermark)
Smart Choices for Better Cuts
Let voices lead. If there’s dialogue, keep music a step behind—support, don’t smother.
Cut on the beat. Align edits to drum hits or chord changes. Invisible rhythm = higher watch time.
Pick one motif. One strong theme beats a playlist of strangers. Echo it early, land it late.
Accents over carpets. A single chime on the hero shot > a blanket of effects everywhere.
Stay legal. Royalty-free music and clear-license SFX protect your video. First stop: free music & SFX guide.
FAQ
How can I use music from another video?
The editor can act as an audio replace tool:
- Set the original video’s volume to 0.
- Add the other video to the music track.
Can I use multiple audio tracks at the same time?
Yes—absolutely. You can add as many audio tracks as you need: for example, one for the music file, a second for voice-over, and a third for sound effects.
Tip: balance levels so speech leads, use fade-ins/outs for smooth entries, and lower the music slightly under dialogue for clear, professional sound.